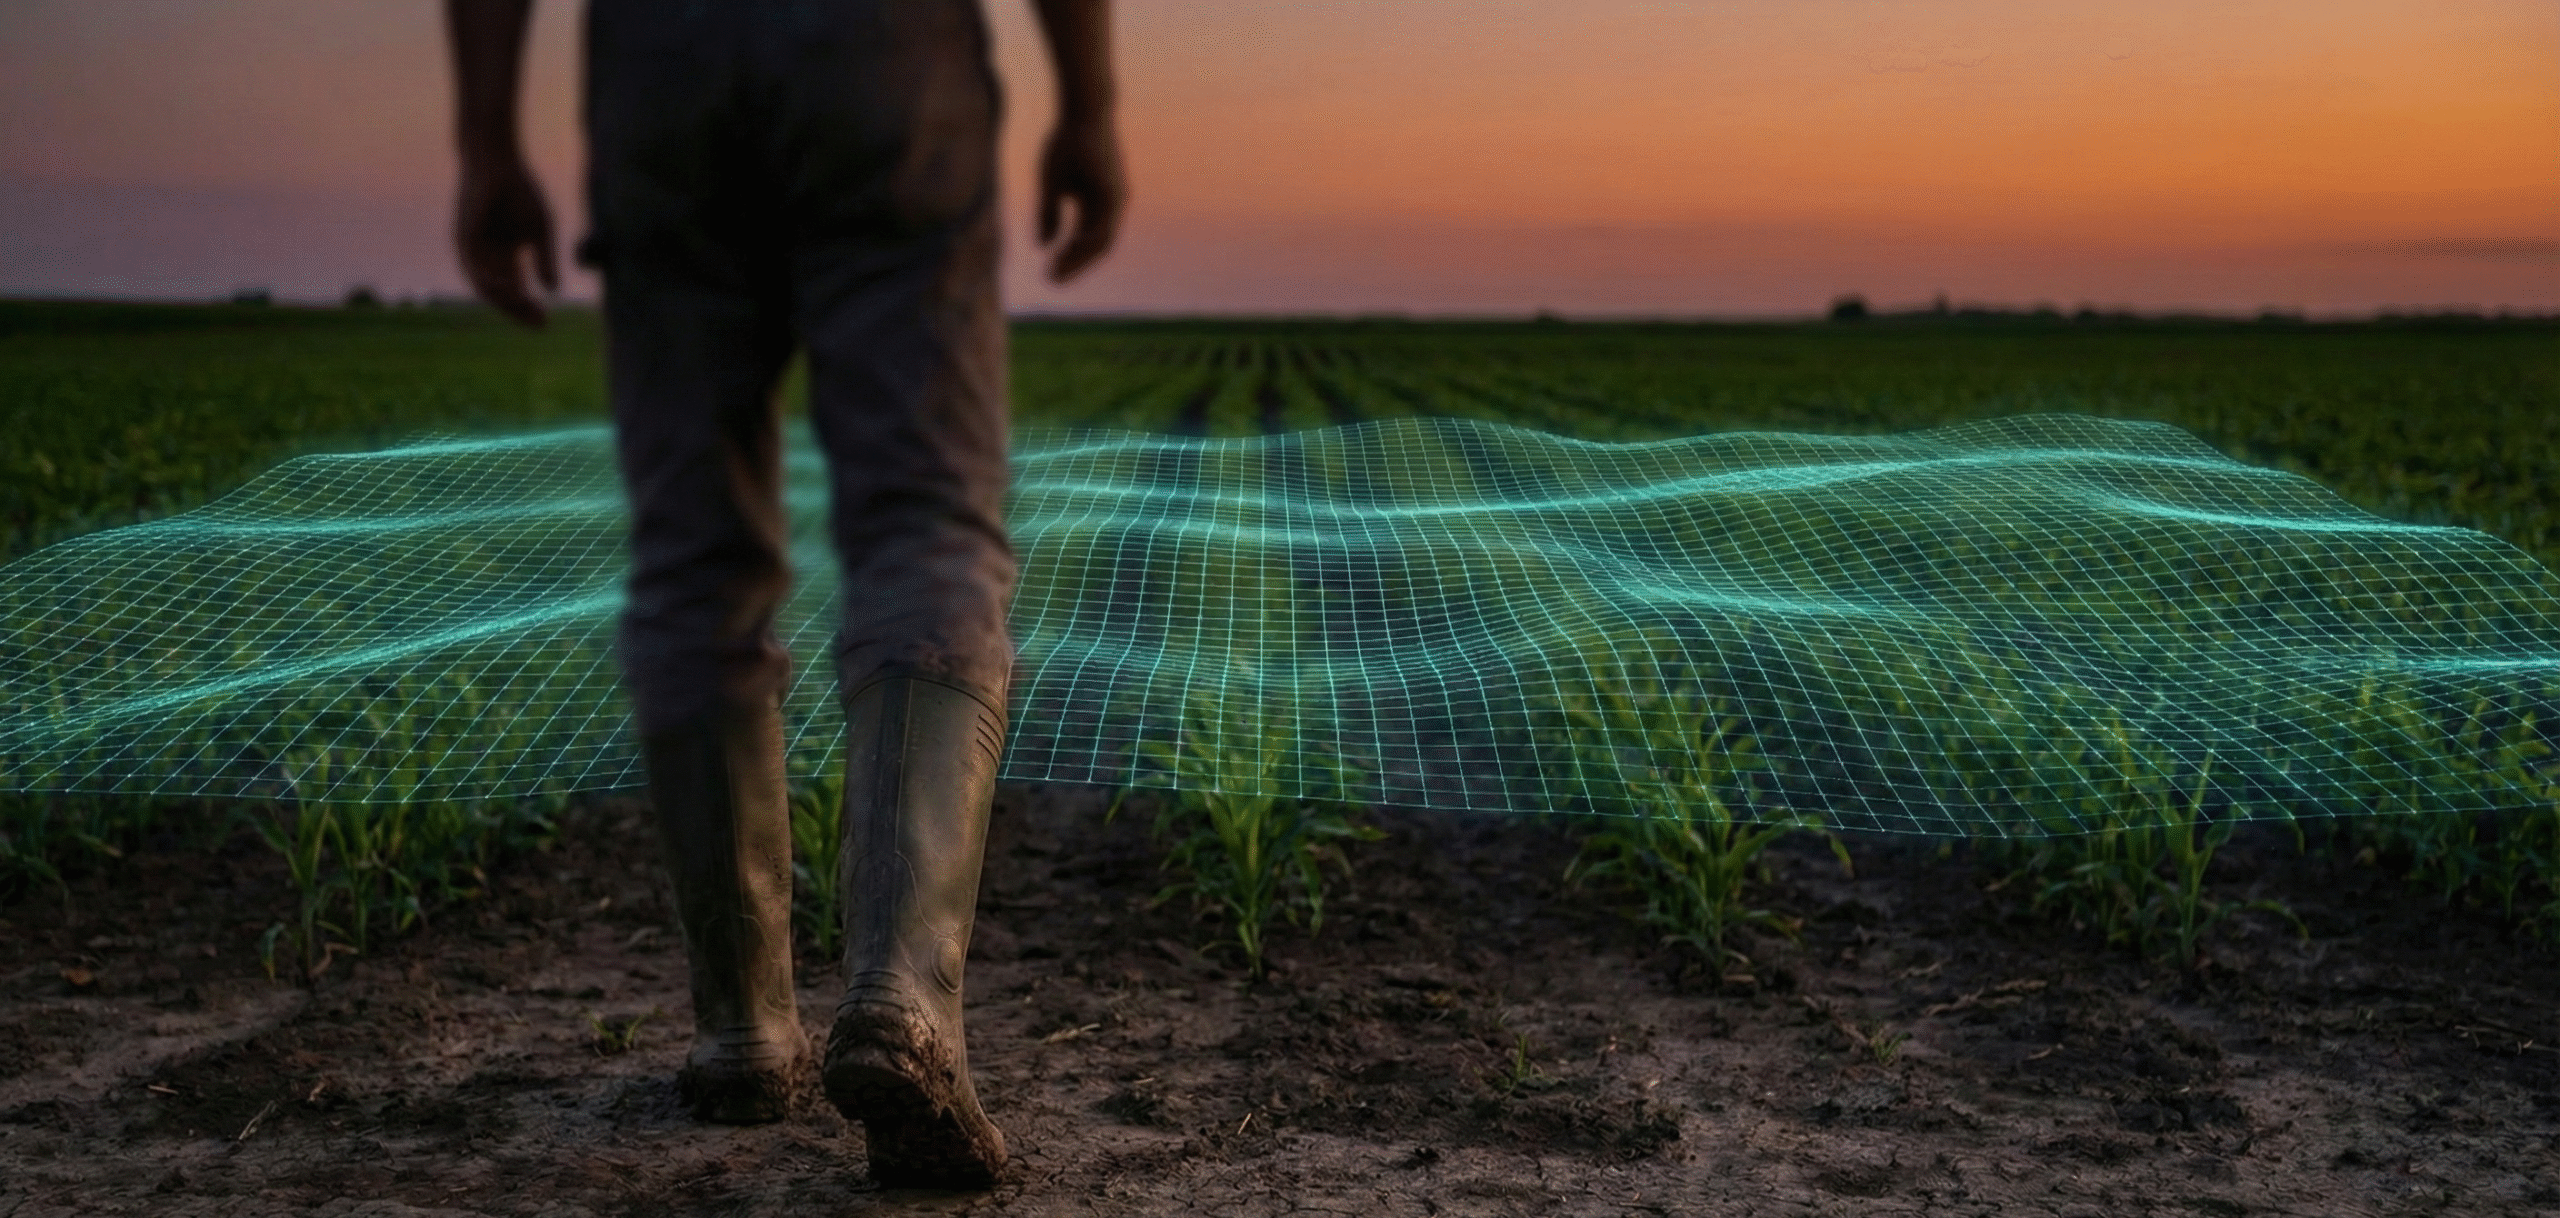
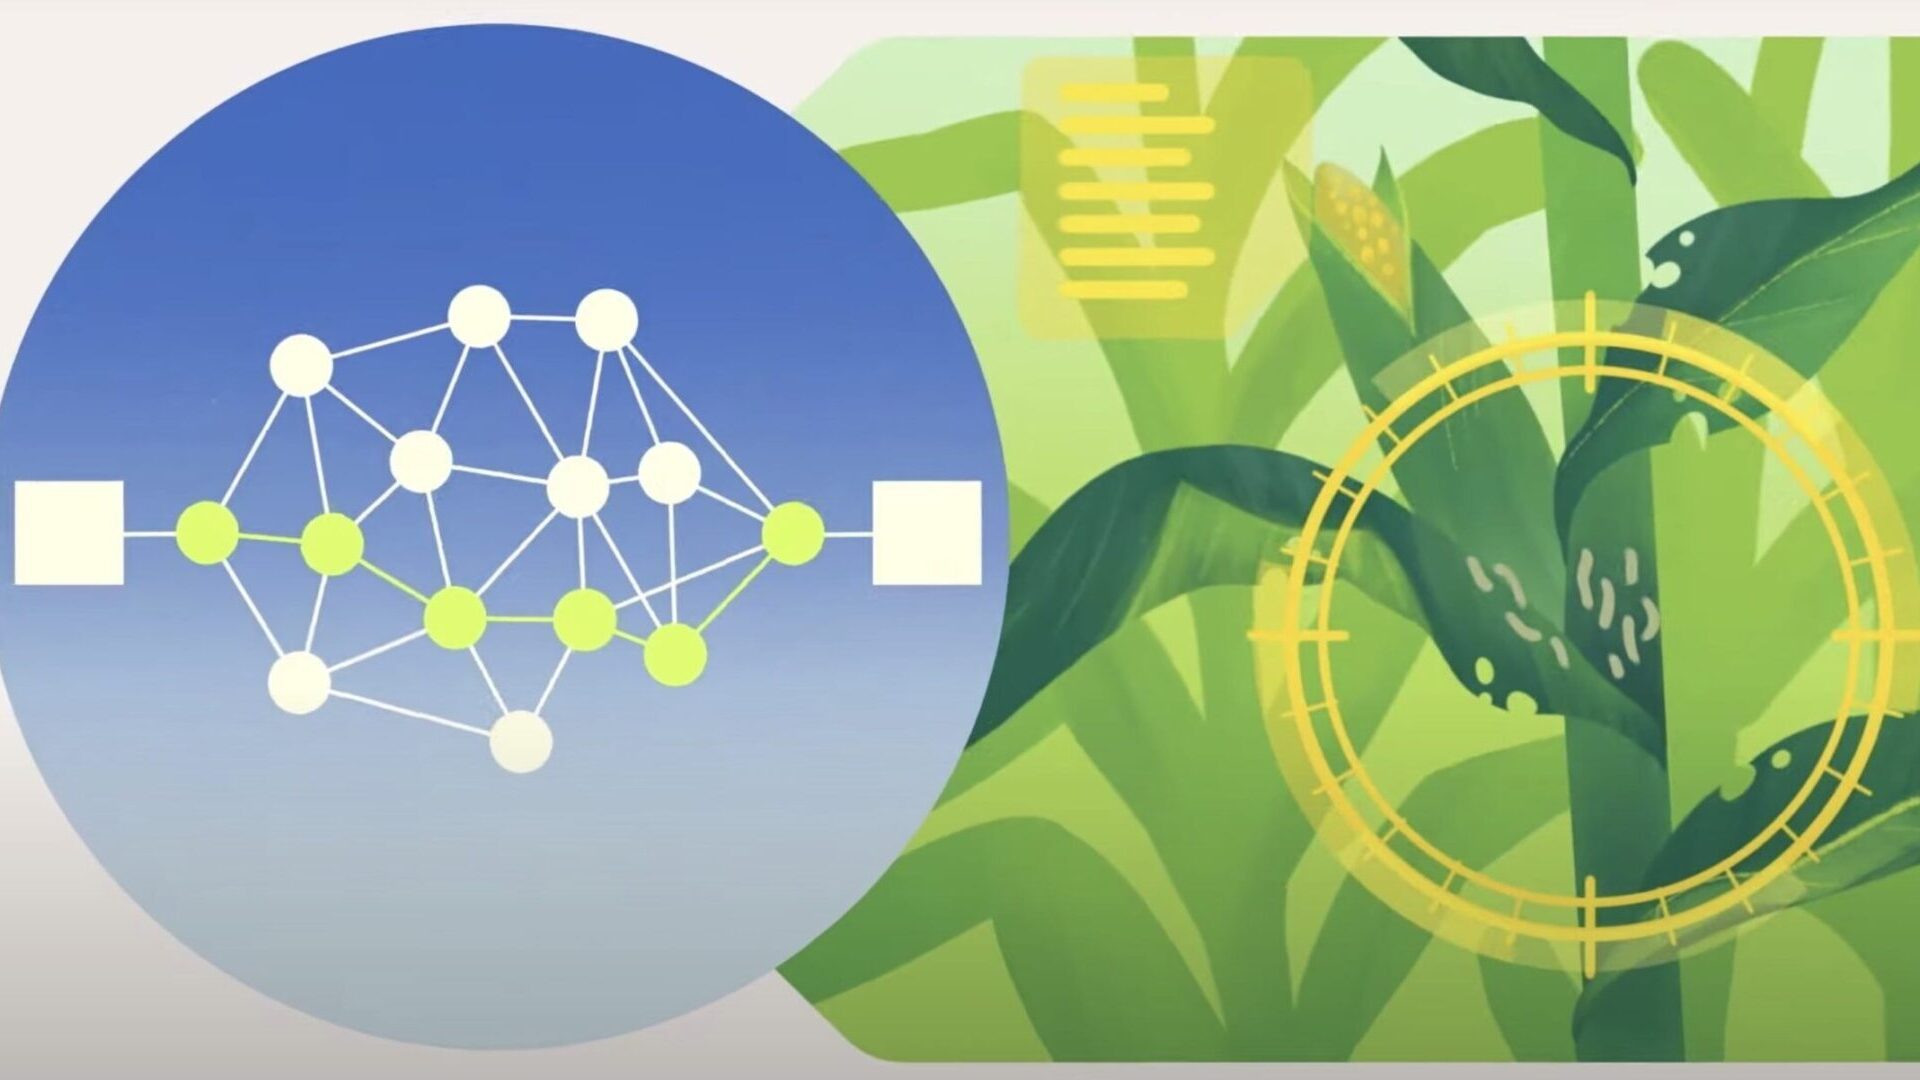
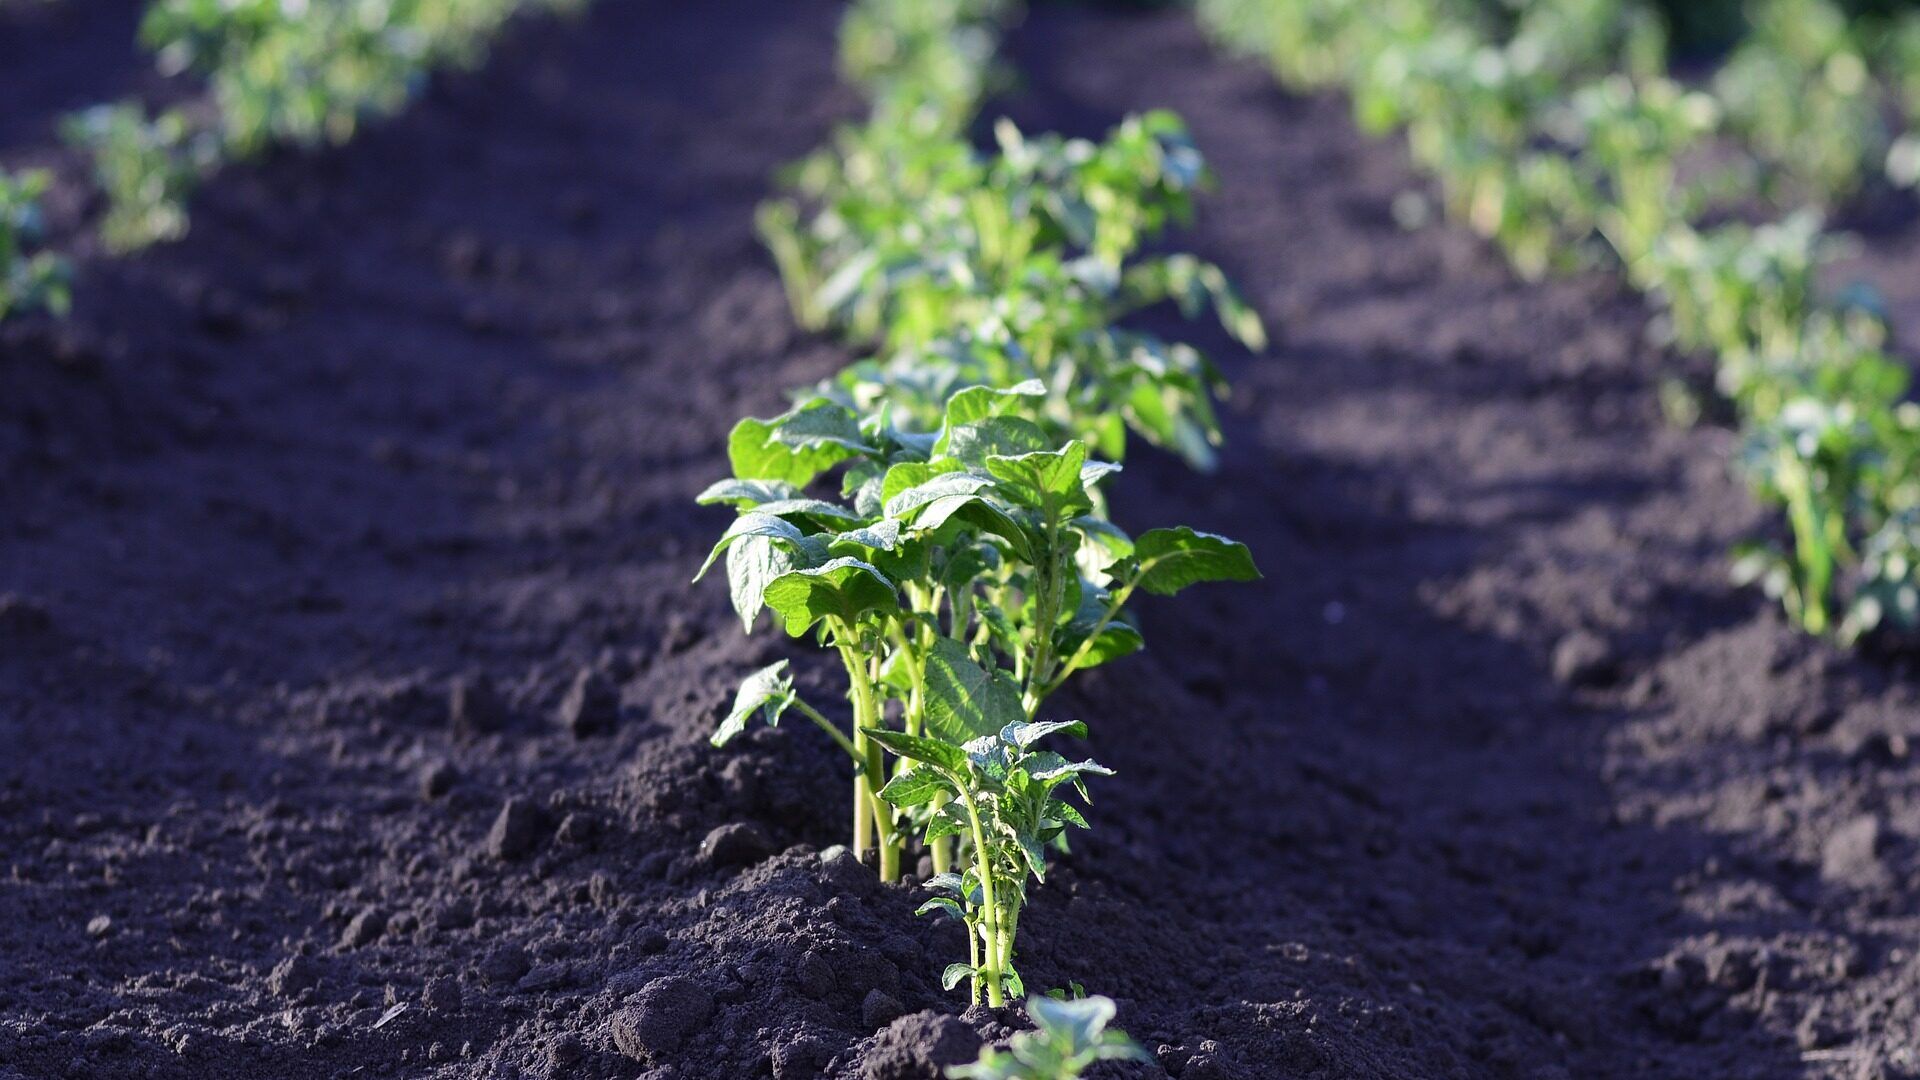
Gardening Myths: Sifting Fact from Fiction

Gardening is rewarding but comes with its fair share of myths and misconceptions. These range from strange watering techniques to unorthodox plant health remedies found in your kitchen pantry. Let’s debunk a few of these gardening myths to cultivate a more informed community.

Myth 1: Adding Sand to Heavy Clay Soil Will Make It Looser

This tip may seem logical, given that sand is loose and drains well. However, adding sand to clay soil can create a material similar to concrete. Instead, organic matter such as compost or aged manure is the best choice for improving clay soil. They enhance the soil’s structure, help it retain nutrients, and promote better water drainage.

Myth 2: Using Native Plants Means No Pest Problems

While it’s accurate to say that native plants usually require less maintenance than exotic varieties, claiming they are completely pest-free is misleading. Pests often adapt to local flora, and native plants can still become victims of these pests. Regular inspection and integrated pest management practices are essential for maintaining plant health, regardless of origin.

Myth 3: More Fertilizer Helps Plants Grow Better

Fertilizers are to plants what vitamins are to humans: helpful but harmful in excess. Over-fertilization can cause sudden plant growth but result in weaker plants. It can also lead to nutrient imbalances, damaging the plants and the environment. Using fertilizers judiciously, based on soil and plant needs, is the key to nutrient management.

Myth 4: Irrigating Your Plants with Milk Helps with Combating Pests and Diseases

Milk is a nutrient-rich drink good for our bones, but not necessarily your plants. Despite milk’s nutritional content, it is generally not advisable to use it for irrigation. Here are a few reasons why:

  1. Risk of Pathogen Growth: Milk is an organic substance that provides an excellent medium for the growth of microorganisms, including harmful bacteria and fungi. These microbes can lead to plant diseases, deteriorating their health and vigor.
  2. Soil Imbalance: Using milk can disrupt the pH balance of the soil. Milk is slightly acidic and can lower the soil’s pH, which may not benefit plants that prefer slightly alkaline or neutral conditions.
  3. Disruption of Soil Structure: The fat content in milk can interfere with water and air movement in the soil, thereby impeding root uptake and possibly leading to waterlogging and root suffocation.
  4. Nutrient Overload: While milk contains beneficial nutrients such as calcium, too much of it can result in nutrient imbalances, leading to plant toxicity or nutrient lockout of other essential elements.
  5. Attract Pests: Milk’s sugar content may attract various pests, such as ants, flies, and other insects, leading to pest infestation problems.

Clean water is generally a more efficient, cost-effective, and safe resource for routine plant irrigation.

Myth 5: Spreading Lemon Peels in the Garden Helps to Improve Plants Health

There’s an old myth about spreading lemon or citrus peels in the garden to deter pests. Spreading lemon peels directly in the garden is often not recommended due to several reasons:

  1. Citrus Oil Content: Lemon peels contain citrus oils that can be harmful to plants and beneficial insects like bees. This oil can inhibit plant growth and potentially cause damage.
  2. pH Level: Lemon peels are highly acidic; their introduction to soil may alter the pH level and render it too acidic for many plants to thrive. Most plants prefer a neutral or slightly acidic pH level. Excess acidity can hinder the plant’s ability to absorb nutrients efficiently.
  3. Rotting Process: The rotting process of lemon peels may attract unwanted pests into your garden. Flies, gnats, and other insects might be drawn to the decaying peels.
  4. Potential for Disease: Any disease or pest present on the peel could infect your soil or plants.

Despite these concerns, it’s important to note that lemon peels can be beneficial if used properly. They can add nutrients like nitrogen, phosphorus, and potassium to compost. A safer practice is to compost your lemon peels in a compost pile or bin, allowing them to break down fully before adding the compost to your garden soil, where the pH effect will be greatly lessened and more balanced.

Myth 6: Using Paprika Water as Pesticide

Some gardeners swear by using paprika water as a natural pesticide. While it’s true that capsaicin, the compound that gives hot pepper its heat, can repel some pests, it’s far from a good solution. Irrigating plants with paprika mixed with water is generally not recommended due to several reasons:

  1. Nutrient imbalance: Firstly, paprika or other spices don’t provide the necessary nutrients (like Nitrogen, Phosphorus, and Potassium) that plants need to grow.
  2. Soil pH impact: Spices could potentially impact the soil pH level. Paprika is moderately acidic and could change the soil’s pH, making it unfavorable for some plants that thrive in neutral to slightly alkaline soils.
  3. Potential for disease and pests: While paprika is known to deter certain pests, it can also potentially attract other pests or contribute to the growth of certain fungi or bacteria, which could prove detrimental to plant health.
  4. Solute Concentration: Water mixed with paprika will increase the solute concentration of the irrigation water. Plants could find it harder to absorb this water (osmotic stress), leading to water stress or dehydration.
  5. Capillary clogging: Tiny particles from the paprika might clog the tiny capillaries of the plant’s water absorption system, leading to decreased water and nutrient uptake.
  6. Risk of burning the plant: Certain plants, especially those with delicate tissues, could get “burned” or exhibit toxic reactions when exposed to spices like paprika.

While paprika has been used in some pest control applications, it’s not meant for regular irrigation use. Researching and employing proven horticultural methods for plant care is always a good idea.

application of sugar to crops and its impact on yield and beneficial insects.

Myth 7: Sugar Applications Improve Yield

While sugar application has been found to increase the population of beneficial insects, it does not appear to result in a statistically significant increase in crop yield. Research suggests that sugar application can be beneficial for attracting beneficial insects, but its impact on yield is inconclusive.

A study conducted in Wisconsin, Illinois, Minnesota, and Indiana compared different sources of sugar in soybeans. The study did not find a statistical yield increase with sugar application, and there were no significant differences among the sugar sources concerning yield. Similar results were found regarding sugar application to corn and soybeans.

While sugar application to crops can attract and maintain beneficial insects, it is important to consider the potential risks associated with this practice. One of the main risks is that sugar application may attract unwanted pests, such as aphids or ants, which can cause damage to plants. Additionally, excessive sugar application can lead to imbalances in the soil ecosystem and may promote the growth of harmful microorganisms. It is crucial to carefully monitor the effects of sugar application and adjust the amount and frequency of application based on the specific needs of the crops and the local environment.

Science-backed gardening

Your garden isn’t just a playground for bizarre experiments – it’s a living ecosystem that needs careful attention. Using substances like milk or lemon might disrupt this delicate balance, inviting more harm than good. Science has consistently shown that the best way to garden involves understanding the plants you’re growing, the soil they’re planted in, and the environment they’re growing in. That’s why we’ve decided to ditch the folklore and stick with proven science in the Agrio app.

Don't wait for your plants to start a rebellion. Download Agrio!
Don’t wait for your plants to start a rebellion. Download Agrio!

Our app provides advice and support validated by years of scientific research and real-world experience from conventional and organic farmers. We incorporate tried-and-true methods for pest control, irrigation, nutrient management, and more, to help you maintain a healthy, productive garden or farm with minimal environmental impact. In situations where home remedies hold value, our agronomy bot, Harvie, stands ready to furnish you with the most optimal and up-to-date information.

In summary, myths can sometimes provide interesting, creative solutions but can also lead to misinformed practices that can harm your plants in the long run. Reach reliable resources like the Agrio app to keep your garden practices scientific, sustainable, and effective. With this approach, gardening becomes less of a guessing game and a rewarding, successful pursuit.

Hey Harvie, what’s wrong with my plant?

My name is Lily, and I’m a teenage girl with a passion for gardening. There’s something magical about planting seeds, nurturing them, and watching them grow into flourishing plants. However, my journey took an exciting turn when I discovered Harvie, an AI bot with incredible capabilities, making my gardening adventures even more thrilling. With a simple voice command, “Hey Harvie, what’s wrong with my plant?” I could rely on its multimodal expertise to examine photos, answer questions, and provide guidance throughout my gardening endeavors.

It all began one sunny afternoon when I decided to transform a small patch of land in my backyard into a vegetable garden. Armed with gardening tools and a dream, I set out to create my little green oasis. But being a novice gardener, I knew I would need guidance and assistance along the way.

That’s when I stumbled upon Agrio, an app with an AI bot specifically designed to assist gardeners with their plant-related queries. Harvie had an impressive array of features, including multimodal capabilities that allowed it to analyze photos of plants and answer general agronomic questions. It seemed like the perfect gardening companion.

Excited, I quickly downloaded the Agrio app on my smartphone and created an account. As I embarked on my gardening adventure, Harvie became my constant companion. It was like having a personal gardening expert right in my pocket. Whenever I encountered a problem or had a question, I would simply take a photo of the plant or describe the issue, and Harvie would come to the rescue.

One sunny morning, as I inspected my garden, I noticed that my tomato plant’s leaves were turning yellow. Worried, I rushed to my phone and opened the Agrio app. With a single tap, I uploaded a photo of the ailing leaves and anxiously awaited Harvie’s analysis.

A few seconds later, Harvie’s cheerful voice emanated from my phone, “Hey, Lily! I’ve examined the photo, and it seems your tomato plant might be suffering from a nutrient deficiency. I recommend adding some organic compost to enrich the soil. Additionally, make sure the plant receives adequate sunlight and water. With proper care, your tomatoes will be back to their vibrant, healthy selves in no time!”

Relieved, I followed Harvie’s advice diligently, nurturing my tomato plant back to health. And true to Harvie’s words, the leaves regained their luscious green color, and tiny green tomatoes began to appear, promising a bountiful harvest.

What's wrong with my plant
What’s wrong with my plant?

But Harvie’s expertise didn’t stop there. One rainy day, I noticed strange spots appearing on the leaves of my cucumber plant. Remembering the reliable advice Harvie had provided before, I turned to the AI bot once again. I described the issue and sent a photo of the leaves, hoping for a solution.

Within moments, Harvie chimed in, “Lily, it looks like your cucumber plant might be affected by a fungal infection called powdery mildew. It’s a common problem during humid weather. I suggest pruning the infected leaves and applying a natural fungicide. It’s essential to ensure proper air circulation around the plant as well. Keep up the good work, and your cucumbers will thrive!”

With Harvie’s guidance, I tackled the powdery mildew issue head-on. I diligently removed the affected leaves, applied the recommended fungicide, and rearranged the garden to improve airflow. Before long, my cucumber plant rebounded, and fresh, healthy cucumbers began to dangle from their vines.

As the gardening seasons passed, my bond with Harvie grew stronger. The AI bot became more than just a helper; it became a trusted friend. Harvie’s vast knowledge and unwavering support elevated my gardening experience to new heights. From pest identification to watering schedules, Harvie had an answer for every challenge I faced.

Through Harvie, I not only honed my gardening skills but also developed a deep appreciation for the wonders of technology. The combination of nature and artificial intelligence created a harmonious partnership, amplifying my abilities as a gardener.

Today, as I stand in my vibrant vegetable garden, the fruits of my labor proudly displayed, I can’t help but feel grateful for the journey I’ve undertaken. Harvie continues to guide me, whispering insights and tips to ensure my garden thrives. Together, we’ve transformed my backyard into a haven of green, a testament to the power of human ingenuity and AI collaboration.

So, the next time you find yourself asking, “Hey Harvie, what’s wrong with my plant?” remember that a world of knowledge and guidance awaits you. Embrace the magic of gardening and let Harvie, your trusted AI companion, join you on the extraordinary journey of nurturing life from seed to harvest.

Tree Doctor App: Revolutionizing Agronomy with AI

Technology has become an integral part of our lives in today’s fast-paced world, permeating various industries. Agriculture, too, has witnessed a significant transformation with the advent of innovative applications. One such groundbreaking mobile app, Agrio, empowers growers and plant enthusiasts to protect their plants with artificial intelligence (AI). This article delves into how a tree doctor app that diagnoses plant problems through photos and conversations with its intelligent bot can serve you.

The Importance of Correctly Identifying Threats to Trees in Orchards and Gardens

In agriculture and gardening, trees are invaluable assets, providing shade, oxygen, beauty, and sometimes even sustenance. However, these green companions face various threats that can jeopardize their well-being. From diseases and pests to environmental stressors, accurately identifying these threats becomes paramount. Correct identification serves as the foundation for effective management strategies and targeted interventions. Different tree diseases have specific treatments, and pests require tailored control measures. By correctly identifying the specific threats, growers and gardeners can implement appropriate preventive measures, timely interventions, and informed decision-making to protect their trees. Accurate identification also facilitates the implementation of disease-resistant or pest-tolerant tree varieties, promotes sustainable practices, and minimizes the use of harmful chemicals. Furthermore, correctly identifying tree threats enhances our understanding of ecological dynamics and supports research efforts to develop improved mitigation strategies. In agriculture and gardening, the importance of correctly identifying threats to trees cannot be overstated as it forms the cornerstone of effective tree care, preservation, and sustainable practices.

Diseased pear tree
Diseased pear tree

Risks

Foliage Diseases and Pests and Their Impact on Plants

The lush foliage of plants not only adds beauty to our surroundings but also serves as a vital source of energy and oxygen production. However, this leafy canopy is susceptible to a range of diseases and pests that can wreak havoc on plant health. Foliage diseases, caused by fungal, bacterial, or viral pathogens, can lead to leaf discoloration, spots, lesions, defoliation, and overall decline. Pests, including aphids, mites, caterpillars, and beetles, feast on the tender leaves, causing visible damage and disrupting the plant’s metabolic processes. These foliage diseases and pests not only affect the aesthetics of plants but can also impair their ability to carry out photosynthesis and nutrient uptake. Timely identification of these issues is crucial for effective management. Implementing cultural practices such as proper sanitation, regular monitoring, and promoting plant vigor through balanced nutrition and irrigation can help prevent and mitigate foliage diseases and pests. Additionally, targeted treatments like fungicides or insecticides can be employed when necessary. By safeguarding the health of plant foliage and promptly addressing diseases and pest infestations, we can preserve the vibrant greenery that enriches our environment and sustains life.

Trunk and Twig Borers and Their Impact on Trees

In the intricate tapestry of nature, trunk and twig borers silently invade trees, posing a significant threat to their structural integrity and overall health. These elusive pests belong to various insect families, including beetles, moths, and wasps. Their larvae tunnel into the trunks, branches, and twigs of trees, creating galleries and feeding on the vital vascular tissues. The damage caused by trunk and twig borers can weaken the tree’s structural stability, impair nutrient transport, and provide entry points for secondary infections. Symptoms of infestation may include wilting foliage, dieback, sawdust-like frass, or exit holes on the bark surface. Vigilance in identifying and addressing these pests is crucial to prevent further damage. Methods to combat trunk and twig borers include physically removing infested branches, applying insecticides targeting the adult borers, and promoting tree health through proper pruning, fertilization, and watering practices. Early detection and intervention are key in mitigating these silent intruders’ impact and safeguarding our cherished trees’ vitality.

Fruit Borers

As fruits ripen, inviting colors and sweet aromas emerge, attracting not only our attention but also that of fruit borers. These persistent pests, including moths, beetles, and larvae, infiltrate fruits, causing damage that can lead to spoilage and significant economic losses for growers. Fruit borers tunnel into the fruits, feeding on the flesh and leaving behind unsightly blemishes, decay, or entry points for secondary infections. Preventing fruit borer infestations is essential for preserving the quality and yield of crops.

Moth caterpillar on an apple fruit

Soil-Borne Diseases and Tree Surgeries

Beneath the surface, a hidden threat lurks, capable of wreaking havoc on our beloved trees – soil-borne diseases. These insidious ailments, caused by pathogens residing in the soil, can severely compromise the health and vitality of trees. As trees draw nutrients and water from the soil, they become susceptible to infection by fungal, and bacterial agents in the ground. These diseases often manifest through symptoms such as leaf discoloration, wilting, stunted growth, or even tree death. In such cases, tree surgeries are critical to combat soil-borne diseases. Skilled arborists and tree surgeons employ techniques such as root pruning, root collar excavation, or soil amendments to diagnose and treat these ailments. By carefully inspecting the affected tree’s root system and implementing targeted surgical procedures, they aim to remove infected tissue, improve root health, and enhance the tree’s chances of recovery. Timely and accurate identification of soil-borne diseases, coupled with precise tree surgeries, serve as crucial tools in preserving the vitality of our arboreal companions and maintaining the ecological balance they contribute to in our environment.

The Power of Agrio: Your Personal Tree Doctor App

Agrio is more than just a mobile app; it’s a tree doctor in your pocket. With its advanced AI capabilities, Agrio revolutionizes how we care for plants. Users can diagnose various plant issues accurately and swiftly by simply taking a photo or engaging in a conversation with the app’s bot.

At the heart of Agrio lies the power of artificial intelligence, which enables the app to analyze visual data and understand textual inputs. By leveraging machine learning algorithms and computer vision, Agrio can quickly identify diseases, pests, nutrient deficiencies, or any other problems plaguing a tree. The app’s intelligent bot engages in interactive conversations with users, gathering additional details to provide precise diagnoses and tailored recommendations.

Plant doctor in your pocket

Tree Doctor App that Provides Instant Diagnosis and Recommendations

Gone are the days of flipping through farming and gardening manuals or searching the internet for hours to identify a plant problem. Agrio provides instant diagnosis and recommendations, saving valuable time and preventing further damage to plants. Its AI-driven system compares the uploaded images or conversational data with an extensive database of plant diseases, pests, and deficiencies, generating accurate diagnoses within seconds. Users are presented with comprehensive information about the identified issue and are guided through appropriate treatment measures, including specific pesticides, fertilizers, or organic remedies.

Continuous Learning and Improvement

Agrio’s AI algorithms are not static but continuously evolve and improve. As more users engage with the app and upload plant data, Agrio’s knowledge base expands, enhancing its diagnostic accuracy and making it even more efficient over time. This iterative learning process ensures that Agrio stays up to date with the latest research and advancements in plant health, constantly delivering the best possible recommendations to its users.

Join the Agrio Community

Beyond its diagnostic capabilities, Agrio fosters a community of plant enthusiasts, connecting users with similar interests and providing a knowledge-sharing platform. The app allows users to join discussion forums, share success stories, and seek expert advice. This collaborative approach nurtures a vibrant ecosystem of individuals passionate about plant care, enriching the overall experience for Agrio users.

Summary

Agrio’s Tree Doctor App is transforming the way we care for plants, empowering growers and plant lovers alike to protect their precious greens with the help of artificial intelligence. Agrio provides instant diagnoses and tailored recommendations by seamlessly combining visual recognition, conversational AI, and an ever-growing knowledge base. With this revolutionary mobile app, plant protection has never been easier, making it a must-have tool.

The Complete Guide to Hydrangea Care with the Aid of an App

Hydrangeas are beloved flowering shrubs known for their large and vibrant blooms, adding beauty and elegance to any garden or landscape. Hydrangeas have become a popular choice for novice and experienced gardeners with their diverse colors and varieties. However, successful hydrangea care requires a proper understanding of their specific needs. This comprehensive guide will delve into the world of hydrangea care, covering everything from selecting the suitable variety, planting, watering, fertilizing, pruning, and troubleshooting common issues. Following these tips, you can ensure your hydrangeas thrive and showcase their breathtaking blossoms.

Choosing the Right Hydrangea Variety

Before embarking on your hydrangea care journey, selecting the right variety that suits your garden’s conditions and personal preferences is essential. Some popular hydrangea types include:

Hydrangea plant

Bigleaf Hydrangeas / Hydrangea macrophylla. Known for their large, rounded flower clusters, bigleaf hydrangeas are divided into mophead (large, round flowers) and lacecap (flat clusters with a ring of showy flowers surrounding tiny, fertile flowers in the center).

Oakleaf Hydrangeas / Hydrangea quercifolia. These hydrangeas feature cone-shaped flower clusters and distinct lobed leaves resembling oak leaves, which turn vibrant shades of red, orange, and purple in autumn.

Panicle Hydrangeas / Hydrangea paniculata. Panicle hydrangeas offer elongated cone-shaped flower clusters that transform from creamy white to shades of pink as they mature.

Smooth Hydrangeas / Hydrangea arborescens. These hydrangeas have large, round flower clusters and are known for their durability and adaptability to various climates.

Planting and Different Aspects of Hydrangea Care

Location

Hydrangeas generally prefer partial shade or filtered sunlight. Too much direct sunlight can cause the flowers and leaves to wilt, and the plant may become stressed. However, some varieties, such as the paniculata and macrophylla types, can tolerate more sun. It’s best to refer to specific cultivar recommendations for sun tolerance. To prevent scorching of the leaves and flowers, it’s ideal for providing hydrangeas with morning sun exposure. This allows them to benefit from the sunlight without the intense midday heat. Afternoon shade can help shield the plant from excessive heat and intensity. Hydrangeas have delicate stems that strong winds can easily damage. Choose a location that provides some protection from gusty winds, or consider installing a wind.

Here are a few key factors to consider:

Soil

Hydrangeas prefer rich, well-draining soil with a slightly acidic to neutral pH range (around 5.5 to 7.0). Avoid areas with heavy clay soil or poorly drained spots, which can lead to root rot and other issues. When options are limited, amend heavy clay or sandy soils with organic matter like compost to improve moisture retention and fertility.

Planting Process

Dig a hole twice as wide and just as deep as the root ball. Gently remove the hydrangea from its container, ensuring the root ball remains intact. Place the plant in the hole, making sure it sits at the same depth as it did in the container. Backfill the hole with soil, firming it gently around the roots. Water thoroughly to settle the soil and remove any air pockets.

Watering

Proper hydration is crucial for healthy hydrangeas. Follow these guidelines to ensure proper watering:
Hydrangeas generally require 1-2 inches of water per week. Water deeply to encourage deep root growth, rather than frequent shallow watering. Avoid overhead watering, as wet foliage can lead to fungal diseases. Instead, water at the base of the plant or use drip irrigation. Mulch around the base of the hydrangea to retain moisture and suppress weeds.

Fertilizing

Fertilize hydrangeas in early spring, just before new growth begins. Use a balanced slow-release fertilizer with equal parts nitrogen (N), phosphorus (P), and potassium (K), such as a 10-10-10 or 14-14-14 formulation. Follow the package instructions for the appropriate amount to apply based on the size and age of your hydrangea. Sprinkle the fertilizer evenly around the base of the plant, avoiding direct contact with the stems. Gently work the fertilizer into the top layer of soil. Water the plant thoroughly to help the nutrients penetrate the root zone.

Pruning

Pruning hydrangeas is essential for maintaining their shape, promoting healthy growth, and ensuring abundant blooms. However, the pruning requirements vary depending on the hydrangea variety.

a) Bigleaf Hydrangeas (Hydrangea macrophylla):
i. Prune after flowering, in late summer or early fall.
ii. Remove dead or damaged wood.
iii. To control size, selectively remove one-third of the oldest stems, cutting them back to the base.
iv. Avoid extensive pruning in spring, as it may remove potential flower buds.

b) Oakleaf, Panicle, and Smooth Hydrangeas:
i. Prune in late winter or early spring, before new growth appears.
ii. Remove dead, weak, or crossing branches.
iii. To shape the plant or control size, selectively remove stems as needed.

Dealing with Common Issues

Pests: Hydrangeas are generally resistant to pests, but they can occasionally face problems like aphids, spider mites, or scale insects. Use insecticidal soaps or horticultural oils to control infestations.

Diseases: Common diseases affecting hydrangeas include powdery mildew, leaf spots, and root rot. Provide adequate air circulation, avoid overhead watering, and promptly remove and dispose of any infected plant material.

Changing Flower Colors: The flower color of certain hydrangea varieties can change based on soil pH. Acidic soil (pH below 7) produces blue blooms, while alkaline soil (pH above 7) results in pink blooms. Adjust the soil pH using amendments like aluminum sulfate for blue flowers or lime for pink flowers.

How Our App Can Help with Hydrangea Care

Agrio is an Android and iOS application changing how farmers and gardeners diagnose plant issues and get advice on how to grow plants. With the help of artificial intelligence (AI) technology, our app can analyze plant images and provide accurate plant diagnoses. Our latest development takes plant diagnosis to the next level: Harvie, a combination of a large language model (LLM) and computer vision model that can analyze images and text to provide accurate diagnosis and plant health suggestions. Harvie is the first multimodal chatbot related to agriculture and gardening.

Agrio user interacts with Harvie, the agronomist chatbot that teaches you how to grow plants.

Summary

Hydrangeas are magnificent flowering shrubs that bring beauty and charm to any garden. By following the guidelines outlined in this comprehensive guide, you can provide the optimal care for your hydrangeas, ensuring they flourish with stunning blooms year after year. Remember to select the right variety, provide proper planting conditions, water and fertilize adequately, prune as needed, and address any common issues promptly. With a little attention and care, your hydrangeas will reward you with an abundance of vibrant and captivating flowers, creating a breathtaking display in your outdoor space.

A Plant Care App Made Intuitive With A Multimodal Chatbot

Large language models, such as GPT, have the potential to significantly enhance the user experience of mobile applications by enabling more natural and efficient interactions. They can power chatbots like ChatGPT and virtual assistants that can understand and respond to complex queries in real-time, providing personalized and intelligent recommendations to users. Overall, large language models have the potential to revolutionize the way we interact with our mobile applications, making them more intuitive and responsive to our needs. Agrio is an Android and iOS plant care app that is changing how farmers and gardeners diagnose plant issues and get advice on how to grow plants. With the help of artificial intelligence (AI) technology, our app can analyze plant images and provide accurate plant diagnoses. Our latest development takes plant diagnosis to the next level: Harvie, a combination of a large language model (LLM) and computer vision model that can analyze images and text to provide accurate diagnosis and plant health suggestions. Harvie is the first multimodal chatbot related to agriculture and gardening.

Navigating the Complexities of Effective Plant Care

Plant care is a crucial aspect of successful cultivation, ensuring the optimal growth and development of plants. However, for individual growers without expert support, there are certain challenges that need to be addressed. First and foremost, identifying and managing plant diseases can be difficult without professional guidance. From fungal infections to viral outbreaks, the lack of knowledge about plant pathology makes it challenging for growers to implement appropriate control measures. Additionally, individual growers often struggle with monitoring and maintaining the right nutrient balance for their plants. Without expert advice, they may find providing the necessary nutrients and maintaining an optimal soil pH challenging, leading to nutrient deficiencies or toxicities that can hinder plant health and productivity. Overall, the absence of expert support in plant care can pose significant challenges for individual growers in effectively managing diseases and providing proper nutrition for their plants.

A Plant Care App: The Multimodal Approach

Image analysis can diagnose plant diseases by analyzing symptoms such as leaf spots, discoloration, or abnormal growth patterns. Image analysis algorithms can be trained using large datasets of images and machine learning techniques, allowing for accurate and efficient identification and diagnosis of plant species and diseases. Large language models, on the other hand, are artificial intelligence models that can understand and generate human-like language. They can be trained on vast amounts of text data, allowing them to learn about different plants and the problems that affect them. Large language models can also understand and interpret human language, allowing users to ask questions about plants and how to grow them. They can provide users with relevant information about plant identification, diseases, and treatments naturally and conversationally.

We combined these two capabilities to create a very powerful chatbot called Harvie. Harvie was trained on millions of images and agronomic text to ensure it could identify plant problems and answer general agronomic questions. Users can interact with Harvie in natural language, describing symptoms and uploading images for a diagnosis. The artificial-intelligence-powered chatbot can understand the context and interpret complex agricultural terminology, making it a powerful tool for anyone dealing with plant issues and wanting to get support on how to grow plants.

Agrio user interacts with Harvie, the agronomist chatbot that teach you how to care for plants.
Agrio user interacts with Harvie, the agronomist chatbot that teaches you how to care for plants.

Personalized Agronomist that Teaches You Plant Care

Harvie, the multimodal plant care and agronomic advice bot, has the ability to provide personalized advice to users by analyzing a wide range of data sources. By reading all user input to the Agrio app, analyzing past conversations, and taking into account the user’s specific preferences and needs, Harvie can provide customized recommendations for each individual user. This is made possible by leveraging machine learning algorithms and natural language processing, which enable Harvie to understand and interpret user input in a way that is intuitive and user-friendly.

In addition to analyzing user input, Harvie can also take into account weather data, soil quality, and other environmental factors that can impact plant growth and health. By considering all of these variables, Harvie can provide users with real-time recommendations that are tailored to their specific conditions and needs.

Overall, Harvie represents a major step forward in the field of agronomic advice, providing users with a personalized and intelligent bot that can help them achieve optimal plant growth and health. With its advanced capabilities and ability to analyze multiple data sources, Harvie has the potential to transform how users interact with plant care and agricultural technology and help drive greater efficiency and sustainability in farming practices.

Artificial Intelligence for the Rescue: Revolutionizing Agriculture and Improving Food Security

A multimodal artificial intelligence model that can diagnose plant problems from images and user text input, and provide guidance in conversation with growers in many languages, has the potential to revolutionize the field of agriculture and help address the problem of food security. This AI model can provide growers with up-to-date agronomic advice, personalized recommendations, and real-time solutions to plant-related issues. By leveraging multiple modalities, such as images and natural language processing, the AI model can provide growers with an intuitive and user-friendly interface that enables them to communicate with the system in their native language. This can help reduce the farmer-agronomist gap and provide growers with access to expert advice and guidance, regardless of their location or language. This AI model can help increase crop yields, reduce waste, and improve food security by enabling growers to make informed decisions about planting, fertilizing, and harvesting.

Summary

Agrio’s new chatbot feature is a game-changer for plant diagnosis. With the ability to analyze images and text, the app provides more accurate diagnoses and suggestions for treatments and preventative measures. If you’re a gardener or farmer looking for a reliable tool to diagnose plant issues, Agrio is the plant care app for you. Try it out and see how it can help keep your plants healthy.

Growing Potatoes: A Step-by-Step Guide to Potato Sprouts Planting

Potato sprouts planting is a simple and rewarding way to grow your potatoes at home. Homegrown potatoes taste fresher and more flavorful than store-bought varieties, but they are also a great way to save money and reduce your carbon footprint. Potatoes are a versatile and nutritious food that can be incorporated into many dishes.

Potato sprouts planting

To plant potato sprouts, you will need the following materials:

  • Potato sprouts or potato seeds (also known as seed potatoes)
  • Potting soil or compost
  • A container or plot of land in which to plant the sprouts

Before you begin, it’s important to choose the right potato sprouts for your climate and soil conditions. Many different types of potato seeds are available, each with its unique flavor and growing characteristics. Some popular varieties include Russet, Yukon Gold, and Red Bliss.

Once you have selected your potato sprouts, it’s time to start. If you are planting in a container, fill it with potting soil or compost, making sure to leave enough room for the sprouts to grow. If you are planting in a plot of land, loosen the soil and mix in compost or organic matter to help improve the soil structure.

Next, plant the potato sprouts about 8 inches apart and cover them with a few inches of soil or compost. Water the sprouts thoroughly, and keep the soil moist but not waterlogged. As the sprouts begin to grow, you may need to add more soil or compost to the container or plot to ensure that the roots have enough room to grow.

As the potato plants mature, keep an eye out for pests and diseases, and take steps to control them if necessary. You can also fertilize the plants with balanced fertilizers to help them grow strong and healthy.

Once the plants have matured, you can harvest your homegrown potatoes. Simply dig them up carefully, taking care not to damage the plants or the potatoes. You can then enjoy your homegrown potatoes in various dishes or store them in a cool, dry place for later use.

Important diseases and pests

Potato plants are susceptible to several diseases that can cause serious damage if not properly controlled. Some common diseases that can affect potato sprouts include:

  1. Early Blight: This fungal disease causes dark, circular spots on the leaves and stems of potato plants. As the disease progresses, the spots may become sunken and surrounded by a yellow halo.
  2. Late Blight: This is a more serious disease that can cause the rapid death of potato plants. It is characterized by dark, water-soaked lesions on the leaves and stems of the plant and can spread quickly under moist conditions.
  3. Potato Scab: This bacterial disease causes raised, corky lesions on the potato’s skin, making them unsightly and reducing their appeal. Use resistant varieties in gardens in which scab was a problem. Rotate with non-host crops. Maintain soil pH levels at around 5.1 and ensure the soil moisture levels are optimal during the first 2 to 6 weeks following tuberization.
  4. Blackleg: This bacterial disease damages the stem. Start with healthy plant material, as the disease is seed-borne. Keep the soil well-drained after temperatures reach above 10 Celsius. Don’t use access nitrogen. Calcium and magnesium level should be high to lower the risk of this disease.
  5. Colorado Potato Beetle: This pest is a common problem for potato growers, as it feeds on the leaves of the potato plant and can cause significant damage. The adult beetles are yellow with black stripes, while the larvae are orange with black spots. Look for egg masses on the underside of the leaves once the plant emerges. To control Colorado potato beetles, you can use cultural techniques (such as removing weeds, which can harbor the beetles), biological control, such as Beauveria bassiana, and chemical controls (such as insecticides).
Don't wait for your plants to diagnose themselves. Download Agrio!
Don’t wait for your plants to diagnose themselves. Download Agrio!

To prevent these diseases, it is important to choose disease-resistant varieties of potato seeds, practice proper cultural techniques (such as rotating crops and avoiding overhead watering), and use appropriate chemicals as needed.

Summary

Planting potato sprouts is a fun and rewarding way to grow fresh, delicious potatoes at home. With just a little effort and care, you can enjoy the taste and nutrition of homegrown potatoes all year round. So why not give it a try? Start your potato growing adventure today, and if you need any further assistance or guidance, our friendly agronomic bot Harvie is always here to help. Don’t miss out on the joy of harvesting your own homegrown spuds!

Understanding and Controlling Red Mites: A Comprehensive Guide

Red mites are tiny arthropods classified as Arachnida and members of the Tetranychidae family, along with hundreds of different species. They are distributed worldwide and are a persistent concern for growers in warm, arid, and dry weather regions. Red spider mites’ presence in fields could go unnoticed until infestation reaches a critical point were damage to plants is visible.

Red mites life-cycle

The life cycle of red spider mites involves several stages of development, including eggs, larvae, nymphs, and adults.

When weather conditions are right, the female red mites lay eggs on the undersides of leaves or the stems of the host plant. The eggs hatch into larvae, which then develop into nymphs. The nymphs molt several times as they grow, eventually becoming adult mites.

The entire life cycle of a red spider mite can be completed in as little as 5 to 10 days, depending on the temperature and humidity conditions. This means that red spider mites can produce several generations per year, with the exact number of generations varying depending on the specific species and the local climate.

Red mites on rose leaves

How do they spread?

One way that red spider mites can migrate is by the wind. They are small and lightweight and can be easily carried by the wind from one plant to another. This can be especially problematic in greenhouses or other enclosed growing spaces, where the mites can migrate between plants more easily.

Another way that red spider mites can migrate is by hitching a ride on humans or animals. For example, the mites may be carried along if an infested plant is moved from one location to another. Similarly, if an animal brushes against an infested plant and then moves to another plant, the mites may be transferred in this way.

Finally, red spider mites can also migrate by crawling from one plant to another. This is more likely to occur when plants are near one another and can be particularly problematic in gardens or greenhouses where many different types of plants are grown nearby.

How to spot them?

Red mites are tiny and difficult to see without magnification. To spot red spider mites, it is helpful to use a magnifying glass or hand lens with at least 10x magnification.

To look for red spider mites, you should focus on the undersides of leaves, as this is where they tend to hide. You should also check the stems and the base of the plant, as well as any flowers or fruit that may be present. Red spider mites may also be found on other parts of the plant, so it is important to examine the entire plant thoroughly.

When looking for red spider mites, you should be on the lookout for small, reddish-brown insects that are about the size of a grain of salt. You may also see fine webbing on the leaves, indicating that red mites are present. If you are having trouble spotting the mites, you can try gently shaking the leaves or tapping the plant gently to encourage the mites to move.

Shaking the plant above a white sheet of paper can effectively spot red mites, as the mites will fall onto the paper and be easier to see against the white background. Hold a white paper beneath the plant and gently shake the leaves and stems. This will cause any red spider mites present to fall onto the paper.

It is also helpful to check for other signs of an infestation, such as yellow or discolored leaves, leaf drops, or stunted plant growth. These may be indicators of a red spider mite infestation, even if the mites themselves are not immediately visible.

Why is it challenging to control red mites?

First, they reproduce quickly and can build up large populations in a short amount of time. This makes it difficult to control them with chemical pesticides, as they may quickly build up resistance to the pesticides being used.

Second, red spider mites are small and difficult to see, making it hard to identify infestations until they are well established. They also tend to hide in the undersides of leaves, making it difficult to spot them and apply pesticides directly to them.

Finally, red spider mites can be easily spread from plant to plant, either by wind or by humans and animals moving infested plants or soil. This means that even if you can control an infestation on one plant, the mites may quickly spread to other plants in the area.

In the following, we will concentrate on the important aspect of biological control. To read more on conventional methods, refer to our treatment page.

Biological control

Phytoseiulus persimilis is a predatory mite that feeds on plant-damaging mites, such as spider mites. It is often used as a biological control agent to control spider mite infestations in agricultural settings, including in the cultivation of bananas.

Phytoseiulus persimilis is native to South America but has been introduced to other regions to control spider mites. It is a small, reddish-orange mite with a translucent body. It feeds on all stages of spider mites, including eggs, larvae, and adults.

In addition to feeding on spider mites, Phytoseiulus persimilis also feeds on pollen and nectar from flowers. It is active at temperatures above 15°C (59°F) and has a relatively short life cycle, with a generation time of about 10-14 days.

Phytoseiulus persimilis is considered to be effective at controlling spider mite infestations, but it is not a silver bullet solution. It is important to monitor the population of predatory mites and spider mites to ensure they can keep the red spider mites population in check. In addition, Phytoseiulus persimilis may not be effective in controlling certain species of spider mites, so it is important to identify the specific type of spider mite causing the problem to determine the most appropriate control measures.

There are several ways to apply Phytoseiulus persimilis in gardens and fields to control spider mite infestations:

  1. Purchase and release: Predatory mites can be purchased from biological control suppliers and released directly onto plants infested with spider mites. It is important to follow the supplier’s recommendations for the appropriate number of mites to release per square meter of infested plants.
  2. Inoculative release: In this method, a small number of predatory mites are released onto the plants at regular intervals over an extended period. This helps to establish a population of predatory mites that can maintain control of the spider mites.
  3. Augmentative release: This method involves releasing a larger number of predatory mites onto the plants simultaneously to quickly reduce the red mites population. This is typically used for severe infestations or when a quick reduction in the spider mite population is needed.

It is important to monitor the population of predatory mites and spider mites after releasing Phytoseiulus persimilis to ensure that the predatory mites effectively control the spider mites. In some cases, it may be necessary to release additional predatory mites if the spider mite population increases again.

It is also important to consider the environmental conditions when applying Phytoseiulus persimilis. The mites are more effective at controlling spider mites at higher temperatures and when the relative humidity is below 70%. In addition, it is important to avoid applying pesticides that are harmful to predatory mites, as this can reduce their effectiveness at controlling spider mites.

Summary

Red spider mites are small, reddish-brown insects that can infest a wide variety of plants. They reproduce quickly and can build up large populations in a short amount of time, making them challenging to control. Red spider mites are difficult to see and tend to hide on the undersides of leaves, making them hard to spot and treat. They can also be easily spread from plant to plant by wind or humans and animals moving infested plants or soil. To effectively control red spider mites, it is important to use a combination of methods, including physical removal, natural predators, and chemical controls, and to be diligent in monitoring for and quick to treat any new infestations.

Soybean Aphid Scouting and The Role of Digital Scouting Tools

Soybean aphids (Aphis glycines) are small, pear-shaped insects that feed on the sap of soybean plants. They are native to Asia but have spread to many other regions, including North America, where they can cause significant damage to soybean crops. Soybean aphid scouting helps in Identifying and managing soybean aphids on time. It is an important aspect of integrated pest management (IPM) for soybean production.

What are soybean aphids?

Soybean aphids are small insects that range in color from pale green to yellow or brown. They have long antennae and two short tubes, or cornicles, on the rear of their bodies. Soybean aphids reproduce asexually, with female aphids giving birth to live offspring. They can produce several generations per season, with the number of generations varying depending on the region and climate. Soybean aphids feed on the sap of soybean plants, resulting in reduced plant growth, stunted plants, and reduced yields. In severe infestations, soybean aphids can also vector viral diseases.

It is important to monitor for soybean aphids and implement management strategies to reduce their populations and prevent the spread of viral diseases. This can include the use of insecticides, as well as cultural practices such as crop rotation and planting resistant varieties.

Soybean aphids (Aphis glycines). Courtesy of The Bugwood Network

When to scout for soybean aphids

It is important to start scouting for soybean aphids at the early vegetative stage of development. Soybean aphids are most likely found on soybean plants’ lower leaves and stem and are most active during warm, humid weather. Therefore, regularly scout for soybean aphids throughout the growing season, especially during the vegetative and reproductive stages of soybean development.

During the early vegetative stage, you should focus on identifying the presence of soybean aphids and monitoring their population levels. This will allow you to determine whether treatment is necessary and, if so when the treatment should be applied. If you wait until later in the growing season to start scouting, you may miss the opportunity to control soybean aphid populations and prevent yield losses effectively.

In addition to regular scouting, it is also helpful to use a growing degree days (GDD) model to predict the timing of key developmental stages for soybean aphids, such as egg hatch, nymphal development, and adult emergence. This can help you plan your scouting activities and ensure that you are monitoring for soybean aphids at the most critical times.

In addition, fields that have a history of soybean aphid infestations or are near infested fields should be monitored more closely.

How to scout for soybean aphids

There are several steps involved in conducting a thorough soybean aphid scout:

Select representative plants: Choose plants representing the field, including plants of different ages and at various locations within the field.

Count aphids: Examine the lower leaves and stems of the selected plants for soybean aphids. Count the number of aphids on each plant and record the data.

Evaluate the level of infestation: Determine the soybean aphid infestation based on the number of aphids found per plant. A low infestation level is typically considered fewer than 250 aphids per plant, while a moderate infestation level is 250-999 per plant. An infestation level of 1,000 or more aphids per plant is considered severe. Start applying treatment when more than 250 aphids were counted per plant.

Management options

Several options for managing soybean aphids include chemical, biological, and cultural approaches. Chemical control methods, including the use of insecticides, can be an effective way to manage soybean aphid (Aphis glycines) infestations. Systematic insecticides are a type of chemical control method that can be used to manage soybean aphid infestations. Systematic insecticides are applied to the soil, taken up by the plant, and distributed throughout the plant tissue. This allows the insecticide to provide long-lasting control of soybean aphids and other insects that feed on the plant. These insecticides can be used as a seed treatment or soil drench. Seed treatments are applied to the seed before planting and protect emerging seedlings.

Systematic insecticides reduce the need for multiple applications throughout the growing season. However, they also have some limitations. Systematic insecticides may be less effective at controlling high soybean aphid populations. Due to their persistence in the environment, they may significantly impact non-target organisms, such as pollinators. It is important to choose an insecticide that is specifically labeled for use on soybeans, and that is effective against soybean aphids.

It is also important to consider the potential for insecticide resistance, which can repeatedly occur when soybean aphids are exposed to the same insecticide. To reduce the risk of resistance, it is important to rotate between different classes of insecticides and to use multiple control methods in combination.

Biological control methods involve natural predators, such as ladybugs and lacewings, to reduce soybean aphid populations. Cultural control methods include crop rotation, planting resistant varieties, and avoiding late planting, which can reduce the risk of soybean aphid infestations.

Digital field scouting app

Digital scouting apps, such as Agrio, can be a helpful tool for keeping track of pest infestations, including soybean aphids (Aphis glycines). These apps can help simplify the scouting process by providing a platform for recording and organizing data about pest populations, crop development, and management strategies.

Agrio can help with pest counting by using computer vision technology to analyze images of pest infestations. This can be especially useful for quickly and accurately counting large numbers of pests, such as soybean aphids, which can be time-consuming and challenging to do manually.

To use this feature, you would need to take photographs of the pests using your smartphone or other device and upload them to the app. The app would then use artificial intelligence algorithms to identify and count the pests in the images.

Summary

Soybean aphid scouting is important in managing soybean crops and preventing yield losses. Digital tools help field scout professionals to complete their tasks quickly and accurately and share their findings with their teams and clients.

Maximizing Plant Health with Raised Bed Garden

Raised bed garden is a popular and effective way to grow various plants, including vegetables, herbs, and flowers. They allow for better soil management and control over the growing environment, leading to healthier and more productive plants. There are several raised beds to choose from, each with its advantages and disadvantages. This article will look closely at the different types of raised beds and their benefits. Whether you’re a seasoned gardener or new to raised beds, this guide will help you choose the right type for your home garden.

Advantages of a raised bed garden

Improved soil structure

Raised beds can be filled with a mixture of soil, compost, and other amendments, which can help improve the structure and fertility of the soil. This can be especially beneficial for areas with poor soil quality, such as heavy clay or sandy soil.

Better drainage

Raised beds can help improve drainage, as the soil in a raised bed is typically higher and more elevated than the surrounding soil. This can be especially helpful in areas with poor drainage or heavy rainfall, as it can help prevent waterlogging and soil erosion.

Increased accessibility

Raised beds can be easier to access for people with mobility issues, as they are typically at a more comfortable height for planting, watering, and harvesting.

Pest control

Raised beds can help deter pests such as slugs and snails, as the elevated soil can make it more difficult for them to reach the plants.

Increased productivity

Raised beds can be more productive than traditional in-ground gardens, allowing for better soil management and control over the growing environment.

Overall, raised bed gardens can be a useful and effective tool for home gardeners looking to improve the health and productivity of their gardens.

Raised bed garden
Raised bed garden

Why is soil drainage important?

Adequate water supply

Plants need a certain amount of water to grow and thrive, but too much water can be harmful. Poor drainage can lead to waterlogged soil, which can deprive plants of oxygen and lead to root rot and other issues. On the other hand, well-draining soil allows excess water to drain away, ensuring that plants have access to the water and nutrients they need without becoming oversaturated.

Optimal root growth

Roots need oxygen to function properly, and waterlogged soil can deprive roots of oxygen. Poor drainage can also cause roots to rot, leading to stunted or unhealthy growth. Well-draining soil allows roots to access the oxygen and nutrients they need for optimal growth.

Pest and disease prevention in raised bed garden

Poor drainage can create an ideal environment for pests and diseases to thrive. Waterlogged soil can encourage the growth of fungi and bacteria, leading to root rot and other issues. Well-draining soil can help prevent these problems and promote healthy plant growth.

Soil erosion prevention in raised bed garden

Poor drainage can lead to soil erosion, which can wash away valuable nutrients and topsoil. Soil erosion is the movement of soil particles, often caused by the action of wind or water, which can wash away valuable nutrients and topsoil. Poor drainage can contribute to soil erosion, as excess water can wash away soil particles, particularly in areas with heavy rainfall or irrigation. Raised beds can help prevent soil erosion in several ways. First, the elevated soil in a raised bed is less prone to erosion than in-ground soil, as it is not as exposed to the elements.

Additionally, the soil in a raised bed is typically well-draining, which can help prevent waterlogging and reduce the risk of soil erosion. Another way that raised beds can help prevent soil erosion is by promoting plants’ growth of deep, healthy root systems. Deep roots can help anchor the soil and prevent erosion, particularly during heavy rain or wind. In a raised bed, the combination of well-draining soil and the opportunity for deep root growth can help prevent soil erosion and promote healthy plant growth.

Types and characteristics of raised beds

There are several types of raised beds, each with its own set of advantages and disadvantages:

Wood frame raised beds

These are the most common type of raised beds, and they are made by building a frame out of wood and filling it with soil. The advantages of wood frame raised beds include their durability, versatility, and ease of construction. They can also be made in any size or shape, making them a good option for small or oddly shaped gardens. Disadvantages of wood frame raised beds include the need for periodic maintenance and the fact that they may rot over time if not properly treated or sealed.

Stone or brick raised beds

These raised beds are made by constructing a frame out of stone or brick and filling it with soil. The advantages of stone or brick raised beds include their durability, longevity, and aesthetic appeal. They can also be a good option for areas with heavy clay soil, as the stones or bricks can help improve drainage. Disadvantages of stone or brick raised beds include their cost and the fact that they can be difficult to construct.

Concrete block raised beds

These raised beds are made by stacking concrete blocks to create a frame and filling it with soil. The advantages of concrete block raised beds include their durability, longevity, and ease of construction. They can also be a good option for areas with heavy clay soil, as the concrete blocks can help improve drainage. Disadvantages of concrete block raised beds include their cost and the fact that they may not be as attractive as other types of raised beds.

Metal raised beds

These raised beds are made by constructing a frame out of metal and filling it with soil. The advantages of metal raised beds include their durability, longevity, and ease of construction. They can also be a good option for areas with heavy clay soil, as the metal frame can help improve drainage. Disadvantages of metal raised beds include their cost and the fact that they may not be as attractive as other types of raised beds.

Overall, the type of raised bed that is best for you will depend on your specific needs and preferences. Consider factors such as cost, durability, ease of construction, and aesthetic appeal when deciding which type of raised bed to use in your garden.

Summary

Raised beds are an effective tool for pest control and prevention of soil-borne fungal diseases in the home garden. The elevated soil in a raised bed is less prone to pests and diseases, as it is less exposed to the elements than in-ground soil. Additionally, the soil in a raised bed is typically well-draining, which can help prevent waterlogging and reduce the risk of soil-borne fungal diseases. Raised beds can also be covered with a layer of mulch or protected with a fence or netting to keep out pests and animals, further reducing the risk of pest infestations and diseases. Combining these factors can help promote healthy plant growth and improve the overall productivity of the garden.

The Top Tomato Companion Plants for a Successful Harvest

Tomatoes are a staple in many home gardens, but did you know that choosing the right companion plants can help enhance their health and yield? Companion planting is a gardening technique that involves pairing different plant species together in the same area to take advantage of their complementary growth habits, nutrient requirements, and pest-deterring properties. By planting the right tomato companion plants, you can create a diverse and harmonious planting arrangement that will benefit all of the plants involved.

Understanding tomatoes

Before diving into the world of tomato companion plants, it’s important to understand tomatoes’ specific needs and characteristics. These sun-loving vegetables prefer well-draining soil with a pH of 6.2 to 6.8 and plenty of sunlight. They are sensitive to certain chemicals and pests and can be prone to diseases such as verticillium wilt and blossom-end rot. Tomatoes are also heavy feeders, requiring a lot of nutrients to thrive.

Tomatoes generally prefer plenty of sunlight, as they are a warm-season vegetable that requires at least 6 hours of direct sunlight per day to thrive. However, in very hot climates or extremely hot weather, tomatoes may benefit from some shade to prevent overheating and sunscald.

Shade can help regulate the temperature around the tomato plants, keeping the soil cooler and protecting the plants from the sun’s intense heat. This can help prevent wilting, yellowing of the leaves, and other signs of stress that can affect the health and productivity of the plants.

It’s important to keep in mind that too much shade can also be detrimental to tomatoes, as they require a certain amount of sunlight to produce fruit. Generally, a location that receives at least 6 hours of direct sunlight per day is ideal for growing tomatoes. If you live in a hot climate or are experiencing particularly hot weather, you can provide some shade for your tomato plants by using shade cloth or by planting taller companion plants that will provide some natural shade.

Add tomato companion plants for a successful harvest

Choosing the right companions

Many plants make good companions for tomatoes, including herbs, flowers, vegetables, and other fruit trees. Herbs like basil, oregano, and marjoram can help deter pests and improve the flavor of tomatoes. Basil, in particular, has a strong aroma that can help repel aphids and other pests that can damage tomatoes. Oregano and marjoram can also add a delicious flavor to tomato dishes when used fresh or dried.

Flowers like nasturtiums, calendulas, and marigolds can deter pests and attract beneficial insects. Nasturtiums, in particular, have a strong aroma that can help repel aphids and other pests, and their bright flowers can add a pop of color to the garden. Calendulas and marigolds can attract beneficial insects and add a cheerful touch to the garden.

Vegetables like carrots, onions, and peppers can make good companions for tomatoes due to their similar watering and fertilizing needs. Carrots, for example, can help improve the soil structure and can also be grown in the same soil as tomatoes. Onions and peppers can also thrive in similar growing conditions and can be used in various dishes when paired with tomatoes.

Other fruit trees, such as apples and blueberries, can also complement tomatoes in the garden. Apples, for example, can provide shade for tomatoes and be grown in the same soil. Blueberries are another good option, as they have similar soil and watering requirements and can provide shade for tomatoes.

Planting and care

Proper planting and care are essential for the success of any companion planting arrangement. When planting tomatoes and their companions, it’s important to consider the specific needs of each plant, including their preferred soil type and sunlight exposure. It’s also important to pay attention to spacing and arrangement, as some plants may need more room to grow or may benefit from being planted in specific patterns. Regular watering and fertilizing according to the needs of each plant can also help ensure their health and productivity.

The ideal spacing for tomato plants depends on the variety of tomatoes being grown, as well as the size and layout of the garden. In general, it’s recommended to plant tomato seedlings about 18 inches to 36 inches apart, with 36 inches being the ideal spacing for larger varieties. This allows enough room for the plants to grow and provides sufficient space for air circulation. Poor air circulation can lead to a buildup of humidity and heat, creating an ideal environment for the growth and spread of diseases such as powdery mildew. To ensure good air circulation, it’s recommended to avoid overcrowding the plants and planting them too close to fences or other structures. Pruning the plants regularly can also help improve air circulation by removing excess foliage and allowing more light and air to reach the center of the plant.

You can help ensure their health and productivity and enjoy a successful tomato harvest by taking the time to properly space and care for your tomato plants. Proper spacing and air circulation can go a long way in preventing diseases and promoting healthy growth in your tomato plants.

Summary

In conclusion, companion planting with tomatoes can be a rewarding and effective way to enhance the health and yield of your home garden. By understanding the specific needs and characteristics of tomatoes and choosing the right companion plants, you can create a diverse and harmonious planting arrangement that will benefit all the plants involved. With proper planting and care, companion planting can be a simple and rewarding way to enjoy a bountiful tomato harvest.

Strawberry Companion Plants: The Best Options for Your Garden

Companion planting is a gardening technique that involves pairing different plant species together in the same area to enhance their growth and productivity. This can be done for various reasons, including to deter pests, improve soil quality, or take advantage of the complementary growth habits of different plants. For home gardeners looking to grow strawberries, choosing the right companion plants can be an effective way to ensure the success of their crop. In this article, we discuss strawberry companion plants and their potential benefits.

Understanding strawberries

Strawberries are a popular and versatile fruit that can be grown in a wide range of climates. They thrive in well-draining soil with a pH of 5.4 to 6.5, and prefer full sun to partial shade. However, strawberries are also sensitive to certain chemicals and pests and can be prone to diseases such as verticillium wilt and gray mold. Understanding strawberries’ specific needs and characteristics is important for choosing the right companion plants.

Choosing the right strawberry companion plants

Many plants make good companions for strawberries; we discuss the best options in the following. It’s important to remember that not all plants will work well as companions for strawberries, and it may take some trial and error to find the right combination for your garden. Additionally, it’s important to consider each plant’s specific needs and characteristics when selecting companion plants, as well as the size and layout of your garden. With careful planning and attention to the needs of each plant, you can create a diverse and harmonious companion planting arrangement that will benefit all of the plants involved.

Herbs as strawberry companion plants

Herbs can make excellent strawberry companion plants for strawberries due to their ability to deter pests and improve the flavor of the fruit.

Herbs such as thyme, chives, and borage are known to repel pests like aphids and spider mites, which can damage strawberry plants. These herbs can also attract beneficial insects like bees and hoverflies, which can help pollinate the strawberries and control pests.

Other herbs like chamomile, dill, and parsley can help improve the flavor and aroma of strawberries. These herbs can be planted nearby to provide a complementary taste and scent to the strawberries.

It’s important to note that not all herbs are good companions for strawberries. Some herbs, like mint, can actually inhibit the growth and development of strawberries, as I mentioned in my previous response. Therefore, it’s important to choose the right herbs to plant alongside your strawberries for the best results.

Flowers as strawberry companion plants

In addition to adding visual appeal to the garden, flowers can also provide practical benefits when grown alongside strawberries. Marigolds, for example, are known for their ability to deter pests and can also add a splash of color to the garden. Nasturtiums are another good option, as they can attract beneficial insects and can also be used in salads or as a garnish.

Vegetables as strawberry companion plants

Vegetables can also make good companion plants for strawberries due to their similar watering and fertilizing needs. Lettuce and spinach are popular choices, as they can be grown alongside strawberries and harvested at the same time. Other vegetables that may complement strawberries include peas, beans, and radishes.

Other fruit trees

In addition to herbs, flowers, and vegetables, other fruit trees can also make good companions for strawberries. Apples, for example, can provide shade for strawberries and can also be grown in the same soil. Blueberries are another good option, as they have similar soil and watering requirements and can also provide shade for strawberries.

Planting and care

Proper planting and care is important for ensuring the success of any companion planting arrangement. When planting strawberries and their companions, it’s important to consider the specific needs of each plant, including their preferred soil type and sunlight exposure. It’s also important to pay attention to spacing and arrangement, as some plants may need more room to grow or may benefit from being planted in specific patterns. Regular watering and fertilizing according to the needs of each plant can also help ensure their health and productivity.

One Proposed Blueprint for a Strategic Strawberry Garden Setup

Our garden design touts the strawberry plant as the centerpiece. Growing borage near strawberries brings several benefits. This herb can amplify the flavor of the strawberries while providing a barrier against harmful pests. Moreover, the bright blue blooms of borage lure advantageous insects such as bees, which play an integral role in pollination, leading to escalated fruit yield.

In addition, incorporating spinach plants into your setup serves dual purposes. Given its limited root depth, spinach doesn’t compete for nutrients or moisture with the strawberry plants. It’s also a swift-growing vegetable, casting an abundant shade over the strawberry plants. This shade protects the strawberries from damaging sun exposure and helps maintain soil temperature, enhancing the fruit output.

Another vibrant addition to your garden could be marigolds. These sunny blossoms serve as organic pest deterrents, warding off nematodes and aphids while simultaneously alluring beneficial insects. The aesthetic appeal of the striking contrast between the red strawberries and blooming marigolds cannot be overlooked and will add visual charm to your garden.

Weed infestation can pose a problem for strawberry gardens. To tackle this, consider sowing thyme around the outer perimeter of the strawberry setup. This pervasive herb acts as a natural weed suppressant. Moreover, its distinct aroma disheartens would-be pests from invading your strawberry plants, contributing to both the health and productivity of your prized strawberries.

Summary

In conclusion, companion planting with strawberries can be a rewarding and effective way to enhance the health and productivity of a home garden. By understanding the specific needs and characteristics of strawberries and choosing the right companion plants, home gardeners can create a diverse and harmonious planting arrangement that will benefit all of the plants involved. With proper planting and care, companion planting can be a simple and rewarding way to enjoy a successful strawberry crop.

An app that tracks chill hours and simplify fruit tree selection

Fruit trees require a certain amount of winter chill to produce fruit. This period of cold temperatures is necessary for the tree to properly go through the process of dormancy, which is essential for the tree’s overall health and fruiting potential. Different fruit tree varieties have different chill hour requirements, and it is important to choose a variety that is well-suited to the climate in which it will be grown. An app that serves as chill hours calculator and tracks chill hours in real-time, with hyperlocal accuracy, offers a better method than tracking chill hours by zip code, aiding in choosing suitable varieties.

If a fruit tree does not receive enough winter chill, it may have problems producing fruit or produce fruit of poor quality. On the other hand, if a fruit tree receives too much winter chill, it may be damaged or have reduced fruiting potential. By choosing a fruit tree variety that is appropriate for the expected chill hours in your area, you can help ensure that the tree will thrive and produce high-quality fruit.

Don't wait for your trees to measure time themselves. Download Agrio and effortlessly monitor their chill hours!
Don’t wait for your trees to measure time themselves. Download Agrio and effortlessly monitor their chill hours!

Many fruit trees require a certain amount of winter chill to produce fruit, including:

  1. Apple trees: Apple trees are native to temperate regions of the Northern Hemisphere and are well-suited to cool, moist climates. They require between 500 and 1200 chill hours and are tolerant of frost.
  2. Apricot trees: Apricot trees are native to the Northern Hemisphere’s temperate regions and are well-suited to warm, dry climates. They require between 300 and 800 chill hours and are sensitive to frost, damaging the flowers and affecting fruit production.
  3. Cherry trees: Cherry trees are native to temperate regions of the Northern Hemisphere and are well-suited to cool, moist climates. They require between 500 and 1000 chill hours and are tolerant of frost.
  4. Peach trees: Peach trees are native to the Northern Hemisphere’s temperate regions and are well-suited to warm, humid climates. They require between 300 and 800 chill hours and are sensitive to extreme cold.
  5. Plum trees: Plum trees are native to temperate regions of the Northern Hemisphere and are well-suited to cool, moist climates. They require between 500 and 1000 chill hours and are tolerant of frost.
  6. Nectarine trees: Nectarine trees are a type of plum tree and have similar chill hour requirements. They are native to temperate regions of the Northern Hemisphere and are well-suited to cool moist climates. They require between 500 and 1000 chill hours and are tolerant of frost.
  7. Pear trees: Pear trees are native to temperate regions of the Northern Hemisphere and are well-suited to cool, moist climates. They require between 300 and 1000 chill hours and are tolerant of frost.
  8. Persimmon trees: Persimmon trees are native to warm, humid climates and are well-suited to subtropical and tropical regions. They have low chill hour requirements and can grow in areas with as few as 100 chill hours.
  9. Pecan trees are native to the southern United States and are well-suited to warm, humid climates. They require a certain amount of winter chill to produce a good crop of nuts, typically between 300 and 800 chill hours. Pecan trees are also sensitive to extreme cold and can be damaged by temperatures below -20°F (-29°C).
  10. Almond trees: Almond trees are native to the Mediterranean region and require a warm, dry climate with mild winters. They need between 200 and 600 chill hours and are sensitive to frost, damaging the flowers and affecting nut production.
  11. Walnut trees: Walnut trees are native to temperate regions of the Northern Hemisphere and are well-suited to cool, moist climates. They require between 800 and 1200 chill hours and are tolerant of frost.
  12. Hazelnut trees: Hazelnut trees are native to the temperate regions of Europe and Asia and are well-suited to cool, moist climates. They require between 500 and 1000 chill hours and are tolerant of frost.
  13. Chestnut trees: Chestnut trees are native to the Northern Hemisphere’s temperate regions and are well-suited to cool, moist climates. They require between 500 and 1000 chill hours and are tolerant of frost.

It is important to choose the right variety of these trees for your climate, considering the expected chill hours in your area. For example, if you live in a region with mild winters, you may want to choose a tree variety that requires fewer chill hours. On the other hand, if you live in a region with very cold winters, you may want to choose a fruit tree variety that is better suited to withstand those conditions.

How to compute chill hours?

The formula for calculating chill hours, also known as chill units, is based on the number of hours that the temperature is between 32°F (0°C) and 45°F (7.2°C) during the winter months. This period of cold temperatures is necessary for fruit trees to properly go through the process of dormancy, which is essential for their overall health and fruiting potential.

To calculate the chill hours for a particular location, you will need to track the temperature data for a period of time. You can use a thermometer or other temperature-tracking device to measure the temperature at regular intervals, such as once per hour, and record the data. You can then use the following formula to calculate the total number of chill hours:

Chill hours = (Number of hours with temperature between 32°F and 45°F) x (Number of days)

For example, if the temperature was between 32°F and 45°F for 10 hours per day for a total of 90 days, the total number of chill hours would be:

Chill hours = (10 hours/day) x (90 days) = 900 chill hours

When should I start tracking the chill hours?

The time period for tracking chill hours will vary depending on the climate in your region. In general, chill hours are typically measured from November to March in the Northern Hemisphere and from May to September in the Southern Hemisphere. These months correspond to the winter season in the respective hemispheres and typically have the lowest temperatures of the year.

To determine the specific time period for tracking chill hours in your region, you will need to consider the typical temperature range during the winter months and the chill hour requirements of the fruit tree varieties you are interested in growing. You can use a thermometer or other temperature-tracking device to measure the temperature at regular intervals, such as once per hour, and record the data. You can then use the formula above to calculate the total number of chill hours for your location.

It is also important to note that the time period for tracking chill hours may vary slightly depending on the specific climate conditions in your region. For example, if your region has a relatively mild winter with few frosty nights, you may need to track chill hours over a longer period to get an accurate measurement. On the other hand, if your region has a very cold winter with many frosty nights, you may be able to track chill hours over a shorter period.

In general, it is a good idea to consult with a local nursery or extension office to get specific recommendations for tracking chill hours in your area. They can provide you with more detailed information about your region’s climate conditions and help you determine the best time period for tracking chill hours based on your specific needs.

Timing interventions with the aid of chilling hours calculator

There are several interventions that farmers may use to help ensure that their fruit trees receive the appropriate amount of winter chill. These interventions may be used to supplement natural chill hours or limit chill hours to fruit trees growing in regions with severe winters. Some common interventions include:

  1. Using cold frames or other protective structures: Cold frames or other protective structures can help keep fruit trees warm during the winter months while still allowing them to receive natural chill hours. These structures can be especially useful for protecting young or tender trees from extreme cold.
  2. Watering trees during dry spells: Providing adequate moisture to fruit trees during the winter months can help prevent drought stress, which can reduce the tree’s ability to produce fruit. Watering trees during dry spells can help ensure they have the moisture needed to thrive.
  3. Using windbreaks or other protective measures: Windbreaks or other protective measures can help reduce the impact of cold winds on fruit trees, helping to keep them warm and protected during the winter months.
  4. Applying mulch or other protective materials: A layer of mulch or other protective materials around the base of fruit trees can help insulate the roots and prevent them from freezing. This can help protect the tree’s overall health and increase its chances of producing fruit.

In general, it is important for farmers to carefully monitor the chill hours their fruit trees receive and to take appropriate action to ensure that the trees receive the appropriate amount of winter chill. Depending on the trees’ specific needs and the region’s climate conditions, this may involve using one or more of the interventions described above.

A few substances may help “wake up” fruit trees after the winter dormancy period. These substances are typically applied in the spring after the trees have received the appropriate amount of winter chill, to stimulate new growth and improve the tree’s overall health. Some common substances used for this purpose include:

  1. Nitrogen-rich fertilizers: Nitrogen is an essential nutrient necessary for fruit trees’ growth and development. Applying a nitrogen-rich fertilizer in the spring can help stimulate new growth and improve the tree’s overall health.
  2. Growth hormones: Certain growth hormones, such as auxins and cytokinins, can help stimulate new growth and improve the tree’s overall health. These hormones are typically applied in a spray or other treatment and can effectively promote new growth in fruit trees.
  3. Pruning fruit trees in the spring can help remove damaged or diseased branches, encourage new growth, and improve the tree’s overall health. Pruning should be done carefully, following proper techniques, to avoid damaging the tree.

It is important to note that these substances and practices should be used with caution and following the tree’s specific needs and the region’s climate conditions. Overuse or improper application of these substances or practices can damage the tree or reduce its overall health and productivity.

Why is it important to time it according to the chill hours?

If a fruit tree has not received enough winter chill, it may not be fully dormant and may not respond well to substances or practices intended to stimulate new growth. On the other hand, if a fruit tree has received too much winter chill, it may be damaged or may have reduced fruiting potential. By timing the application of these substances or practices according to the chill hours, you can help ensure that the tree is in the optimal state for new growth and that it will benefit from the treatment.

It is important to carefully monitor the chill hours that your fruit trees receive and to use the appropriate substances or practices at the appropriate time to help the trees thrive and produce high-quality fruit.

How can I find out how many chill hours my tree variety needs?

There are a few different ways to find out how many chill hours your fruit trees need:

  1. Consult a gardening or fruit tree growing guide: Many gardening or fruit tree growing guides provide information about the chill hour requirements of different fruit tree varieties. You can use these guides to help determine which varieties are most suitable for your climate.
  2. Check with a local nursery or extension office: Local nurseries and extension offices can provide information about the chill hour requirements of different fruit tree varieties and help you determine which varieties are most suitable for your climate.
  3. Calculate the chill hours for your location: You can use a thermometer or other temperature-tracking device to measure the temperature at regular intervals, such as once per hour, and record the data over a period of time, typically from November to March in the Northern Hemisphere or from May to September in the Southern Hemisphere. You can then use the formula above to calculate the total number of chill hours for your location.

It is important to note that the chill hour requirements of fruit tree varieties can vary depending on the specific climate conditions in your region. It is a good idea to consult with a local nursery or extension office to get specific recommendations for your area. They can provide you with more detailed information about your region’s climate conditions and help you determine the best fruit tree varieties for your specific needs.

What observations suggest that a tree finished the dormancy period?

There are a few signs that you can look for to determine if a fruit tree has finished the dormancy period:

  1. Buds start to swell: As the tree begins to come out of dormancy, the buds will start to swell, indicating that new growth is about to start.
  2. Leaves start to emerge: As the tree continues to come out of dormancy, the leaves will start to emerge from the buds. This indicates that the tree has finished the dormancy period and is ready for the growing season.
  3. Flowers start to bloom: Many fruit trees will start to produce flowers as they come out of dormancy. The blooming of flowers is often a good indicator that the tree has finished the dormancy period and is ready for the growing season.

It is important to note that the timing of these signs can vary depending on the specific climate conditions in your region and the tree’s specific needs. It is a good idea to consult with a local nursery or extension office to get specific recommendations for your area. They can provide you with more detailed information about your region’s climate conditions and help you determine when your fruit tree is likely to come out of dormancy.

Why tracking chill hours can be complicated and how the Agrio app chill hours calculator makes it easy

Tracking chill hours can be complicated and cumbersome for several reasons:

  1. It requires consistent monitoring: In order to accurately track chill hours, you need to measure the temperature at regular intervals, such as once per hour, over a period of time. This can be time-consuming and may require you to set up a temperature-tracking device or to manually record the temperature data.
  2. It requires accurate data: In order to calculate the total number of chill hours accurately, you need to ensure that you are recording the temperature data accurately and consistently. This can be challenging, especially if you are relying on manual methods or if you are working with equipment that is prone to error.
  3. It requires knowledge of the chill hour requirements of different fruit tree varieties: In order to choose the right fruit tree variety for your climate, you need to know the chill hour requirements of different varieties and how those requirements compare to the chill hours in your location. This can be confusing for those who are new to fruit tree growing or who are unfamiliar with the specific requirements of different varieties.

How does the chill hours calculator works

Once you draw your growing area on the map, Agrio calculates the accumulated chill hours for the last year and the current year. You can use last year’s data to determine which tree variety will perform optimally in your region.

Add the growing area in the home screen to start the tracking

Select the plot you just added and open the weather modal to review the information. The data is updated daily so that you can track the chill hours in real time.

Summary

The Agrio app can help with these challenges by providing a simple and convenient way to track chill hours and choose the right fruit tree variety for your climate. The app includes a temperature-tracking feature that allows you to record temperature data easily and calculates the total number of chill hours for your location. In addition, the Agrio app can track hyperlocal weather data, which can be especially useful for growing fruit trees in regions with microclimates or other variations in weather conditions. By tracking hyperlocal weather data, the Agrio app can provide you with more accurate and detailed information about the climate conditions in your specific location, which can be beneficial for choosing the right fruit tree variety and for optimizing the care and management of your trees. Overall, the Agrio app can be a valuable tool for those interested in tracking chill hours and choosing the right fruit tree variety for their specific needs.

Using technology to monitor the spread of citrus greening disease

Citrus greening disease, also known as Huanglongbing (HLB), is a serious and deadly bacterial disease that affects citrus plants, including oranges, lemons, and grapefruits. The disease is transmitted by small insect vectors, such as the Asian citrus psyllid, and causes the fruits to become misshapen, bitter, and inedible. Citrus greening disease has devastated citrus crops in many parts of the world, including the United States, and has posed a significant threat to the global citrus industry.

Citrus greening disease has been found in many parts of the world, including Brazil, China, India, Indonesia, Japan, Mexico, and the United States. In the United States, the disease has been found in Florida, Texas, and California, and has posed a significant threat to the citrus industry.

Countries that are at risk of citrus greening disease include those with a warm climate and a high population of the insect vectors that transmit the disease. These include countries in Asia, Africa, Central and South America, and the Caribbean. Additionally, countries that import citrus fruits from areas where the disease is present may also be at risk of the disease spreading through the movement of infected plants or fruits.

The disease is a threat to the entire citrus industry in affected countries because it is highly contagious and difficult to control. Once a tree is infected with the disease, it will slowly decline and eventually die, with no cure currently available. This means that infected trees must be removed and destroyed to prevent the disease from spreading. Additionally, the presence of the disease can make it difficult for farmers to sell their fruits, as consumers may be unwilling to buy infected fruits. This can lead to financial losses for farmers and the industry as a whole.

Home gardens as a source of citrus greening spread: The weak link in disease prevention and control

Home gardens with citrus trees can be an important source of the spread of diseases such as citrus greening. These gardens are often not monitored by experts, making them a weak link in the chain of disease prevention and control.

One reason why home gardens can be a source of disease spread is that the homeowners may not be aware of the signs and symptoms of the disease. Citrus greening disease, for example, can be difficult to identify, as the symptoms may not be immediately apparent. This can lead to the disease being present in the garden for some time before it is detected, allowing it to spread to other plants and trees.

Furthermore, home gardens may not be managed according to best practices for disease prevention and control. For example, homeowners may not regularly inspect their trees for signs of the disease, or they may not remove infected plants promptly. This can allow the disease to spread more easily, increasing the risk of it spreading to other areas.

Additionally, home gardens can be a source of disease spread through the movement of infected plants or fruits. For example, homeowners may inadvertently transport infected plants or fruits to other areas, either through the sale or donation of plants or through the movement of plant materials such as compost or mulch. This can introduce the disease to new areas, increasing the risk of it spreading to agricultural areas.

Overall, home gardens with citrus trees can be a significant source of the spread of diseases such as citrus greening. The lack of expert monitoring and management in these gardens can make them a weak link in the chain of disease prevention and control, increasing the risk of the disease spreading to larger agricultural areas.

The role of Agrio in pest and disease management

Agrio is a digital pest management app that helps farmers, agronomists, and gardeners to identify plant problems and to model the spread of pests and diseases. The app uses advanced machine learning algorithms and a large database of plant images and information to identify pests and diseases and provide recommendations for control and management. Agrio can be used by anyone with a smartphone or tablet, making it a valuable tool for farmers, agronomists, and gardeners to monitor their crops and take action to prevent pests and diseases from spreading.

Agrio provides quick and easy identification of the psyllid, allowing home growers to recognize the pest and take action to prevent it from spreading. This can include removing infected plants, applying pesticides to control the pest, or contacting a local extension agent for assistance.

Agrio also provides a mechanism for home growers to report the presence of the psyllid and the disease to local authorities. This can help to alert agricultural officials to the presence of the disease in a particular area and allow them to take action to prevent its spread. This can be especially important in areas where the disease is not yet present, as early detection and intervention can help to prevent its establishment and spread.

How Agrio helps to monitor the spread of citrus greening disease

One of the key features of Agrio is its ability to monitor the spread of pests and diseases, including citrus greening disease. By using the app to scan their crops and submit images and information regularly, farmers and agronomists can track the presence and spread of the disease in their fields and take action to prevent it from spreading further. Additionally, the app’s modeling capabilities can help users to predict the potential spread of the disease based on various factors, such as the location, weather, and pest populations. This can help users to make informed decisions about where and when to take control measures to prevent the disease from spreading.

Summary

The use of technology, such as the digital pest management app Agrio, can play a vital role in combating the spread of pests and diseases in agriculture. By providing quick and accurate identification of plant problems, the app can help farmers and agronomists to take timely and effective control measures to prevent the spread of pests and diseases. Additionally, the app’s modeling capabilities can help users to predict the potential spread of diseases and to make informed decisions about where and when to take control measures. The use of digital technology in agriculture has the potential to revolutionize the way we manage pests and diseases and to protect our crops and our environment.

How a field scouting app can improve pest and disease control

In plant protection, scout teams play a vital role in protecting crops from pests and diseases. These teams are responsible for regularly checking fields for signs of infestation or infection and for implementing control measures to prevent damage to crops. Pests and diseases can have a devastating impact on crops, leading to reduced yields and lower profits for farmers. In some cases, infestations and infections can even cause entire crops to fail. That’s why it’s so important for fields to be regularly monitored by skilled scout teams. In the following, we discuss how a field scouting app can help scouting teams save time and achieve better results. Tailored for ag retailers, agronomists, co-ops, and farms, our agronomy management solution is a game-changer in agricultural protection and productivity.

Our application revolutionizes field scouting by integrating advanced features. Users can import satellite imagery for comprehensive field analysis, capture photos, and annotate maps for detailed observations. The app supports creating and scouting unlimited fields, ensuring scalability for any size operation. Its offline functionality allows for uninterrupted scouting in remote areas. A standout feature is the ability to consolidate observations from multiple scouts, providing a holistic view of field conditions. Scouting reports can be generated and shared directly from the mobile app in PDF format, enhancing communication and efficiency. Additionally, users have convenient access to historical scouting data on the go, offering valuable insights over time.

Scouting agricultural fields

Scout teams typically consist of trained professionals familiar with the common pests and diseases that can affect crops. They use a variety of methods to identify potential problems, including visual inspections, soil, and plant tissue testing, and the use of specialized equipment.

Once a potential pest or disease problem has been identified, scout teams can recommend and implement control measures to prevent further damage. This may include the use of pesticides, the application of fungicides, or the implementation of other control strategies.

In addition to their role in pest and disease management, scout teams can also provide valuable information to farmers about the overall health of their crops. By regularly monitoring fields and providing timely reports, scout teams can help farmers make informed decisions about fertilization, irrigation, and other important agronomy practices.

Overall, the role of scout teams in protecting fields from pests and diseases is crucial to the industry’s success. By regularly checking fields and implementing effective control measures, scout teams help to ensure that crops remain healthy and productive.

Computer vision based app can help scout teams to identify crop problems

One way that technology is helping to improve the effectiveness of scout teams is through the use of computer vision-based apps. These apps use machine learning algorithms to analyze images of crops, identifying signs of pests, diseases, and other problems.

By using a smartphone or other mobile device, scout teams can quickly and easily take pictures of crops in the field. The app then processes the images, highlighting potential issues and providing recommendations for control measures. This can save time and effort compared to traditional pest and disease identification methods, which can be labor-intensive and time-consuming.

In addition to helping scout teams identify problems, computer vision-based apps can also provide valuable information to farmers. By tracking the spread of pests and diseases over time, farmers can make more informed decisions about managing their fields and protecting their crops.

Overall, computer vision-based apps are a valuable tool for scout teams working in the field. By providing quick and accurate identification of pests and diseases, these apps can help to prevent crop damage and improve the overall health of fields.

Digitalize the field scouting process

In addition to helping scout teams identify pests and diseases in fields, a scouting app can assist agronomists in preparing digital scouting reports. These reports can provide a detailed record of findings from field inspections, including the location and extent of any identified problems.

Digital scouting reports can be easily shared with other scout team members, allowing for efficient communication and coordination. They can also be shared with growers, providing valuable information about their crops’ health.

Agrio is a field scouting app that helps you record observations during a field inspection
Agrio is a field scouting app that helps you record observations during a field inspection.

One of the key benefits of digital scouting reports is that they can be easily stored and accessed in the future. This allows agronomists to create an archive of field inspection data that can inform decision-making in future seasons. For example, the data can be used to identify trends and patterns and predict potential pest and disease outbreaks.

Furthermore, this data can also be used to train artificial intelligence algorithms, providing agronomists with suggestions and predictions based on the information in the archive. This can help agronomists to make more informed decisions about pest and disease management and to take a more proactive approach to protect crops.

Overall, a scouting app can be a valuable tool for agronomists, providing them with a range of benefits, including the ability to create digital scouting reports, communicate findings with the team and growers, and create an archive of data that can inform future decision-making.

Precise application of pesticides with the aid of a field scouting app

Geo-tagged imaging is a technology that allows for the precise location of field problems to be recorded and stored. This can be especially useful when it comes to the application of pesticides in fields.

Traditionally, pesticides have often been applied to entire fields, even if only a small portion of the field is affected by pests or diseases. This can be wasteful and lead to environmental concerns, as excess pesticides can leach into the soil or run off into nearby water sources.

With geo-tagged imaging, agronomists can take pictures of the affected areas and use GPS coordinates to pinpoint the exact location of the problem. This information can then guide the application of pesticides, allowing for more precise and targeted applications.

This approach has several benefits. First, it reduces the amount of pesticides needed, as only the affected areas are treated. This can save farmers money and reduce pesticide use’s environmental impact. Second, it can also improve the effectiveness of pest and disease control, as the pesticides are applied directly to the areas where they are needed.

Overall, using geo-tagged imaging in fields can help to improve the precision of pesticide application, leading to cost savings and reduced environmental impacts. It can also help to improve the effectiveness of pest and disease control efforts.

Field scouting app helps you keep good communication with growers

The digitization of field scouting can help agronomists stay updated about the interventions the growers apply. This can be particularly useful in cases where multiple interventions are used or when different growers manage the same field.

With traditional field scouting methods, it can be difficult for agronomists to keep track of the interventions applied in a given field. This can lead to misunderstandings and inefficiencies, as agronomists may not be aware of the interventions that were previously used or may recommend interventions that are not compatible with those already applied.

However, with a digital scouting app, agronomists can easily access information about the interventions applied in a given field. This can be done by linking the app to the grower’s records or by allowing the grower to enter information directly into the app.

Agronomists can use this information to make more informed pest and disease control recommendations. For example, if the grower has already applied a certain pesticide, the agronomist can recommend complementary interventions that can improve the effectiveness of the pesticide.

Digital scouting report

In addition, the information can also be used to improve the overall management of fields. By having access to a complete record of interventions, agronomists can identify patterns and trends and can make more accurate predictions about potential pest and disease outbreaks.

Overall, digitizing field scouting can provide agronomists valuable information about the interventions applied in a given field. This can help them make more informed recommendations, leading to better pest and disease control and improved crop yields.

Create and share PDF reports

Early detection of field problems

An archive of data collected by scout teams using a digital scouting app can be used to train algorithms to identify problems in fields using satellite imagery. This can provide agronomists with a powerful tool for monitoring the health of crops and identifying potential issues.

To train the algorithms, agronomists can use the data from the archive to create a dataset of images that show different pests, diseases, and other problems. The algorithms can then be trained to recognize these problems in new images, such as those taken from satellites.

Once the algorithms are trained, agronomists can use them to analyze satellite images of agricultural fields, looking for signs of pests, diseases, and other issues. This can provide a quick and efficient way to monitor the health of crops, allowing agronomists to identify potential problems and take action to prevent or mitigate damage.

Using algorithms to identify problems from satellite imagery has several benefits. First, it allows for large areas to be monitored quickly and efficiently, providing a more comprehensive view of the health of agronomy crops. Second, it can also provide valuable information to farmers, allowing them to make more informed decisions about pest and disease management.

An archive of data collected by scout teams using a digital scouting app can be used to train algorithms to identify problems in fields using satellite imagery. This can provide agronomists with a powerful tool for monitoring the health of crops and identifying potential issues.

Overall, using algorithms to identify problems in fields from satellite imagery can provide agronomists with a powerful tool for monitoring crop health and identifying potential issues. This can help improve the effectiveness of pest and disease control efforts and ultimately lead to better crop yields and higher profits for farmers.

Summarizing the benefits of field scouting app

Field scouting apps can save time and increase precision in several ways. First, by using a digital app, scout teams can quickly and easily record and store information about the health of crops. This can save time compared to traditional methods, which can be labor-intensive and time-consuming.

Second, a field scouting app can also help to improve the accuracy of pest and disease identification. Using computer vision algorithms, the app can automatically highlight potential issues in images taken in the field. This can save time and effort compared to manual identification and improve the results’ accuracy.

Third, a field scouting app can also assist with precisely applying pesticides and other control measures. Using geo-tagged imaging, the app can provide the exact location of field problems, allowing for more targeted and precise applications of pesticides.

Finally, a field scouting app can provide valuable information to agronomists and growers. By tracking the spread of pests and diseases over time, the app can provide insights into trends and patterns and can be used to make predictions about potential outbreaks in the future. This can help agronomists and growers to take a more proactive approach to pest and disease management, ultimately leading to better crop yields and higher profits.

Overall, a field scouting app can save time and increase precision in various ways, providing valuable benefits to agronomists, scout teams, and growers.

How to scout for peach twig borer in fruit orchards

In a previous post, we discussed the main disease and pest risks in stone fruit orchards. In this post, we will focus on the peach twig borer. To scout fruit orchards for the presence of this moth, you will need to inspect the trees for signs of infestation. The peach twig borer is a small moth that lays its eggs on the branches of apricot, almond, cherry, nectarine, plum, pear, and peach trees. When the eggs hatch, the larvae burrow into the twigs and branches, causing them to die.

To scout for the pest, look for dead or dying twigs or branches on the trees. The larvae of the peach twig borer feed on the sap in the twigs and branches, causing them to wilt and die. If you find any dead or dying twigs, carefully inspect them for the presence of the peach twig borer.

When inspecting the twigs and branches, look for the small, black-headed white larvae of the peach twig borer. These larvae are about 1/4 inch long, and have a distinctive wrinkled appearance. They may be found inside the twigs and branches. As the larvae mature, they change their color to brown.

If you find the peach twig borer in your orchard, you will need to take action to control the infestation. There are several methods for controlling the peach twig borer, including the use of chemical pesticides, cultural controls, and biological controls.

Peach twig borer. Courtesy of Ilia Ustyantsev

When should I start scouting for the peach twig borer?

The best time to start scouting for the peach twig borer depends on a number of factors, including the climate and location of the orchard, and the variety and type of trees being grown.

In general, it is best to start scouting for the pest as soon as the trees start to bud in the spring. This is when the adult moths begin to emerge from their overwintering sites and lay their eggs on the branches of the trees. By starting to scout early in the season, you can identify any infestations early and take action to control them before the larvae cause significant damage to the trees.

You should continue to scout for the peach twig borer throughout the growing season, as the moths can lay multiple generations of eggs throughout the summer. Monitoring the trees regularly and taking action to control any infestations that are found can help to prevent significant damage to the orchard.

Using traps to monitor the peach twig borer

There are several types of traps that can be used to catch adult peach twig borers. Some of the most effective include pheromone traps, which use a chemical attractant to lure the moths into the trap, and sticky traps, which use a sticky substance to catch the moths as they fly by.

Pheromone traps are specifically designed to attract the peach twig borer, and they can be an effective way to monitor the population of the moths in your orchard. These traps typically consist of a small container or bag that is filled with a synthetic version of the moth’s pheromone, which is a chemical that the moths use to communicate with each other. When the moths are attracted to the pheromone, they fly into the trap and become stuck.

Sticky traps are another type of trap that can be used to catch adult peach twig borers. These traps consist of a sticky substance, such as a glue-like material, that is applied to a surface, such as a card or strip of paper. When the moths fly by the sticky trap, they become stuck to the surface. Sticky traps can be placed in the orchard to monitor the population of the moths and help to identify any infestations that may be present.

Peach twig borer’s growing degree days model

A growing degree days model is a tool that can be used to predict the development of insects and plants based on temperature. Growing degree days are a measure of heat accumulation over time and can be used to predict when certain events, such as the emergence of insect pests or the flowering of plants, will occur.

At the beginning of the spring, Install pheromone traps and check them weekly. Once the peach twig borer moth was captured, trigger the biofix, and the model would predict when the moth is likely to lay its eggs and when the larvae are likely to emerge. The model will keep you informed regarding the emergence of future generations. This information can help you to plan your pest control efforts and monitor the orchard for signs of infestation.

Monitoring growing degree days helps eliminate the guesswork in determining the time required for control measures. Download Agrio today and make it your growing degree days app. We look forward to seeing you leverage this technology for intelligent and effective pest management in your field. 

In the meantime, as always, we wish you an abundant harvest.

How to scout for aphids in corn fields

Aphids cause substantial damage while they are hidden within the whorl. If aphids are already visible on the plant, significant damage has already occurred. Therefore, it is important to start scout for aphids three weeks prior to tasseling. Randomly select a plant every 40 meters. Pull the whorl upward and out of the plant. Slowly unroll each whorl, and look for the presence of the insects. You can use our crop stage modeling to plan your scouting activities. We will notify you three weeks before tasseling and remind you to start scouting for aphids.

Tasseling cannot be predicted accurately based on calendarial days. We use weather models to provide a more precise prediction.

Corn leaf aphids’ growing degree days model

The life cycle of this pest can be predicted by using weather-based models. These models predict the optimal time to apply pesticide treatments. Once you register a field with a host plant in Agrio, the model automatically starts to run and instructs you in each milestone.

This model allows you to time the appearance of future insect pest generations. When insects are observed on plants, set the biofix date.

The model will track the development of the insects based on weather information. We use hyper-local weather data streamed into our servers once you define your field on the map.

Summary

Monitoring growing degree days helps eliminate the guesswork in determining the time required for control measures. Download Agrio today and make it your growing degree days app. We look forward to seeing you leverage this technology for intelligent and effective pest management in your field. 

In the meantime, as always, we wish you an abundant harvest.

How to scout for colorado potato beetle in potato fields

The Colorado potato beetle is a pest that can destroy potato, eggplant, and pepper crops. If it is not controlled, the beetle will reproduce rapidly and cause damage to the plants. The life cycle of the potato beetle can be predicted by using a weather-based model. It is essential to know the vulnerable period of the pest to determine when it is time to spray. This can help in controlling the pest population and reducing pesticide use.

Colorado potato beetle’s growing degree days model

The life cycle of this pest can be predicted by using weather-based models. These models predicts the optimal time to apply pesticide treatments. Once you register a field with a host plant in Agrio, the model automatically starts to run and instructs you in each of the milestones.

Scouters need to check plants frequently right after plants emerge. Look for egg masses on the underside of the leaves. Set the biofix to start the growing degree days (GDD) counting when eggs were found.

Female adults produce hundreds of eggs each year. The eggs are usually bright yellow to orange and typically found in clusters of ten to thirty on the underside of leaves. The model estimates when frequent scouting needs to be started to find signs of the eggs’ presence. Growers are notified and asked to confirm the eggs’ presence to start the life-cycle tracking.

The larvae should hatch from the eggs in 4-9 days, depending upon the temperature of the air. After this, they will molt three times before they pupate. These immature phases are called instars, and there are a total of 4. Biological treatment is effective against the first-stage larvae, and chemical spraying should be timed to the emergence of later stages. The number of pest generations in one season is also weather-dependent, and the model will estimate it for you, too.

Use the Agrio app to time treatment correctly

Summary

Monitoring GDD helps eliminate the guesswork in determining the time required for control measures. Download Agrio today and make it your growing degree days app. We look forward to seeing you leverage this technology for intelligent and effective pest management in your field. 

In the meantime, as always, we wish you an abundant harvest.

Phytotoxicity causes and how to minimize the risk

Phytotoxicity occurs when a substance causes a toxic effect on plants. Phytotoxicity can occur when chemicals are applied, such as in foliar spraying and irrigation systems, to protect plants from diseases, pests, and other hazards. Additionally, phytotoxicity can occur following applications of fertilizers or growth regulators. There are no control measures; therefore, the focus should be on prevention.

Symptoms of phytotoxicity

  • Burn and necrosis.
  • Chlorosis.
  • Distortion, such as cupping or twisting (might be confused with a viral disease).
  • Stunting and abnormal growth (root damage or poor germination).
Phytotoxicity symptoms on basil leaves
Phytotoxicity symptoms on cucumber leaf
Phytotoxicity burn and distortion symptoms on basil leaves

How to differentiate phytotoxicity from other damages

Symptoms of phytotoxicity can be confused with damages caused by plant pathogenic organisms or genetic disorders. Look for the following patterns to identify damage due to chemicals:

  • Leaf damage patterns show sharp edges with no discoloration gradient.
  • Plants very close to the sprayer show more damage than plants further away from the sprayer.
  • Symptoms show up fast in a wide area (1-7 days after application), and there is no further spread after the initial show-up.
  • New growth will appear healthy.

If there is a doubt, upload images of the affected plant to the Agrio app, and our artificial intelligence will help you with the identification.

Phytotoxicity causes

Environmental conditions

We discussed in much detail the environmental conditions that increase the risk of phytotoxicity in another blog post. In high temperatures (or water-stressed plants), low and high humidity are among several weather factors pesticides should be avoided. We refer the reader to the blog post to read how Agrio can help you time pesticide applications to minimize injury risk.

Agrio can help you time pesticide applications to minimize phytotoxicity risk.

Growth stage of plants

Seedlings, flowering and fast-growing are more sensitive. Time the pesticide applications accordingly. This is especially important when herbicides are applied.

Chemicals applied improperly

If this is the first time that you are using a new pesticide, you should refer to the label of the product to familiarize yourself with the instructions. Check the label of the chemical and make sure the crop being treated is listed. Certain plants are sensitive to certain chemicals, so be careful what you use.

Mixing incompatible chemicals should also be avoided, and the product label provides information about that. Other common causes that we encounter are the application of sulfur and oils in close time proximity (less than a one-month window) and high dosage applications. Sulfur can stay on plants for a long time, and oils interact with it, forming phytotoxic compounds.

Note that high dosage can be in one application or an accumulation of several sequential applications. Apply the chemical thoroughly and evenly to avoid high dosages in some patches.

When testing a new pesticide for the first time, it is advised to apply it on a few plants every few days to get a sense of the amount of pesticide that can cause damage to the plants.

Pay attention to the formulation. Dust and wettable powders are less harmful options than emulsifiable concentrates. Emulsifiers can react with plant tissue and cause unwanted damage. Adjuvants such as spreaders, stickers, and wetting agents can increase the risk of an injury as well.

We recommend devoting separate sprayers to herbicides. Rinse the spraying tanks between applications and calibrate your spraying equipment once a year.

Drifts from the target crop to a sensitive crop

If you practice intercropping or growing different crops in proximity, you should pay attention to drift and the non-target crop sensitivity to the applied pesticide. Examine the field drainage routes and avoid applying pesticides when there is a risk of run-off.

Avoid pesticide spraying on windy days

Residues accumulate in the soil as a cause of phytotoxicity

Repeated applications can result in the accumulation of active ingredients to a toxic level. You should refer to the product label and follow the annual rate restrictions.

If you practice crop rotation (as you should!), you need to plan the next planted crop according to the risk of residues of pesticides and herbicides in the soil. Field crops that are produced after the harvest of a pesticide-treated primary crop might be affected by soil residues. Refer to the label and check the annual application rate limit to see if the crop to be planted next can be in danger.

Summary

Plants are subject to a variety of injuries, and many of these injuries are caused by human beings. The most common human-caused injury is the use of pesticides and herbicides, which can be detrimental to plants in many ways. By following the product label instructions and implementing good practices in the farm and garden, growers can avoid such damage.

Why ideal soil pH increases yield and how to achieve it

As in many problems growers encounter, deviations from ideal soil pH should be tackled early to prevent yield loss. Ideally, growers should adjust the soil pH before planting as adjustments when plants in the soil are slower and put the plants at risk.

What is pH

Soil pH is a measure of the concentration of hydrogen ions in the soil. It is measured on a scale from 0 to 14, with 7 being neutral. When the pH is below 7, the medium is acidic, while above 7 is called alkaline.

How does the soil pH impact plants and what is the ideal soil pH

The pH value has a considerable effect on which nutrients plants can extract from the soil. Chemical reactions in the soil might tie nutrients up when the pH is not in the desirable range. It is common, for example, to see symptoms of chlorosis in new foliage even when fertilizers are provided regularly. Many times the reason is a high pH that makes the micro-elements less available to plants. At low pH, the leaching of magnesium and potassium increases, and their availability in the top layer of the soil decrease.

A tomato plant shows symptoms of iron deficiency. Soil ph for tomatoes should be in the range of 6.2-6.8 for optimal nutrient uptake.

The most accessible form of zinc, manganese, and copper to plants require soil with a pH level between 5.5-6.5, although they can still be utilized at a moderate rate in a wider range of 4.5-7.5.

Iron becomes moderately available when the pH is below 7.5 and is highly available below 6.5. Other nutrients become less available when the pH is very low. Note that FeEDDHA (ethylenediamine-di-o-hydroxy-pheny lacetic acid), a type of chelated iron that is also known as Sequestrene 138, is available to plants even if the pH reaches 9. This is not the case with iron sulfate, another compound used to treat iron deficiency. But using FeEDDHA is not a long-term solution for iron deficiency.

In general, chelated fertilizers work better compared to regular micronutrients when the soil pH is greater than 6.5.

Effect of pH on the root availability of the essential elements in soil. Blue denotes the ideal soil pH for the majority of plants (slightly acidic). Courtesy of CoolKoon
Effect of pH on the root availability of the essential elements in the soil. Blue denotes the ideal soil pH for most plants (slightly acidic). Courtesy of CoolKoon

Heavy metals that are toxic to plants are more mobile in acidic soils and therefore are more likely to be taken up by plants. Aluminum is one of the metals that dissolve in low pH and damage plants. Severe acidity harms essential microorganisms and causes damage to the soil structure.

Since the optimal pH depends on the grown type of plant, we are providing a table with common crops and pH targets below.

PlantOptimal pH range
Alfalfa6.6-7.0
Corn5.8-6.2
Soybean6.3-6.5
Wheat6.3-6.5
Rice5-6.5
Guava5.5-6.8
Most vegetables6.0-6.8
Citrus6.0-6.8
Coffee5.0-6.0
Blueberry4.5-5.5
Rose6.0-6.5
Optimal soil pH for different crops

To conclude, growers should aim to obtain ideal soil pH in the range that is most suitable for their plants to optimize the availability of the entire spectrum of nutrients and increase yield.

How the soil pH can change with time

The pH level in the soil can change due to fertilizers or the addition of organic matter such as compost and by watering with either acidic or alkaline water. When measuring the soil pH, it is essential to check the pH of the water as well. A non-neutral water pH will make the soil pH unstable.

Organic matter and minerals that break down in the soil over time lower the soil’s pH. In addition, nitrate that goes below the root zone (nitrate leaching) causes the pH to decrease as well. Therefore growers should constantly plan ahead to keep the pH in a range that supports plant growth. Soil pH intervention takes time to have an impact, and therefore planning and early actions are crucial.

With poor soil drainage, you can expect an accumulation of salts in the field and an increased pH. Increasing the soil calcium concentrations can help with improving drainage. As calcium concentration goes up, the soil porosity improves.

How to measure soil pH and when to do it

The soil pH can be tested in the lab after soil samples from different parts of the field or garden are sent. In addition, there are field kits that provide a colorimetric indicator that show an estimate of the pH. Different kits require mixing the soil with water before the measurement.

When measuring the pH in the field, water the soil first. Use distilled water to make the soil wet and avoid making it muddy. To make the measurement accurate, take a sample of the soil away from spots exposed to direct sunlight (especially on hot days).

A more convenient way to measure pH is to use a digital soil ph meter. In this case, examine the probes and make sure they are in good condition and rust-free. Calibrate it with natural water before performing the test. Wash the probes with distilled water to remove salts before measuring.

A field kit used to determine soil pH | Courtesy of the university of Michigan SEAS
A field kit used to determine soil pH | Courtesy of the University of Michigan SEAS

How to change the soil pH

When the pH measurements start approaching the edges of the ideal soil pH range, it is time to act. Ideally, you should apply corrections in the fall, well before the planting, as it takes time for the pH to change.

How to lower the soil pH

To lower the pH, sulfur should be applied to the soil. Elemental sulfur, aluminum sulfate, and sulfuric acid are some of the options. The different forms vary in cost and speed of action. Elemental sulfur is considered a safe and economical way to reduce soil pH and is highly recommended to home growers.

If there are already plants in the soil, apply sulfur in low doses once a month. High dosages of sulfur are toxic to plants. Test the pH again every month.

The dosage depends on the soil type and the gap between the starting point and target pH. Soils rich in clay or organic matter, for example, have a high buffering capacity and require more sulfur before change can be observed.

Sulfur should be incorporated into the soil to affect the layer in the soil that is penetrated by the roots. Watering the soil after the sulfur application can help with that.

Gypsum (calcium sulfate) is another option if you grow in alkali soil. It is not very soluble, and therefore in normal soils, it will have a very minimal effect. In alkali soil, however, the sodium concentration is high. The calcium in the gypsum replaces the sodium in chemical interactions. This results in increased water infiltration and lowering of the soil pH.

Note that organic matter such as peat moss that has a pH of 3.0–4.0 can lower the soil pH as well.

As long as the pH is above 6.5, provide the micro-elements in their chelated form or foliage spraying.

How to increase the soil pH

Lower soil acidity can be obtained by adding lime to the soil. Ground agricultural limestone is a popular choice. The pace of change will be higher as finer the limestone particles. Hydrated pulverized limestone is considered to have the fastest effect, but precise dosages are important and can be easily missed.

Avoid using calcium magnesium carbonate (dolomitic limestone) if the soil contains normal or high magnesium levels. Adding magnesium to the soil in such situations can be toxic to the plants.

To calculate the amount of lime needed, refer to the soil test. The buffer capacity (ECEC) is the soil’s ability to resist pH changes. ECEC measures the Cation exchange capacity (CEC), a measure of the soil’s ability to hold positively charged ions. The buffer capacity, together with the desired change in pH, dictates the amount of lime that should be added.

The lime should be incorporated into the soil to a depth of at least 10 cm. Otherwise, the effect will be very superficial, and the deep soil layers will stay acidic. Optimal soil pH correction is the one that results in uniform acidity along the soil profile. Due to that, growers that avoid the destruction of the soil structure might find it challenging to optimize the pH profile.

Summary

The soil pH is a crucial factor when it comes to plant survival and prosperity. Farmers and home growers should monitor the soil pH constantly and plan to keep it in the optimal range. We are looking forward to welcoming you to our community and supporting you with any questions you might have regarding soil pH and plant health. In the meanwhile, as always, we wish you an abundant harvest.

Common plant watering mistakes made by home growers

Plant watering is a frequent action required to keep plants healthy and support their growth. As such, wrong practices can have a profound negative effect on plants. The good news is that these can be corrected very easily. Based on the experience we have in supporting growers on the Agrio app, we list the most common plant watering mistakes we encounter and explain how to avoid them.

Prolonged periods of wet soil

When it comes to soil moisture, it is easy to get it wrong. When the soil is wet, the process of gas exchange in the roots cannot take place at normal rates. If the gas exchange process is being interfered for a long period It can cause injuries to the roots. Soil moisture is also a crucial factor when it comes to soil-borne disease triggering. Waterlogged soil and the presence of standing water promotes such diseases.

Dry soils on the other hand, can cause damage as well. The balance might be tricky when the environment is not monitored constantly.

Before we discuss a simple approach to monitoring water requirements, let’s discuss the factors that affect water availability.

Evapotranspiration

Evapotranspiration is when water vapor is released into the atmosphere from the soil, leaves, and other surfaces. It is one of the ways in which water moves from plants to the air.

Evapotranspiration is a major contributor to water cycling in the global hydrologic system. The rate of evapotranspiration depends on many factors such as plant type and cover, temperature, humidity, wind speed, solar radiation, soil type, and depth. In essence, the water that we provide to the plants should compensate for the water that was lost in the evapotranspiration process.

Evapotranspiration can change considerably when the weather changes, or when we change the plant location. There is no simple way to predict a watering schedule if environmental factors are not monitored.

Overwatering and poor soil drainage

One of the main reasons for prolonged times of wet soil is overwatering. If the watering rate is above the plant needs, accumulation of water in the plant’s surroundings can happen. Watering plants in winter with frequent rains is one situation that can lead to that.

When water has nowhere to go, the soil can dry itself based on evaporation. But the rate is many times not sufficient.

One common mistake we encounter is the lack of holes at the bottom of the pot. This includes situations in which the holes are blocked by stones that made their way to the bottom of the pot with time.

When selecting the container you are going to use, make sure it contains holes that allow good soil drainage, and occasionally check to see that the holes are not blocked. It is a good practice to re-pot once a year to prevent soil compaction that can contribute to poor soil drainage and root development.

Excessive water should be removed soon after the plant’s watering is finished. This is important when the pot is placed inside a tray that collects the excessive water. The tray serves as a water reservoir if not emptied. The water from the tray is pulled back into the pot, not allowing the soil to dry and keeping it wet for longer than we intended.

Why container size affects soil drainage

When the plant is still small and the roots don’t spread to the entire soil volume, the drainage is poor. You can think about the soil sections that are not reachable by the plant roots as water reservoir. Therefore, it is important to start with a small pot. The small pot will constrain the size of the roots and will not allow the plant to reach its full potential. Therefore you should re-pot once the plant grows.

If you didn’t follow the watering rules we just discussed, you might be able to get a warning sign before the situation gets out of control. You will often see fungal growth on the surface of the soil. This might indicate that the soil moisture stayed high for too long time.

Underwatering

When the weather becomes hotter, you might forget to adjust the watering volumes. This can result in poor water conduction to the foliage that, in turn, will show up as a tip burn or wilt of the plant. When the plant is exposed to direct sunlight, the early symptoms can be sunburns due to the poor ability of the plant to cool itself.

Soil that stays dry for a long time will cause injuries to the roots, which are often irreversible.

Drought stress symptoms due to lack of plant watering

When should I water my plants?

As a rule of thumb, the plant should be watered whenever the top 3 inches (roughly 10 cm) of the soil dry out. Use your fingers to feel the soil moisture level and decide if watering is needed. Note that If the soil is still wet after 7 days since the last watering, there might be a problem with the drainage.

Salinity and plant watering

Salinity is the total concentration of the ions in a medium. Ions concentration goes up when salts are dissolved. High concentrations of different salts can cause problems. High concentrations of sodium chloride can have a devastating impact on seed germination and create osmotic stress causing plants to become water deficient. High concentrations of sodium chloride can also cause ion imbalances and toxicity seen on older leaves as burned tips, which can develop into more extended necrosis.

Check the level of salts in the designated soil before planting. Plan in advance, considering crop susceptibility to sodium chloride, soil structure, and characteristics, and the quality of your water source. If necessary, initiate preventive measures that can improve overall drainage or initiate several pre-planting, high-volume irrigation executions to wash and push aside salts.

Regularly search for visual symptoms of salinity, especially after heavy rains. Look for white-colored patches on the soil. This will improve response times to prevent serious damage from occurring.

Symptoms of salt toxicity in avocado plant

How to check the salts concentration in the soil and water

Measuring devices are available in gardening stores to help you test the electrical conductivity of the soil and water. The electrical conductivity is proportional to the concentration of dissolved salts in the medium.

Avoid tap water when salts concentration is high

Very often, tap water is not a good source for plant irrigation. Tap water might contain heavy fluoride and chlorine that can aggregate in the soil and become toxic to plants. Tap water can also have a high pH that will cause an undesirable change to the soil pH in the long run. Rainwater should be the preferred option. It is common practice to aggregate rainwater in barrels during the winter and use them to irrigate plants all year.

Reverse water osmosis filters can be used to remove salts from tap water if rainwater is not a viable option.

As a last resort, put water In open containers for at least 24 hours to get rid of the fluoride. Unfortunately, this approach will not change the chlorine content in the water, and therefore it should not be the preferred approach to preprocess the water.

Prevent salt accumulation in the soil

To reduce the salt accumulation in the soil, don’t stop watering until water starts to come out from the bottom of the pot. This will allow the water to dissolve salts and remove them from the roots zone.

Overhead irrigation and increased disease risk

You might be tempted to stand in the middle of the garden and water your plants with a hose. It is a convenient way to cover the entire garden fast. But this approach is not recommended.

Overhead irrigation increases the leaf moisture and might cause a spread of pathogens from the soil to the plants.

Leaf wetness

Generally speaking, leaf wetness makes the environmental conditions more favorable for bacterial, fungal, and oomycete pathogens. By pouring the water on the soil, we can make sure that the leaves stay dry and decrease the risk of disease development.

Splashing water from contaminated soil

Another risk factor for disease development is the potential transfer of pathogens from the soil to above-the-ground plant parts. Water splashing can be how pathogens find their way from contaminated soils to stems, foliage, and fruits. Avoiding overhead irrigation is one way to lower this risk. Growers can also cover the soil with polyethylene or mulch to lower the risk even further.

Summary

With a few simple practices, you can ensure that your plants get an adequate amount of high-quality water. We are looking forward to welcoming you to our community and supporting you with any questions you might have regarding plant watering and plant health. In the meanwhile, as always, we wish you an abundant harvest.

What do you need to know about parasitic wasps in agriculture

Parasitic wasps in agriculture can play important role in keeping plants protected. In recent years the practical knowledge on leveraging their benefits has been growing rapidly. In this post, we will present information that will help you utilize this practice to improve plant protection in your fields and gardens.

"I cannot persuade myself that a beneficent and omnipotent God would have designedly created parasitic wasps with the express intention of feeding within the living bodies of Caterpillars." Charles Darwin
“I cannot persuade myself that a beneficent and omnipotent God would have designedly created parasitic wasps with the express intention of feeding within the living bodies of Caterpillars.” Charles Darwin

The importance of biocontrols in plant protection programs

The use of biocontrol has been around since the 19th century. Biocontrols have been used to control pests in agriculture and forestry. Biocontrols are a form of pest control that uses natural enemies to combat pests and they are a great way to reduce the amount of pesticides used.

The biggest problem with chemicals is that when you spray, the chemical doesn’t work anymore after a while because the insects build up resistance. Another downside is the toxicity of pesticides to beneficial insects. For example, most chemical sprays that kill whiteflies also kill bumblebees. Biocontrols can be used as an alternative that is friendly to pollinators and other beneficial insects.

Three types of biocontrols: predators, parasitoids, and pathogens

Biocontrols can be divided into three groups: predators, parasitoids, and pathogens. Predators eat the prey, while parasitoids lay their eggs on or in the body of their host. Parasitoids are more specific than predators and have a higher success rate in controlling populations of insects. Pathogens are microbial antagonists used to suppress diseases and eliminate insect pests. Bacillus thuringiensis for example, is a bacteria used as an insecticide that acts against moth caterpillars.

Most parasitic wasps are beneficial insects

After parasitic wasps lay their eggs, the eggs hatch, and the wasps larvae feed on the host’s body fluids. Parasitic wasps are not protected from parasitoidism; some wasps parasitize the parasites and therefore are not considered beneficial.

The number of pesticides available to farmers is running out

Pesticide resistance is a major problem for farmers around the world. Farmers need to find new ways of protecting their crops from pests or suffer the consequences. Due to the developed resistance, farmers must resort to more expensive and toxic pest control methods. The lack of new pesticides on the market is becoming more severe due to regulatory requirements. Even after such pesticides have been invented, it takes years before they can be used in farms because of the length of the approval processes. 

Biology of parasitoid wasps

Parasitoid wasps are fascinating creatures that have been around for millions of years and have evolved to be very successful in their niche. It is estimated that these organisms parasitize over 20% of all insect species. Therefore, understanding their way of action can be very helpful in pest control.

Parasitic wasps can be found worldwide, but they are most prevalent in temperate regions. The insects utilize the parasitoidism mechanism to survive and reproduce. In practice, it is an insect-host relation in which the larvae are dependent on the host while they feed on their tissues. As a result, the host will not be killed until there is a completion of larval development.

How to tell a parasitoid wasp from other insects

Wasps are shaped like a triangle, and their size is partly related to that of the host. They have long, thin waists and large wings. Some wasps are dark brown or black with yellow stripes on their bodies. Some wasps can be orange, red, or yellow with black stripes.

Wasps are distinguished from bees by their lack of pollen-carrying structures on their legs and the fact that they do not have the same kind of hairy body as bees.

How to build a parasitoid wasps population in fields and gardens

Support flowering plants in and around the growing area

Parasitic wasps can feed on nectar from flowers, so it’s not unusual for them to be attracted to the scent of flowers. The wasps can be found on most flowering plants, but they prefer some over others. The female parasitic wasp lays eggs on the host plant and then flies off to find more prey.

Allow at least a low level of pest presence on plants 

Some products allow the introduction of the wasps with the target insect to the growing area to support them even when the plants are not infested. But more generally, the wasps should be released when the host is present, and the infestation is mild.

Use insecticides that are selective and don’t harm parasitic wasps

Organophosphates such as malathion, disulfoton, and acephate are highly toxic to natural enemies. Carbaryl harms bees, natural enemies, and earthworms. Systemic neonicotinoids, such as imidacloprid, can be very toxic to bees and parasitic wasps, especially when applied to flowering plants. Pyrethroids, Afidopyropen, chlorantraniliprole, chlorpyrifos, dimethoate, fenpropathrin, methomyl, and thiamethoxam are toxic to parasitic wasps.

Less toxic insecticides are Potassium salts of fatty acids, Insecticidal oils, Microbial insecticides such as Bacillus thuringiensis and spinosad, and Botanical insecticides such as Pyrethrins and Azadirachtin.

Insect growth regulators such as pyriproxyfen and buprofezin are safe for parasitic wasps (but very toxic to beetles such as the vedalia beetle that can help in soft-scale insect control).

The persistence of the insecticides should be considered as well. While there are some whose effects will disappear after a few days, others will persist for months. For example, Carbaryl will have a bad effect on parasitic wasps for up to five months after the pesticide application.

Moth caterpillar killed by a braconid wasp parasitoid
Moth caterpillar killed by a wasp parasitoid

What are the disadvantages of the parasitoid wasps approach?

The negatives to parasitoids are the cost of purchasing them and the maintenance costs associated with keeping them alive in your garden or farm. Parasitoids do not harm your plants or crops, so you can use them without worrying about causing damage to the plants.

How to time the release of wasps?

The average lifespan for adults is around 1-2 weeks. It might be necessary to release more than once, depending on the size of the infestation.

Groups of parasitoid wasps

Ichneumonid wasps

Ichneumonid wasps are a group of insects that belong to the family Ichneumonidae. They are a large and diverse group of wasps, with over 60,000 known species. These parasitoid wasps preys mainly on caterpillars of butterflies and moths

Ichneumonid wasps
Ichneumonid wasp

Braconid wasps

Braconid wasps are a group of insects that belong to the family Braconidae. They are a large and diverse group of wasps, with over 40,000 known species. This group of parasitoid wasps attack caterpillars and a wide range of other insects, including greenflies and aphids. 

Braconid wasps
Braconid wasps

Chalcidoid wasps

This group of parasitoid wasps parasitizes eggs and larvae of greenfly, whitefly, cabbage caterpillars, and scale insects.

Examples of parasitoid wasps that are important to agriculture

Aphid wasp parasitoid

Aphid wasp parasitoid is an insect that feeds on aphids. It has a long, thin body with a black and yellow pattern. The female aphid wasp parasitoid lays her eggs inside the aphids. The eggs hatch inside the aphids, and the larvae feed on them until they are fully grown before emerging from their hosts as adult wasps.

The life cycle of an aphid wasp parasitoid starts with the egg stage, where females lay their eggs inside the bodies of aphids. This can happen in two ways: either through oviposition or ovipositor. Oviposition is when females lay eggs directly into the body of an aphid, whereas ovipositor is when they use a long tube-like organ to insert the eggs.

Encarsia formosa

Encarsia formosa is a species of chalcidoid wasp. It is a commercially available parasitoid of greenhouse whitefly,

Scoliid wasp

Scoliid wasps are a family that feeds on beetles. The female finds the beetle grubs in the soil, and lays an egg on it. The young wasps feed on the beetle grub.

Anagyrus lopezi

Acts against cassava mealybugs. These insects can reduce crop yields by 60-80%. A successful preventative program was conducted in Thailand in which parasitic wasps were being reared by the millions and mass-released. A similar experiment was conducted in West Africa in the early 1980s. The result was a suppression of the pest population levels from more than 100 individuals on each cassava tip to fewer than 10-20.

Hyperparasitism wasps

Hyperparasitism can be seen in many different groups of organisms, including plants, fungi, and animals. In the case of wasps, hyperparasitism occurs when one species of wasp (the hyperparasite) lays its eggs on or inside the body of another species of wasp (the host parasite) that is itself feeding on a host organism. The wasp larvae then feed on the host parasite, eventually killing it.

Hyperparasites usually appear at the end of summer, when conditions are favorable for them and their host. Hyperparasites can disrupt the effectiveness of a biological control program. It is difficult to eliminate them, but you can minimize their population. Make sure to remove the parasitic wasps in late summer to remove the host of the hyperparasites.

Dendrocerus spp. and Alloxysta spp. attack Aphidius spp. You can know they are present by examining the exit hole in the aphid mummy.

Summary

In this article, we summarized the benefits of using parasitic wasps in agriculture. In practice, no biocontrol is perfect. Instead, a balance should be found between conventional insecticide applications and biocontrol. Greenhouses have been the domain of biocontrol for decades, even when chemical pesticide usage was on the rise. Partly thanks to the fact that the value of the crop is higher. In addition, greenhouses have a significant advantage as they function as a closed environment. Beneficial insects are going to stay inside. Recently biocontrols have become more prevalent in sectors such as floriculture, viticulture, and outdoor fruits. Track the number of wasps in the growing area and see what works best for you. When the control of different insects is needed, more wasps should be released, and the costs can be higher than conventional treatment. 

We are still in the early days, and robust protocols do not always exist. There is a need to start practicing it to gain knowledge. Join our community where we discuss such practices in a case-by-case manner, we are happy to support your experimentations and help you learn and improve.

What you should know about NDVI imagery in agriculture

Monitoring agricultural fields tracking progress, and spotting problems in the field before symptoms are apparent is crucial for a successful harvest. Exciting advancements in technology allow us to capture images of farms worldwide with the aid of satellites, thus making monitoring simple and affordable. The most popular vegetation index used by farmers is the Normalized Difference Vegetation Index(NDVI); monitoring NDVI imagery in agriculture can serve as an indicator of the health of plants.

What is NDVI imagery, what do NDVI values indicate, and why is it useful?

NDVI is a remote sensing method for estimating crop health and biomass. The NDVI index measures the difference between visible and near-infrared reflectance of the vegetation. Crop reflectance depends on leaf area, chlorophyll content, age of leaves, canopy density, and soil type. NDVI is often used with satellite imagery, which provides high-resolution images from space. The use of satellites has helped to make NDVI more accessible to farmers worldwide because it is accessible to anyone with an internet connection. Monitoring NDVI in agriculture for crop health screening has been around for decades. Still, it has only recently gained popularity due to the use of satellites and high-resolution aerial photography that provide frequent revisits. It gives an accurate estimate of plant biomass and leaf area index (LAI) without needing any ground data collection or manual interpretation.

How is the NDVI index calculated?

NDVI is calculated with the following formula: 

NDVI = (NIR-Red) / (NIR+Red)

Where NIR is near-infrared light, and Red is the visible red light. NDVI values range from -1 to 1. Sand, rock, or snow areas show values of 0.1 or less. Sparse vegetation, such as senescing crops, shows moderate NDVI values of between 0.2 to 0.5. High NDVI values of 0.6 to 0.9 correspond to dense vegetation.

How do I get NDVI imagery?

Agrio is an Android and iOS application. With Agrio Monitoring fields becomes very simple, and it does not require prior knowledge. Apps like Agrio allow you to draw your fields on the map to start the monitoring process. You will receive frequent scans and interpretations once the fields’ location is defined.

How to read and analyze NDVI imagery?

By inspecting the NDVI scans, we can better understand the fields’ situation and spot places that might show stress. For example, examine the level of green in the image below, showing different stages of plant development in the various fields, and internal variation inside individual fields.

NDVI imagery of wheat fields

Notice the isolated green patches in the otherwise orange reading that indicates the development of weeds’ growth.

When comparing the NDVI scans of consecutive days, we can see spots that do not develop as expected and require immediate attention. For example, examine the image below and notice the red patches in fields that are in early development stages and therefore are expected to show an increase in the NDVI with time.

Track the daily changes in the NDVI imagery

The limitations of NDVI imagery in agriculture

NDVI shows a low correlation with the chlorophyll content; it is more severe in advanced growth stages when the NDVI becomes saturated. This saturation is due to the increase in the leaf area and the density of the canopy structure. Therefore, in this stage, there is a need to monitor an index that is highly correlated with the leaf chlorophyll content and less sensitive to the leaf and canopy structure.

Chlorophyll plays a crucial role in photosynthetic processes such as light-harvesting; thus, the content of chlorophyll is a potential indicator of a range of stresses. Other spectral bands can detect chlorophyll functioning changes, such as the red-edge early on. This precedes the actual losses in leaf chlorophyll concentrations; therefore, monitoring such changes can be an early indicator for developing biotic and abiotic stress.

Why technology progress makes the selection of specific vegetation indices less critical?


Since we have become very skilled in teaching computers to identify patterns in large data, selecting a specific index is not essential. Instead, artificial intelligence can analyze the entire spectrum of reflected light and provide insights. In the old days, pre-engineered features were needed to train machines to classify patterns in the data. But these days are over, and we now know how to program the machine to pick the best features during the training process.

Vegetation indices are convenient when human experts are examining the scans. It is difficult for humans to make sense of a large amount of information encoded in the full spectrum. For that purpose, presenting specific indices that experts are familiar with is still useful. But the number of monitored acres and the high frequency of satellite revisits make it less desirable for growers and agronomists to do the analysis manually.

What started as a choice due to limitations became a convention in the industry.


Leveraging artificial intelligence to detect anomalies in satellite imagery

After discussing the benefits that can result from monitoring spectral reflectance, we need to address the practicality of this approach. One of the challenges in leveraging spectral analysis in stress detection is to identify the precise patterns in the satellite scans that indicate that the plants are under stress. Even when individuals develop the expertise of examining the scans manually, the task becomes cumbersome when the number of covered acres is high.

The use of artificial intelligence in agriculture has been on the rise due to the recent advancements in technology and contributes to the efforts to overcome these challenges. Anomalies are detected using artificial intelligence by making decisions based on patterns learned from large training datasets.

The entire spectrum of light that can be captured by satellite sensors contains interesting information when it comes to early stress detection.
The entire spectrum of light that satellite sensors can capture contains interesting information regarding early stress detection.

The progress in developing early detection tools can become faster once a large volume of high-quality data can be collected affordably. To achieve that, we took the crowdsourcing approach and built a tool that allows growers to identify plant pathology based on smartphone-captured images. Growers are directly benefiting from this service while helping to train algorithms for early detection, a capability that can be more beneficial for them in the long term. The geotagged images are used as ground truth and help us to train the algorithms to identify the problems directly from the satellite scan. The computer is presented with satellite scans in which it is known which of the field regions are diseased. We make fast progress as we can collect a large volume of high-quality data.

Such data allow us to learn the patterns of the typical reflectance patterns of many different plant problems. We leverage these capabilities to develop easy-to-use monitoring solutions. Farmers using Agrio can monitor the health of their fields in a very simple way. All that is needed is to define the field location by drawing a polygon representing the field boundary. Once this is done, we are kicking in to do constant monitoring for you and notify you when a new scan is available.

Summary

Satellite monitoring in agriculture is a technique that has been used for many years. However, the use of satellite technology to monitor agricultural fields has increased significantly over the past decade. Using satellite monitoring in agriculture can increase yield, improve precision, and early detection of issues with crops.

Users can access Sentinel and PlanetScope satellite scans on our platform. We apply our algorithm to the imagery to monitor crop progress, spot problems in the field, and alert growers when interventions are needed.

We invite you to leverage these capabilities to avoid losses, grow better, and spray less.

How to prevent plant fungal diseases

Experiencing poor crop yields due to plant fungal diseases such as downy mildew, rose black spots, or rust? Do not see this as a necessity of reality. Plant fungal diseases are becoming more and more prevalent as the climate changes. They cause significant economic losses and are challenging to deal with, but with the right approach, remarkable results can be achieved.

Did you find yourself again in the situation in which the plants show symptoms? You probably ask yourself what this disease is and how I should treat it. Unfortunately, many growers stop there. However, the most critical question to ask should be – how should I prevent it from happening next time.

In the ideal situation, growers should be able to apply fungicides before the disease starts to develop in the field. You might be tempted to spray when there is a slight doubt. However, excessive spraying is not economical and can cause unnecessary damage to plants. We have limited opportunities to apply preventative measures, so it’s better to be at the optimal time.

One condition that should be met before a decision to spray is made is the presence of spores in the field. However, the presence of the fungal spores on plants is not enough; the disease develops only when the weather conditions support that. 

Farmers find it difficult to monitor these conditions as it requires knowledge about the environmental conditions that can not be easily obtained. But fungicides applied when spores are not in the field or when weather conditions are not suitable for the disease development get wasted. In addition, such applications increase the risk of pesticide injury to the plants, are bad for the environment and growers’ health, and reduce the potential profits at the end of the season.

So how can you decide when it is time to spray? Let us dive a bit into the technicalities. By the end of this short article, you should be informed on how to time the preventative applications correctly.

How do plant fungal diseases develop?

Fungal spores are the first stage in the fungal life cycle and the mean by which fugal diseases spread. Their mobility helps them travel by riding other organisms or by traveling long distances carried by the wind. Once they land in a supportive environment, the spores germinate and form a mycelium. The mycelium provides nutrients to the spores and supports their growth.

As the mycelium grows, it may encounter another compatible fungus. The fungi cells merge into a single cell and then split into two cells, which results in mixed genetic information. This sexual reproduction ensures genetic diversity.

In some environmental conditions, most fungi can reproduce asexually. When it’s time to reproduce, instead of branching out and combining with another mycelium, they produce mitospores (Asexual spores) that look just like the parent. These then start a new cycle and grow a new mycelium.

Germination and reproduction of the spores initiate the disease. Pathogenic fungi can live inside plants or on their surfaces. They feed on the plant tissue and damage it.

In the stage where the spores were not germinated and infection was not started, protectants fungicides can be applied. Protectants can be used in healthy plants to prevent spores from growing or penetrating the host tissue. Some examples of protectants are mancozeb, chlorothalonil, and copper-based fungicides. After the disease is initiated, other fungicides should be applied to eradicate the fungi. These fungicides should have a different mechanism of action that disturb other processes that allow the fungus to develop and survive. Therefore, it is important to alternate between different fungicides. Utilizing different mechanisms of action help to prevent resistance development.

Philippa Uwins, CC BY-SA 3.0 <https://creativecommons.org/licenses/by-sa/3.0>, via Wikimedia Commons
Fugal spores as can be seen in electronic microscope | Philippa Uwins, CC BY-SA 3.0 https://creativecommons.org/licenses/by-sa/3.0, via Wikimedia Commons

Spore traps can provide early warning of the spread of plant fungal diseases

How can you know if the spores were carried with the wind and arrived in your region? The direct way is to install spores traps in the fields. Agricultural spore traps are used to detect the presence of fungal spores in the air. They help farmers to take preventive measures against plant fungal diseases. Farmers should install the traps in good distribution in fields and send the air samples from the traps to the lab at a high enough frequency. The lab does a microscope analysis to quantify the spores and classify them.

The trap costs, maintenance overhead, and the need to send frequent samples to the labs might make it a non-practical practice. There are attempts to bring costs down and do the analysis in the field, but in the near future, growers might want to consider alternative approaches.

Airborne spores cause the spread of plant fungal diseases. Courtesy of Dr. Sahay

How can we learn about spores spread without installing expensive hardware?

Considering the obstacles that were discussed above, we can think of other ways to monitor the spread of spores. Plants can be thought of as spore traps, in the fields and around them. Gardens are excellent examples of places in which fungal diseases can get discovered first.

When spores land on plants and disease develops, the symptoms make it possible to identify the exact pathogen and save the need to do the lab testing. The region in which the disease is initiated is going to benefit less from the early warning but the fields around can. But actually, we can do better than that by modeling long-distance spread.

How far from the hot spot can such an observation be used as a warning? Once an area with an infestation is discovered, weather-based models can be used to predict the routes of spread of the spores by analyzing the wind direction and speed. By combining such predictions with actual observations on the ground, as the migration progresses, we can have a good understanding of the spores spread in real-time.

What are the weather conditions that support fungal disease development?

Weather variables such as temperature, humidity, and rainfall can help model the risk of spores germination and reproduction. When the optimal conditions persist for several uninterrupted hours during the day, the disease initiation is expected to happen. Each fungus should be modeled differently. Scientists arrive at such models by experimenting with the environmental conditions in a controlled environment. Growers and crop advisors can utilize such models to track the development of the fungi of interest in their fields.

With the ability to track the weather constantly and apply such models, an early warning system became possible. As discussed above, if the weather conditions are suitable but the spores are not present, an alert will cause unnecessary fungicide application. Therefore it is essential to wait for these two conditions to be met. With the aid of technology, and the ability to collect data globally, we managed to bring the predictive capabilities of this approach to an all-new level, and we made it easily accessible for you.

Summary

By considering the presence of the spores in remote areas, the wind variables, the presence of potential hosts in the route between your fields and the monitored remote regions, and the risk of spores germination and reproducing; we can provide an accurate map of the risks of many diseases across the globe. By using this approach, we can optimize the decision-making in fungicide applications without the need to install expensive hardware in fields. In Agrio we built a large community of farmers and gardeners that are monitoring their crops. The information that is being uploaded to the system, together with the identification of the plant problems, help us to see the big picture. We invite you to take advantage of this progress and increase your planning capabilities for better plant protection.

An app that identifies plant diseases and diagnoses plant problems

Visual inspection plays an important role in plant disease identification and diagnosing plant problems, as a lab test is not a practical tool for day-to-day diagnosis. Due to costs and turnover time, growers make decisions based on the symptoms seen in plants. Plant inspection is time-consuming, and it often leaves growers with doubts. Crop advisors support the growers with plant disease identification and treatment decisions and ensure that errors are minimized. But what if such assistance is not available? Luckily, technology can come to the rescue by offering a plant care app to growers. An artificial intelligence-based app that identifies plant diseases became possible thanks to the big leap in performance engineered by the artificial intelligence research community.

In recent years, software products can complete vision-based tasks with expert accuracy. Why not apply this technology to plant disease identification and agronomy advisory? The widespread use of mobile devices makes this question even more relevant as such devices made it possible to distribute a plant care app on a large scale and help growers diagnose plant problems.

Agrio is an Android and iOS application developed to do just that. It helps growers manage plant protection more sustainably, as disease identification is crucial in the plant protection routine.

The plant care app holds immense value for a broad and varied range of users. Beyond its significance to farmers and crop advisors, a substantial portion of its user base comprises home growers actively seeking expert insights. These individuals harness the app’s disease identification feature to cater to their specific requirements. This usage pattern resonates harmoniously with the emerging inclination among millennials, who are increasingly employing technology to foster their home-based food cultivation endeavors.

Furthermore, Agrio recommends and champions biological and organic treatments within its comprehensive, integrated pest management protocols. This distinctive aspect significantly enhances its pertinence to seasoned gardeners and budding home cultivators.

In navigating the gardening world, it’s crucial to discern between evidence-based practices and mere myths that can lead us astray. The availability of advanced tools, like the aforementioned app, empowers us to separate fact from fiction. Traditional gardening wisdom is invaluable, but a discerning approach is necessary to avoid falling victim to pitiful myths that could hinder the health and productivity of our plants.

Don’t wait for your plants to diagnose themselves. Download Agrio!

A free-to-use plant care app that identifies plant diseases and saves time

When tending to your garden or scouting the field, Agrio diagnoses plant problems and provides instant identification that saves the need to waste time on identifying the problems and recording the results. Moreover, the recorded images can be inspected by others and used as a reference in the future. Growers that find it difficult to obtain accurate diagnoses use the tool as an assistant or as a way to receive a second opinion when there are doubts. This is especially important when other sources of advice are unavailable, such as in countries in which the ratio of the number of growers to agronomists is very high.

Symptoms of Tomato Yellow Leaf Curl Virus

Why is it essential to diagnose plant problems in a precise way?

Every pathogen or insect will require a different treatment. In addition, pathogens can develop resistance to some treatments in some geographics; this information should be considered when treatment is advised.

When the problems are already observed in the plot, exact identification can help prevent the spread. The strategy for applying measures depends on the precise cause identification.

When it comes to prevention, growers should consider the implications for the following seasons. Crop rotation or soil treatment might be advised when the pest is expected to survive in the soil or plant debris. In the case of a viral disease, it might be advised to plant virus-resistant varieties in the following seasons once the virus has been identified in the region. Other factors that require soil preparation before planting are saline soil, wrong soil pH, the presence of nematodes, and more. In all the examples above, exact identification of the problem must be obtained to prevent future losses.

Agrio | app that identifies plant diseases and pests

How does artificial intelligence identify plant diseases?

State-of-the-art image recognition is based on the concept of artificial neural networks. Similar to how agronomy students learn, the neural network is presented with examples of diseased plants that experts tagged. In the learning process, the network of neurons adapts until it maximizes the performance score. The result is an app that identifies plant diseases and constantly improves as more examples are presented. Agrio learns which treatment protocols are more effective based on the growers’ feedback and observations done in the fields. A treatment that was not effective signals a possible problem with the identification and provides more input for the network to improve.

When it comes to object recognition in a dense cluttered environment, human experts might get it wrong. Luckily, artificial intelligence can be trained to filter out distractions and provide a fast identification and classification of the important patches in an image.
When it comes to object recognition in a dense, cluttered environment, human experts might get it wrong. Luckily, artificial intelligence can be trained to filter out distractions and provide a fast identification and classification of the important patches in an image.

Why artificial intelligence is the right approach for plant disease identification

A massive void in plant protection advisors leads to 40% of yield losses. The ratio of extension workers to farmers is disproportionately low and far from the optimal ratio of 1:50. The access to high-quality advice is even less available for home growers. With the help of AI, we can offer a free-to-use image recognition solution that can close this gap. Agrio analyses thousands of images daily, which would take hundreds of human experts hours otherwise, an alternative that is not economical. The solution is not limited in scale and therefore offers a viable way to support growers, improve global food production, and reduce hunger.

Symptoms of different diseases might seem similar; how can Agrio tell the difference?

The symptoms observed on the different plant parts and information on the geography and weather help us differentiate between problems. Similar to the process of medical diagnosis, the app will present questions to the growers that help arrive at the correct diagnosis in case the information in the images is insufficient.

Why satellites and other remote sensing devices are not enough when it comes to the exact diagnosis of plant problems?

Remote sensing is helpful when growers want to pinpoint the exact locations where problems started. But cameras mounted on drones or other machinery will see just a subset of the symptoms. Often, the symptoms seen on the foliage are secondary; the actual problem can be with the internal tissues in the stems or roots. The app instructs the grower on what interventions are needed in order to expose the root cause. In this sense, there is no good alternative yet to boots on the ground.

Can Agrio learn to identify plant diseases it didn’t see before?

The app is constantly learning. When users upload images that cannot be identified by artificial intelligence, there is an option to share the photos with humans. The correspondence between the grower and the responder is used by artificial intelligence to learn. As a result, Agrio can apply skills learned before to master new plants faster.

What did Agrio learn to identify so far?

Diseases and insect pests are the majority of problems we deal with. But many other abiotic stressors were learned, such as nutrient deficiencies, toxicities, environmental factors such as wind and hail, and many more. The ability to distinguish between biotic and abiotic stress is important and can save unrequired pesticide applications.

Plant diagnosis app that constantly learns

What are the uses of such technology in the futuristic farm?

In the future, computer vision technology will be essential in autonomous farms. In such setups, automatic disease identification will be crucial.

Artificial intelligence for good

Agrio is an app that identifies plant diseases and serves as a personal agronomist that can be carried in the pocket. We make a ground-breaking plant protection support system available to any grower with a smartphone.

We utilize AI to make a profound impact by addressing the global hunger problem. Smallholder farmers and home growers are among the groups that benefit the most from solutions that help diagnose plants. For these two groups, help from experts in most cases is not available, which challenges the diagnosis and proper treatment of diseases and pests and may lead to a loss in crop yield.

By using these technologies, smallholder farmers and home growers can get immediate help for their problems and play an active role in improving artificial intelligence. We can grow better together. Join us today and take part in this exciting journey.

An agricultural development expert discuss precision agriculture

We met Aurel Grabocka in 2020 when he expressed interest in Agrio and got inspired by his enthusiasm for making agriculture better. We had wonderful conversations with him in which we learned about the agriculture scene in Albania and his ideas on how to improve it. We invited him to share his experience with precision agriculture, challenges, and his hopes for the future.

Tell us a bit about yourself, and your experience with agriculture. What kind of services do you provide to growers?

I have a master’s degree as an advisor and trainer for small and medium-sized enterprises (SMEs).

In 1998 I founded the Regional Development Agency (SME) of Korce, Albania. I am the founder and CEO of RDA Korca since then. It is an NGO.

Mainly, RDA Korca is known as a consulting agency for SMEs and local governments and is a leader in the development of business plans and feasibility studies for SMEs. It has been also a supporter of startups in the region.

Since 2019, supported by two EU projects, we have developed and are working on smart agriculture and regenerative agriculture. Especially we are developing extension agriculture services based on Agriculture 4.0. 

Korca region is one of the most important producers of apples in Albania and we are working to support apple producers in producing high-quality apples. Through smart agriculture applications like Agrio, we support them to use inputs in a smart way and minimize the use of pesticides and insecticides. At the same time, we are cooperating with innovative agronomists to change the nutrition of the orchards and increase their immunity. 

The Objective is to enhance Korca’s farmers by increasing the quality competition of Korca’s apples. 

An agricultural development expert examining an apple tree

How many people work with you? What is their responsibility?

We are a small team of three full-time people. Their responsibility is to train farmers on how to use smart applications like Agrio and team with them to improve the production on their orchards.

The Agronomist supports them in improving the nutrition of the orchards based on the data from weather stations, disease models, smart agriculture applications, and SAP analyzes. 

We hire experts based on the requests and needs of our farmers.

Tell us about the disease and pest challenges? How did you manage plant protection in your fields in the past?

Apple orchards suffer from a lot of diseases and insects. In the past farmers managed plant protection based on assumptions and by cooperating with each other. They were spraying based on their experience and having the same calendar every year. As a result, the use of pesticides and insecticides has been increasing every year.

In the last two years, we have introduced disease models based on data from the weather stations. At the same time, we are introducing Agrio as an application that supports farmers in their decisions to protect their crops from insects and pests. 

Our main approach is to support farmers through Agrio and regenerative agriculture practices based on SAP analyses. The route to take samples for SAP analyses is based on the indicators and indices offered by Agrio.

How did you come across Agrio?

Agrio has been suggested to us by a German expert that visited our farms. He suggested this application as a great tool to improve the protection of the orchards from pests and insects. After using it for some days I had an online meeting with Mr. Nessi Benishti who is the CEO of Agrio. Since then we have increased the cooperation, testing, and working with the tool. We are looking to go even deeper into this cooperation.

Recently, we have started to create Teams to support farmers through the platform. It is very interesting and helpful. Farmers find many beneficial services just by using their smartphones.

A seminar on disease and pest identification in apple trees

What is your perspective on digital solutions in agriculture? What do you wish to see in the future?

We are looking to increase the cooperation with Agrio and at the same time develop the network of farmers. Agrio has a great option of teamwork and cooperating with the farmers and experts on the same platform. At the same time, we can have the support of Agrio experts that support us very fast and with great quality advice.

We are looking to cover all of Albania with our extension services. In the near future, we will have a call to ask experts to join us through the platform and to support farmers with advice.

How the satellite scanning changes the way you understand the orchards’ situation? 

Agrio offers a lot of functions to check the health of the orchards by scanning with satellites. It is easy to compare the images of the satellites, check on graphs how the vegetation is doing, and develop the crop scouting route to visit the areas which represent a decrease in the indicators. It offers the possibility to cooperate with the team, exchange ideas and notes, and check the quality of the work.

Through the satellite images, the farmer knows exactly the location where to check and find out in advance if something is wrong with his crops.

Can you describe a particular case in which Agrio helped you detect a pest or a disease? How is the app helping you with your work? 

Agrio team assists us without request on areas that show a decrease in the indicators. They send to us the location and with the help of the smartphone GPS location, we go to the exact location and check for the problems. In this case, after we send the pictures related to the problems, first there were doubts about nematodes on the roots. After digging and discovering the roots, we have seen that there were no signs of nematodes. So, we continued to check the tree and we found prionus apple root borer. After showing through pictures of the stem borer and after the experts of Agrio helped us to identify it, we received their suggestions for the treatment. After applying the treatment, we saw that the vegetation indicators for this field are increasing, and the trees are doing very well.

Precision agriculture applied to early disease and pest detection in the orchard
Detection of pest infestation in an orchard with the aid of satellite imagery

What is the dynamic in the community of growers in your region? What is the level of interest in precision agriculture solutions? 

We have more than two years of promoting precision agriculture and testing it. It is moving and growing but still, it is slow and difficult. Farmers have a lot of difficulties and lack the resources and knowledge to apply precise agriculture. 

What do you wish for in the future?

We wish to increase the community of farmers that use precise agriculture and improve the quality of their products. We want to decrease the use of pesticides and insecticides and provide healthy food for people. We wish to regenerate soil on our farms and produce dense crops and fruits full of vitamins and proteins.

Anything else that you would like to add?

We are changing the existing agriculture practices and we hope that farmers will change on a great scale. Public institutions, local governments, and universities need to support and develop smart agriculture to change the existing theories and practices. Especially public servants and academia of agriculture departments in the universities must increase their knowledge of precision agriculture and start moving from conventional agriculture to regenerative agriculture.

Fighting cannabis pests with the help of beneficial insects

Beneficial insects are a natural and safe form of pest control that can be used to protect against cannabis pests. They are a great alternative to pesticides, and they are not harmful to the environment. The use of beneficial insects is becoming more popular in the face of pesticide resistance and growing public concern about the risks associated with chemical pest control. Several factors must be considered when selecting beneficial insects for release into a particular environment: the type or species of insect; their life cycle; how fast they multiply in numbers; whether they are native to that area or not; where they will live in the environment; what they will feed on and more. The use of beneficial insects is becoming more common in the cannabis industry as it has been proven to be a sustainable way to decrease the use of pesticides while still maintaining the desired quality for the product.

In the following, we review the common cannabis pests and the beneficial insects that can come to the rescue.

Aphids

Aphids are small polyphagous (0.5-5 mm), sap-sucking insects that come in various colors and shapes. Most aphids don’t have wings, but the ones range in colors from black, green, pink, yellow, etc. Aphids are one of the most widely distributed pests in the world and are major cannabis pests.

Feeding can cause stunting and plant/leaf deformities such as curling, while honeydew secretions are a “fertile ground” and a major contributor to the development of sooty mold fungi that can lead to a decrease in photosynthesis.

Aphids are a major vector for dozens of viruses. That alone is enough to put aphids at the top of the most globally economically hazardous list for crops.

Aphids on cannabis leaf

Predators

aphidius colemani

This parasitic wasp is part of the family Braconidae and feeds on several species of aphids, including the peach aphid and the pumpkin aphid. The adult wasp is thin with black, brown, and yellow colors in its different body parts.

It is sensitive to high temperatures and its optimum temperature range is 20-30 degrees Celsius. It lays a single egg inside the aphid’s body. The hatched larva feeds on the internal tissues of the aphid. The aphid becomes a “mummy” with a swollen, brown appearance.

Mealybugs

Considered to be soft-scale insects, mealybugs derived their name from their appearance. Usually, mealybugs are covered with a sticky wax floury or cornmeal-like whitish powder. Some species reproduce sexually, while others are parthenogenic. Mealybugs may be oviparous, viviparous, or ovoviviparous. Their eggs are usually laid in loose masses of cottony wax ovisacs. The flowering and fruiting phases of plants help support a larger mealybug population.

These cannabis pests feed on the phloem by sucking sap from plants. Symptoms appear as small white patches on stems and fruits, followed by the formation of honeydew and the development of sooty mold near infected areas. Mealybugs are known for their ability to transmit plant viruses and can cause heavy losses.

Predators

Anagyrus pseudococci

A parasite that lays a single egg into the mealybug body. The larva that hatches from the egg feeds on the mealybug body and mummified it.

Cryptolaemus montrouzieri

Coccinellid predator that reaches 4 mm long in its adult form; The insect color is dark brown with an orange abdomen. Young larvae prefer mealybugs eggs and larvae, while adults feed on all stages of the pest without preference.

The optimal conditions for its development are 26 Celsius and 60% humidity.

Red spider mites

Red spider mites are small arthropods classified as Arachnida and members of the Tetranychidae family, along with hundreds of different species. They are distributed worldwide and considered a persistent concern for farmers in warm, arid, and dry weather regions.

When weather conditions are right, a female can lay up to seven eggs a day and will do so on the underside of leaves. Adults feed upon plant tissues leaving yellowish nourishing marks. 

Red mite presence in fields could go unnoticed until infestation reaches a critical point where plant damage is visible. 

Predators

Amblyseius swirskii

This particular predatory mite belongs to the Phytoseiidae family. It’s known as the swirskii mite and is a general carnivorous critter that consumes pollen from flowers, as well as Western flower thrips, whiteflies, and red mites.

The mite color can be white, white-yellow, and even light orange. Its color depends on the color of its prey.

The optimum for its development is 25-28 degrees Celsius; The duration of development from egg to adult at a temperature of 26 degrees Celsius lasts about 5-6 days.

Phytoseinulus perssimilis

The Presimilis mite, belonging to the Phytoseiidae family of predators, preys on other mites and small insects. These predatory mites can act as a natural way to keep certain pests in check and are especially effective due to their specificity.

Females are pear-shaped. They have a red-orange hue and, with their long front legs and rapid movement, can capture red mites with ease. The pest feeds on red mites in all growth stages, with a preference for eggs.

The optimal conditions for their development are 21-28 degrees Celsius and a humidity of 60%. In optimal conditions, the pest completes its life cycle within a week.

Leafminers

Leafminers are insects belonging to different orders: sawflies belong to hymenoptora, flies belong to the order of diptera, and moths that belong to the order lepidoptera. Together, they form a large group of plant pests that are important to cultural crops worldwide.

Feeding patterns are important in helping identify the genus and the species, which is quite characteristic. Leafminers are year-long pests that favor warm environments.

The first signs of infestation are tiny yellow dots upon leaves’ upper surfaces. The spots depict where the female laid her eggs. A week after, maggots begin eating their way inside the leaf tissue, thus creating those complex tunnels we recognize so easily. The tunnel provides sufficient living conditions for the larvae. In the following ten days, the tunnel gets wider and longer. Eventually, maggots pop out and fall to the ground, where they’ll complete their metamorphosis and turn into a fly after another ten days.

Its larvae stage is the one responsible for the actual damage. In a large enough population, it can cause a significant drop in yields due to sabotaging photosynthesis.

Leafminer damages on cannabis leaf

Predators

Diglyphus isaea

The parasitic wasp Diglyphus belongs to the family Eulophidae. a natural enemy of dipteran leafminers and a successful commercially available biological product against leafminers.

Diglyphus acts as an external parasite and lays eggs outside the host’s body. The adult is small and is black in color with a metallic green sheen protruding from its surface.

The female injects the leafminer maggot with paralyzing fluid before laying eggs and depositing them close to its body. The maggot stays paralyzed for two weeks, and the larvae that hatch from the egg (after two days) feed on the pest. The adult female is nourished by the body fluids of the pest maggots as well.

At an optimal temperature of 20-25 degrees Celsius, the graduates can live up to 30 days.

Whiteflies

Bemisia tabaci, also known as whitefly, is a multi-host with considerable differences that exist in appearance between adult and nymph stages. Females can lay dozens of eggs, usually on the underside of leaves. Nymphs feed by stabbing into the plant with their mouth parts, sucking up sap from the phloem, and excreting honeydew (a sugar-rich substrate that promotes the growth of sooty mold.) The adults are white and capable of flying, hence the name.

Damage to hosts is caused directly by feeding and indirectly by honeydew. However, their ability to spread viruses has the greatest economic impact. Whitefly vector plant viruses like Begomoviruses, which is a group of plant viruses such as TYLCV in tomatoes and CYSDV in cucurbits. Whiteflies transmit Begomoviruses to host plants.

Predators

Macrolophus pygmaeus

This light green insect is a predator of small arthropods. It is considered an effective predator of whiteflies and tuta absoluta but also feeds on eggs of the whiteflies, thrips, mites, and aphids.

Amblyseius swirskii

Refer to the sections above.

Western Flower Thrips

Western flower thrips are small, polyphagous insects (adults are 1.2 mm in length). They are serious cannabis pests. They can usually be found on the upper parts of plants, especially inside the flowers, where they feed on pollen. Western flower thrips undergo partial metamorphosis, developing through several distinct stages, including egg, larva, pupa, and adult-which can fly only weekly.

They can cause damage to crops directly from feeding or laying eggs in the plant’s tissue and indirect damage from the role it plays as a vector of viruses.

Thrips damages to cannabis leaves

Predators

Orius laevigatus

The carnivorous flea Orius is a relatively small insect that belongs to the family Anthocoridae.

It feeds mainly on insects but also on plants. When feeding on plants, it feeds on the sap and pollen, without harming the plant. Pests such as western flower thrips, whiteflies, and red mites are its source of prey. At an optimal temperature of 25 Celcius, the flea completes its development from egg to adult within 16-18 days and can live up to a month. Luckily, at all stages of development, it can devour pests.

Macrolophus pygmaeus

Refer to the sections above.

Further considerations in cannabis pests control

When the infestation is getting out of control, chemical insecticides might be required. On such occasions, there is a need to select pesticides that are not harmful to the beneficial insects. The Agrio app can help you to choose the right product.

Summary

Integrated cannabis pest management is the approach of combining methods that work better together than separately. It allows diseases and pests to be controlled by managing the ecosystem, which results in long-term cannabis pest control that is less risky to farmers and the environment. IPM is an environmentally sound approach that has been shown to reduce pesticide use by 80% or more compared with conventional pest control approaches. We look forward to seeing you leveraging this information for intelligent and effective pest management in your growing areas. 

In the meantime, as always, we wish you an abundant harvest.

The importance of the red-edge in agriculture satellite imagery

In the effort to grow better food farmers and crop advisors want to have a better understanding of the condition of their crops in real-time. Agriculture satellite imagery can allow them to detect plant stress early before damages are becoming substantial.

Remote sensing is a new revolutionary approach that can help to accomplish that. It is an affordable way to identify plant diseases and other problems early on, which can then be treated before the problem spreads and damages the entire crop. Agriculture satellite imagery leads to more efficient food production, which in turn helps to increase crop yield and decrease hunger worldwide.

It is well known by now that the visible spectrum can be limiting when it comes to the early detection of plant stress. When you scout your plants you might not be aware of the symptoms that are already developing. These symptoms might be presented in the field but not yet visible as symptoms that are visible to the naked eye. Hyperspectral imaging can solve this problem, as it is shown to have promise in the early detection of plant stress. It was demonstrated that the symptoms of stressed plants show in some spectral regions before they can be seen in the visible spectrum.

The red-edge spectrum in agriculture satellite imagery and early plant stress detection

One of the interesting spectral regions is the red-edge. This is the region that shows a large sharp rise in the plant absorption of light. This region is characterized by electric waves with wavelengths between 700 to 800 nm. The sharp incline in the graph is due to the contrast between the strong absorption of chlorophyll and the otherwise reflective leaf. This spectral region is proving to be the most sensitive to disease symptoms and could serve as a leading indicator when it comes to detecting plant stress early.

This led to the increasing number of satellites that were sent to space that carry sensors that are sensitive to these wavelengths. Moreover, there is an increasing amount of research effort that deals with the classification of healthy and infested plants based on spectral signatures in the red edge spectral region. In recent years there is an increasing amount of evidence that shows that the red-edge shows signs of a problem before the condition is detectable with traditional vegetative indices or the naked eye.

Typical plant light reflectance
Typical plant light reflectance as seen in agriculture satellite imagery

Agriculture satellite imagery captured by red-edge sensors

Some of the satellites that carry red-edge sensitive sensors are the Sentinel-2 and PlantScope constellations. Sentinel-2 has spectral channels with different spatial resolutions, including three 20 m resolution red-edge bands at 705 nm, 740 nm, and 783 nm. Planetscope satellites provide 8-band including 3 m resolution with red-edge sensitivity at 733 – 748 nm.

What makes the red-edge region interesting for analysis?

Studies show that the ratio of reflectances at 750 nm to that near 700 nm is directly proportional to the chlorophyll concentration in the leaves. Chlorophyll plays a crucial role in the photosynthetic processes such as light-harvesting, and thus the content of chlorophyll is a potential indicator of a range of stresses. Moreover, it was shown that red-edge absorption analysis can indicate a problem before the actual reduction in the chlorophyll can be observed. The chlorophyll functioning changes can be detected by the red-edge analysis early on. This precedes the actual losses in leaf chlorophyll concentrations and therefore monitoring such changes can act as an early indicator for the development of biotic and abiotic stress.

Another advantage of analyzing this spectral region is the invariance of the results to changing environmental conditions. The absorption and reflectance of the waves are less sensitive to soil background and atmospheric effects.

Some examples of diseases that their monitoring was studied with this approach are late blight in potato and rice panicle blast.

Healthy vs stressed plant reflection in the red-edge spectral region

Leveraging artificial intelligence to detect anomalies in satellite imagery

After discussing the benefits that can result from monitoring the red-edge reflectance we need to deal with the question of the practicality of this approach. One of the challenges in leveraging spectral analysis in stress detection is to identify the precise patterns in the satellite scans that indicate that the plants are under stress. The use of artificial intelligence in agriculture has been on the rise due to the recent advancements in technology and contributes to the efforts to overcome these challenges. Anomalies are detected using artificial intelligence by making decisions that are based on patterns that were learned from large training datasets.

The progress in the development of early detection tools can become faster once a large volume of high-quality data can be collected in an affordable way. To achieve that we took the crowdsourcing approach and built a tool that allows growers to identify plant pathology based on smartphone-captured images. Growers are directly benefiting from this service while helping to train algorithms for early detection, a capability that can be more beneficial for them in the long term. The geotagged images are used as ground truth and help us to train the algorithms to identify the problems directly from the satellite scan. The computer is presented with satellite scans in which it is known which of the field regions are diseased. We make fast progress as we are able to collect a large volume of high-quality data.

Monitor fields with the Agrio smartphone application
Easy access to agriculture satellite imagery with the Agrio smartphone application

Such data allow us to learn the patterns of the typical reflectance patterns of a large number of different plant problems. We leverage these capabilities to develop easy-to-use monitoring solutions. Farmers that are using Agrio can monitor the health of their fields in a very simple way. All that is needed is to define the field location by drawing a polygon that represents the field boundary. Once this is done we are kicking in to do constant monitoring for you, and notify you when a new scan is available.

On our platform, users can get access to Sentinel and PlanetScope satellite scans. We apply our algorithm to the imagery to monitor crop progress, spot problems in the field, and alert growers when interventions are needed.

We invite you to leverage these capabilities to avoid losses, grow better, and spray less.

Remote monitoring during critical corn reproductive stages

Corn tasseling is the reproductive stage of corn where the tassels, which are located on the top of the plant, produce pollen. The tasseling stage is important for both the yield and quality of corn and extra care should be provided that plants are in optimal conditions at this stage. Despite the potential size of the ear already being determined during the previous growth phase, what happens during this period determines the plant’s ability to express the yield potential. The more pollination that occurs the better the eventual yield will be. Corn reproductive stages should be monitored closely by growers.

Corn tasseling
Corn tasseling

How does satellite imagery help farmers to monitor corn reproductive stages?

The ability to monitor crop progress and spot problems in the field before symptoms are apparent is crucial for a successful harvest. Exciting advancements in technology allow us to capture images of farms around the world with the aid of satellites, thus making monitoring simple and affordable.

In the tasseling phase, the crop is vulnerable to insect infestations and disease outbreaks. This phase lasts between 10 to 14 days and it’s crucial to keep an eye on the crop during this time. With the aid of remote sensing monitoring, we can identify the transition to the tasselig phase very accurately. The accuracy of the analysis is very high if we use satellites that visit the fields on a daily basis as we are able to provide the identification of the phase transition in a few days lag.

To monitor the phase transition we monitor the Leaf area index (LAI). LAI is a measure of leaf surface area per unit of ground area. Corn tasseling prediction based on leaf area index is a technique that uses LAI measurements to estimate when corn will enter its reproductive phase. Monitoring the leaf area index with satellites is a new and innovative way to monitor vegetation. It’s an alternative to traditional methods of monitoring vegetation with ground-based measurement.

Identification of the corn reproductive stages based on satellite monitoring

Once we identified the phase transition we use the satellite scan to monitor the plant’s health. In the tasseling stage, it becomes crucial to inspect the plants’ health very closely. Any stress at this stage will result in irreversible losses and therefore a fast reaction is important. The high frequency of satellite visits is essential. With satellites that monitor the fields on a daily basis, growers can identify problems in the fields very early and prevent spread. The spatial resolution is important as well, and with a 3-meter scanning resolution, we are able to have a better capability to observe tiny changes in the plants’ health indicators.

Farmers that are using Agrio can monitor the health of their fields in a very simple way. All that is needed is to define the field location by drawing a polygon that represents the field boundary. Once this is done we are kicking in to do constant monitoring for you, and notify you when a new scan is available.

On our platform, you can get access to Sentinel and Planet scope satellite scans. With Sentinel we are able to provide 10-meter resolution scans with 3-5 days revisit frequency. PlanetScope is one of the satellite constellations operated by Planet. With daily revisits and 3-meter resolution, we can better deal with clouds interference and track the changes in the fields more closely. We apply our algorithm to the imagery to monitor crop progress, spot problems in the field, and alert growers when interventions are needed.

When a problem is detected in the scan it is important to go and inspect the plants. In the following, we provide a summary of the main problems that growers and crop advisors can expect to see in the corn reproductive stages.

Corn rootworm

Corn rootworm (Diabrotica balteata, Diabrotica undecimpunctata, Acalymma trivittatum, Diabrotica undecimpunctata howardi) larvae that have been feeding on corn roots will emerge as adults during the time from
tasselling through the silking and pollination period. Unsuccessful control of this pest can result in poor grain fill. The parasitic tachinid fly, Celatoria diabroticae is a good biological control option.

Corn rootworm
Corn rootworm

Armyworm

Armyworm can cause significant damage to crops and should be dealt with during the “grain fill” period. Weak plants tend to be stripped by caterpillars before larger, healthier plants. If you see 3-4 or more caterpillars per plant, it might be a good idea to spray insecticides so your crops can reach their full potential.

Prefer planting transgenic plant varieties known as Bt-varieties which have good resistance against this pest. Keep the close surroundings of crops neat by removing weeds, plant debris, damaged parts, unwanted plant growth, and closeby plants that are non-cultivated and unprotected.

Armyworm
Armyworm

European Corn Borer


The European corn borer passes the winter as a full-grown larva in corn stalks and weeds. There is a significant interaction between European Corn Borer and Anthracnose. When both are present, severe stalk damage and lodging can occur. Given the severity of the damages, it might be a good idea to harvest your plants early. This will limit the risk of you ending up with low yields due to your plants getting lodged.

European Corn Borer damages

Common rust

Rust as the name implies creates symptoms that are yellow to orange-brown or rust-colored on the top and bottom sides of infected leaves. Symptoms generally do not appear until after tasseling. The disease is caused by the fungus Puccinia sorghi and have easily wind-dispersed spores that put them among the most mobile plant pathogens around the world.

Rust disease symptoms on corn leaf

Northern leaf blight

Northern corn leaf blight (NCLB) is a fungal disease that often emerges where corn is grown year after year in the same field, especially where there is reduced tillage. NCLB favors high humidity conditions, but it has difficulties developing in extreme temperatures, such as very cold and hot temperatures.

Elliptical, “cigar” shaped symptoms first appear on lower leaves and move up the leaves as time passes. Severe yield loss is expected when outbreaks occur before the silking phase.

NLCB stays dorm in infected plant parts until weather conditions are favorable. NCLB infects newly planted corn through splashing water. Preparing the land with tillage practices and removing the previous season’s corn residue are essential for prevention. The presence of standing water will promote the spread of NCLB. Make an effort and improve areas on the field where water tends to accumulate and form puddles. If possible, cover the ground with polyethylene sheets to reduce water evaporation from the soil.

Northern leaf blight disease symptoms on corn leaf

Eyespot

Eyespot is a fungal disease that is caused by the fungus Aureobasidium zeae. The pathogen overwinters in the residue from corn and therefore make it a routine to clean the field after harvest. Treatment is rarely warranted for eyespot in corn.

Eyespot disease symptoms on corn leaf

Head smut

Head smut of corn is caused by the fungus Sphacelotheca reiliana. When scouting look for ears and tassels that were replaced with smut sori filled with teliospores.

This fungal disease can be common in certain areas. It is advised to treat the seeds with fungicides in such cases.

Anthracnose

Anthracnose in corn is a foliar disease that could be common in fields if they have not been left with corn debris from the previous year. Leaf spots typically emerge on lower leaves during wet, cloudy weather. Symptoms, which are easily overlooked at first, can look like small oval/elongated water spots on leaves. The spots form become tan with light orange to red borders. These spots coalesce and cause leaf blight. You may also notice circles of tiny black dots in the middle of blighted spots – these are fruiting bodies of the fungus. This fungus may also cause severe top dieback and stalk rot.

Other things to be aware of while scouting

  • Check for nitrogen and potassium deficiency by looking at the bottom leaves of plants.
  • Plants might turn purple if the pollination or kernel formation was unsuccessful.
  • Drought-like conditions can cause plants to flower earlier than expected. In addition, such conditions can cause a delay in the silk emergence. Irrigation should be provided if possible. Poor anthesis or pollen shed are other symptoms of drought stress.

Summary

We emphasized the importance of crop monitoring during corn reproductive stages. Monitoring fields with satellites can make our lives simpler as they can help us identify the diseases that are affecting cornfields and the nutrient deficiencies in them. This will help us identify the areas where we need to take measures for prevention. Satellites can also be used to monitor a large number of fields, which is not possible with manual monitoring. This will allow us to get early warnings and exact locations of any potential problems.

Integrated pest management in stone fruit trees in early spring

Integrated pest management is a strategy that farmers can use to combat pests and diseases in their crops. This strategy has been used for many years and is still an effective way to manage pests. In the early 1990s, integrated pest management (IPM) was first introduced in stone fruit trees. It has been used ever since as a way to control the spread of pests and diseases in these types of trees. Farmers have found this method more cost-effective than other methods on the market today.

This article will cover some of the important aspects of Integrated pest management in stone fruit trees and how it can be used to improve productivity and reduce pesticide usage.

Wilsonomyces carpophilus

During the rainy winter months, the fungus attacks the dormant buds and a resin secretion is seen as a result.

The symptoms on the fruit and leaves begin as reddish spots that on the leaves soon become necrotic and dehydrated. Due to this, the inner part of the spot falls, leaving a perforated appearance (shot hole). Young green branches are affected by the disease and develop cankers. Fruits can become deformed.

Remove as much infected plant tissue as possible during the summer. At the beginning of fall, before rains start, spray with a Bordeaux mixture or copper-based fungicide. Repeat application in the spring before and during bloom. Dithianon-based fungicides can be used during the season before rain events.

Shot hole disease
Shot hole disease

Botryosphaeria

The damage can be seen on the branches in the form of gummosis. Prevention should focus on keeping stress factors low and spraying with preventative fungicides after pruning or tissue injuries.

Rust

A fungal disease that causes defoliation and decreases the fruit yield as a result. In the end of each season remove all the affected leaves and clean the orchard. During the spring, preventative fungicides applications are needed if the humidity reaches high levels. Tebuconazole, Myclobutanil, and Cyproconazole can be considered. Applications should be continued in 2-3 weeks intervals until the middle of the summer.

Rust symptoms on peach leaf

Powdery mildew

Preventative spraying applications should be focused on protecting the fruits. Therefore, such applications should be performed right after the pollination and until the fruit kernel hardens. After that protect the foliage by removing plant parts that are highly affected and apply fungicides.

Powdery mildew symptoms on peach fruits

Peach leaf curl

This disease is caused by the fungus Taphrina deformans and affects peach, plum, nectarine, and almond trees. Peaches are the most susceptible crop and hence the name. The pathogen can be found on the host’s branches, buds, and bark. It can survive harsh weather conditions, withstanding summer’s high temperatures and prolonged dryness. At the end of a dormancy period, the fungus activity extends due to significant wetting events. As the weather changes and the flower buds swell, water splashes from irrigation or rain and cause fungus spores to reach the buds. That’s where the infection takes place, despite the fact that no green tissue is present. After the pathogen enters the host, it stimulates cells, which leads to abnormal growth. Visual symptoms first appear as reddish areas on newly emerged leaves. With time, swelling and leaf distortion cause fungus spores to break outside, release into the air, and infect new tissues. As the disease progresses, leaves may fall and be replaced by a new set of healthier leaves if a period of low humidity is present during their development. The loss of leaves during springtime results in decreased fruit production, and defoliation, and could expose branches to sunburn.

Control of peach leaf curl disease revolves around prevention through the use of chemical treatments. Broadly speaking, it is fairly common to perform two spraying treatments that are timed with respect to the physiological phase of growth. It is advised that the first treatment is implemented before buds swell, and the second treatment is implemented closer to the bud swelling process. Dithianon, captan, a copper-based fungicide, and bordeaux mix.

Peach leaf curl
Peach leaf curl

Peach twig borer

Anarsia lineatella (the peach twig borer) overwinters on the tree and the larvae emerge in the early spring. The larvae crawl out of hiding with the swelling of the buds. The pest attack flowers, leaves, and shoots. Later generations feed on fruits as well. It is difficult to monitor for it as it is found mainly in the upper third of the tree. Look for flag leaf withering as a sign of the pest presence. Remove such affected branches to lower the pest population.

At the beginning of the spring Install pheromone traps and check them weekly. Once the peach twig borer moth was captured trigger the biofix and follow the growing degree days model. The Agrio app will monitor the progress of the pest life cycle for you. Treatment should be aimed at the larvae. The monitoring of the emergence of the pest generations will help you time the Bacillus thuringiensis and spinosad insecticides optimally. More information and recommendations can be found in our elaborated peach twig borer post.

Almond bark beetle

Weak and degenerate trees, twigs that have dried up as well as trees that have withstood water should be inspected during the scouting. The beetle, in its various degrees, will be found in the woody parts that were recently dried. Look for rubber secretions as evidence of the presence of the pest. To make monitoring more robust, use pheromone traps to capture the adults. Remove and destroy all the infected wood in order to limit the spread.

Olive scale

Start monitoring after the oil spraying is done. Monitor trees that were infested in the previous season. Apply Neonicotinoid-based insecticides when 70% percent of the eggs were already laid. It is important to remember that repetitive usage of the same insecticides can cause resistance development among the pests and therefore under-optimal results.

European grapevine moth

The European grapevine moth (Lobesia botrana) feeds on the fruit. Look carefully in places in which it is hidden and protected such as under the leaves that cover the fruit. Use pheromone traps to monitor the pest presence more carefully.

Summary

Integrated pest management in stone fruit trees is a way of managing pests and diseases. It involves the use of early detection, preventative measures, and treatment methods to reduce the risk of pests and diseases. IPM is a cost-effective and sustainable pest control strategy that involves monitoring for pests, using pesticides only when necessary, and using natural predators to control the population of pests.

Caution and careful notice should be taken when using any plant protection products (insecticides, fungicides, and herbicides). It is the grower’s sole responsibility to keep track of the legal uses and permissions with respect to the laws in their country and destination markets. Always read the instructions written on labels, and in a case of contradiction, work in accordance with the product label. Keep in mind that information is written on the label usually applies to local markets. Pest control products intended for organic farming are generally considered to be less effective in comparison to conventional products. When dealing with organic, biological, and to some extent, a small number of conventional chemical products, complete eradication of a pest or disease will often require several iterations of a specific treatment or combination of treatments.

Integrated pest management in apple orchards in early spring

Pests are one of the biggest threats to apple orchards because they can cause a lot of damage in a short period of time. As such, it is important that farmers keep an eye out for any pests so they can take preventative measures before it becomes too late. In order to maintain the health of an orchard, it is necessary to have a pest management plan in place. A good plan in apple orchards will include integrated pest management (IPM) practices, which include monitoring pests, taking preventative measures, and early detection.

Growers should monitor pests such as apple maggot flies, pear psylla, and codling moth. These insects can be monitored by looking for their larva in the soil around the trees or by looking for their damage to the trees themselves. Monitor these insects every week throughout the growing season to determine which pest has the most negative impact on your orchard.

Two important fungal diseases that should be considered are powdery mildew and apple scab.

Powdery mildew

Remove as much of the infested branches before the orchard is waking up. Start monitoring before bloom. The first treatment can be combined with spraying against apple scab. Applications should be repeated every 7-14 days until the end of the growth.

Powdery mildew of apple

Apple scab

The disease is caused by the fungus Venturia inaequalis. When bloom starts, inspect the leaves and fruits and look for dark powder stains. Combine systematic fungicides such as Difenoconazole with contact fungicides such as mancozeb. Make sure that the spraying is applied especially before rains. Contact fungicides can be applied right after the end of the rains.

To protect the crop from damages caused by pest insects pay attention to the following insects: Codlig moth (Cydia pomonella), San Jose scale, Leopard moth (Zeuzera pyrina), Almond bark beetle (Scolytus amygdali), Olive scale (Parlatoria oleae), and European red mite (Panonychus ulmi).

Apple scab
Apple scab

Codling moth

Codling moth larvae are one of the most destructive pests. Although it can attack various fruits, it mainly damages apples. This is the main pest of apples and needs to be managed in each orchard. Orchards should be scouted twice a week early in the season and once a week later on.

Use pheromone traps to attract male moths. Traps are made of plastic to create a passage and the bait is placed inside. The inner surface of the bottom is coated with a sticky material to hold insects when they fall into the trap. The traps are hung in on the tree at eye level, one for every two acres of trees. It should be installed before the pink stage of apple bud development and checked every day. A total of five moths captured in the trap is the threshold to set the biofix, this is the day in which growing degree days should start counted. Use the Agrio app to time the insecticide applications accurately.

Codling moth
Codling moth

San Jose scale

Install pheromone traps and sticky tapes before blooming begins. The pheromone traps should be located in the canopy, protected from the wind. Lures should be replaced monthly. Monitor these traps regularly looking for adult males. Once males are captured set the biofix date to start tracking the crawlers emergence. Apply treatment aimed at crawlers. Make sure that the spraying covers the entire tree. Reinstalll the traps to track the emergence of following generations.

Olive scale

Start monitoring after the oil spraying is done. Monitor trees that were infested in the previous season. Apply Neonicotinoid-based insecticides when 70% percent of the eggs were already laid. It is important to remember that repetitive usage of the same insecticides can cause resistance development among the pests and therefore under-optimal results.

Leopard moth

The larvae burrow in the wood skeleton and cause degeneration and destruction of the wood. Identify active burrows and pull the larvae out with a thin steel wire. The sawdust should be scattered under the tree to allow identification in the case of renewed activity. Traps can be used to capture the female moth. Traps with pheromone should be hanged near wooded areas. Install sexual disruption as it is very effective against this moth.

Almond bark beetle

Weak and degenerate trees, twigs that have dried up as well as trees that have withstood water should be inspected during the scouting. The beetle, in its various degrees, will be found in the woody parts that were recently dried. Look for rubber secretions as evidence of the presence of the pest. To make monitoring more robust, use pheromone traps to capture the adults. Remove and destroy all the infected wood in order to limit the spread.

Summary

Integrated pest management in apple orchards is a way of managing pests and diseases. It involves the use of early detection, preventative measures, and treatment methods to reduce the risk of pests and diseases. Integrated pest management in apple orchards is a cost-effective and sustainable pest control strategy that involves monitoring for pests, using pesticides only when necessary, and using natural predators to control the population of pests.

What farmers need to know about pesticide weather considerations

There is a limited amount of time to control plant pests and diseases. As the time window opportunity might be even shorter due to unsuitable weather conditions, applicators need to be able to identify and plan accordingly. Pesticide weather considerations play a huge role in pesticide application timing. It can significantly impact the amount of pesticides that are sprayed, their effectiveness, and the risk of causing harm to the plants and the environment. We provide a hassle-free ‘Delta T spraying scheduler’ designed to simplify your decision-making process.

The four key pesticide weather considerations for pesticide application success

The four key weather factors that affect pesticides are temperature, wind, precipitation, and humidity. The worst weather conditions for applying pesticides are strong wind, high temperature, intensive rain, and low humidity. The wind is a crucial factor because it affects how pesticides move through the air; The wind can carry agricultural pesticides far away from where they were sprayed, making them drift onto other people’s property. This decreases the effectiveness of the spraying and increases the risk of polluting the environment and harming people living in nearby areas. This is why farmers must take into account wind direction and speed when spraying their fields with agricultural pesticides in order to reduce spray drift.

Precipitation and humidity can also change how pesticides are distributed, but it has a more minor effect than wind. Temperatures of air and surfaces are important factors in the efficacy of pesticides. Different chemical compounds have different temperature ranges at which they are most effective. For example, the insecticide pyrethroid is most effective at temperatures higher than 50°F.

Spraying pesticides outside is not recommended when there is more risk for a high evaporation rate, degradation, and extended droplet lifetime. The degradation of pesticides can increase when the humidity is high. High humidity also decreases evaporation, resulting in extended droplet lifetime and increased drift risk. These also play an essential role in safety. Higher concentrations of pesticides in the air can lead to potential health risks for workers and nearby residents. Some pesticides are more sensitive to temperature changes than others. In warm weather, humidity should allow good evaporation conditions. This will ensure that the pesticides have less time to break down into toxic compounds while contacting the plants. Decisions on spraying in such cases become challenging as high temperatures make plants more vulnerable to pests and diseases. Their natural defense systems break down and become more susceptible to pests and diseases like fungi and insects. Therefore, applicators need to carefully choose the timing of spraying to protect plants in such weather conditions.

A better way of telling how quickly pesticide droplets evaporate is the Delta T spraying indicator. Delta T is the difference between wet and dry bulb temperatures, which can be calculated by combining the effect of temperature and relative humidity.

Delta T spraying model shows the preferred spraying conditions

Growers should also pay attention to the inversion phenomena. Inversion happens when the temperature increases with the distance from the ground. Spraying should be avoided in this case as the risk of drifting pesticides long distances is high. The inversion hazard is often highest from dusk to a few hours after sunset and weak at sunrise.

Rainfall can have a significant effect on the efficacy of pesticides. Rain has been shown to reduce pesticide washout in some instances and increase pesticide washout in others. The primary function of systemic pesticides is to be taken in by the roots, but the rain needs to be relatively light for this to happen without the effect of washing the active material away from the plant surrounding. In general, the plant will absorb most of the systematic pesticide solution within about 2-4 hours. Therefore, it is essential to know how long you need to spray before the rain starts in order to get an acceptable level of control. In the case of contact pesticides, rains can wash out the active ingredient and damage the protective and curative effect that was intended.

Pesticides can be applied as a liquid, powder, or gas. The pesticide used depends on the crop and pest to be controlled. The method of application should be added to the set of considerations when weather conditions are considered. For example, herbicides can evaporate at a greater rate when sprayed under high temperatures, while fungicides can freeze at lower temperatures.

Generally speaking, the best time to spray is early morning or late evening when there is little wind, and the temperature is cool. In the case of insecticide, the evening is preferred as the interference with bees is minimized.

How technology can help you with timing spraying

Agrio allows you to use hyper-local weather monitoring to obtain more precise information about the climate in your fields. It is the practice of collecting and analyzing weather data at a very specific and localized location. This is in contrast to traditional weather monitoring, which typically involves collecting data from large weather stations. Hyper-local weather monitoring is useful because it provides much more detailed and accurate information about the weather at a specific location than can be obtained from larger-scale weather monitoring systems.

With constant hyper-local weather monitoring and forecasting, we can show you the best spraying opportunities in the Agrio app. We save you time and present you with this information when you decide on a spraying application. In addition, our weather forecasts update every hour, so you can stay updated when forecasts are changing.

Intervention scheduling. Red - don't spray | Yellow - Spraying conditions are not optimal | Green - Good conditions for spraying
Intervention scheduling. Red – don’t spray | Yellow – Spraying conditions are not optimal | Green – Good conditions for spraying

Once a spraying strategy is planned, we help you keep a record and send you reminders in due time.

Track field Interventions

Summary

Pesticide weather considerations should be taken seriously before planning spraying applications. Using weather predictions to optimize treatment timings is an essential tool that will help you to optimize pest and disease control in your fields. We look forward to seeing you leveraging this technology for intelligent and effective pest management in your field. 

In the meantime, as always, we wish you an abundant harvest.

Crop scouting app with the aid of artificial intelligence

Farmers and crop advisors share a common goal of maximizing crop yield. They need to work together to make sure that all interventions are coordinated, which is where digital crop scouting app comes in handy. With the aid of artificial intelligence, we created an app that allows crop advisors to record their insights in the field with a minimum of typing. The result is a scouting report that can be prepared fast and completed while the advisors are still in the field. Tailored for ag retailers, agronomists, co-ops, and farms, our agronomy management solution is a game-changer in agricultural protection and productivity.

Agrio also enhances communication between crop advisors and improves how they deliver their insights to growers. Although many communication channels already exist, there is a need to equip crop advisors and farmers with a dedicated crop-scouting app that makes agronomy-related communication easy.

As a grower, whether you scout the field or hire a crop scout to do it for you, a digital tool helps you keep things in order.

Agrio | Collaborative crop scouting tools for better farm management
Collaborative crop scouting tools

Our application revolutionizes field scouting by integrating advanced features. Users can import satellite imagery for comprehensive field analysis, capture photos, and annotate maps for detailed observations. The app supports creating and scouting unlimited fields, ensuring scalability for any size operation. Its offline functionality allows for uninterrupted scouting in remote areas. A standout feature is the ability to consolidate observations from multiple scouts, providing a holistic view of field conditions. Scouting reports can be generated and shared directly from the mobile app in PDF format, enhancing communication and efficiency. Additionally, users have convenient access to historical scouting data on the go, offering valuable insights over time.

Create and share PDF reports

Collaboration capabilities at the team level

In the past, collaboration was only possible as part of Agrio’s Workgroup, which is intended for large groups of growers such as farming cooperatives. We made it possible for Agrio users to collaborate on a single field. Farmers and crop advisors can examine remote sensing insights, alerts, and information collected during the inspection process. Moreover, they can assign plant protection-related tasks to each other and coordinate interventions in a simple way.

Create geotagged notes on the map that your team can review

Team members are notified once satellite scans, preventative suggestions, and recommendations are ready for review. Members can examine and analyze these inputs and inspect the places in the fields requiring attention. The scouting tasks can be assigned to the group members. Members are notified once the fields are scouted and observations are uploaded to the system.

How a crop scouting app can improve your productivity

In the field, inspectors can use our crop scouting app to create geotagged digital scouting reports. Agrio helps you to create notes and capture photos as you scout your field. The artificial intelligence analyses the images and recordings and makes suggestions to be added to the reports.

The personal assistant helps pest inspectors prepare reports faster.

Team members can see the observations collected, get updates on the parts of the fields inspected by other team members, and plan the scouting route accordingly. Discussions on the required interventions are becoming easier within the groups.

AI-based crop scouting app

Team members can define tasks, such as trap checking, for example, and be notified once other members complete tasks. Pesticide applications, fertilization, irrigation operations, and other interventions can be quickly recorded using the field calendar. Moreover, we use this information to send you reminders and let you know when we have insights on which interventions worked better. Use this tool to create experiments with different interventions and monitor their progress.

Agrio | Crop scouting app

The scouting reports can also be shared with growers not using Agrio. You can create a pdf or a link to an interactive web-hosted report that can be sent via email or message.

Share interactive reports with growers

Fast insight recording and sharing are essential for proper plant protection and farm management. We are excited to offer farmers and field inspectors our crop scouting app and look forward to progressing in the field of agriculture together. We wrote a short manual to help you get started; you are invited to have a look. See you on the app!

Growing degree days calculator for pest management optimization

With integrated pest management (IPM), monitoring crops and correctly identifying pests demands well-trained experts. Choosing one treatment over another is based on a set of factors that include the pest’s identity, the size of the pest population, the pest maturity stage, and the environment. If treatment is to be applied, it should be scheduled to make the most economic sense. Whether you are an agronomist, farmer, or gardener, tracking the growing degree days (GDD), also known as growing degree units, can take your plant protection skills to a new level. Luckily this operation, which is considered cumbersome, and requires phenology modeling understanding, is becoming very simple with the growing degree days app we offer. Agrio acts as a growing degree days calculator and makes your life easier.

What are growing degree days?

GDD is a measure used to calculate the amount of heat required for the development of organisms (such as insects) in each stage of their growth. GDD is used to predict insects’ migration, egg hatching, fungal spore development, sexual maturity, and more. Operations that aim to reduce the population density of a pest need to coincide with the high presence of the most susceptible life stage of the species in the field. With insects, GDD can help us time the vulnerable stages of certain insects, such as the hatching of eggs of a particular pest. Compared with using the calendar method to estimate the organism stage, GDD is a more accurate method.

Each organism may require a different amount of accumulated heat to develop from one life stage to another. Phenology models are being developed and tested in laboratories and field experiments to provide accurate life cycle predictions. However, such procedures are expensive to conduct, and therefore the phenology models of many organisms are not readily available. Large-scale observations made by growers worldwide and reported on the Agrio platform is an easy way that allows the development and update of such models.

Combining a weather forecast with a rigid phonology model brings a new level of sophistication to pests, diseases, and weeds management.

Growing degree days formula, growing degree days base temperature, and development thresholds

Phonology models predict the effect of temperature on the growth and development of biological organisms. Experiments show that there is a range of temperatures in which development is possible. The lower and upper developmental thresholds are usually used. When the temperature is below the lower developmental threshold (growing degree days base temperature), the organism is not expected to develop further. The upper developmental threshold is generally regarded as the temperature at which the growth rate starts to decrease. The growing degree days base temperature and upper threshold are determined through experiments and are unique to a specific organism.

Set the biofix to initialize the GDD calculator

The accumulation of growing degree days starts at the biofix (biological fix) date. The biofix can be a biological event or a calendar date that makes the organism’s survival possible. In case of a biological event, growers must scout their fields to time the event’s occurrence. In some cases, trap installation and frequent examinations of the traps are needed to set the biofix accurately.

In many situations, the biofix is set based on the development stage of the plant. Satellite monitoring and weather models help us to forecast the plant stages for you. We send detailed information regarding scouting recommendations in every stage of the growth.

Area-wide Integrated Pest Management

Once precise methods are followed to decide on treatment schedules, there are vast options that become possible. One of the exciting possibilities is the alignment of treatment schedules in different farms and gardens. Communities of growers can consider the practice of Area-wide integrated pest management, which is the paradigm in which pest control decisions and timing are coordinated in many fields occupying a wide area. This approach is especially practical for mobile pests as it provides better control of pests in broad areas by eliminating the pest migration between fields.

Growing degree days calculator and growing degree days app

Agrio makes precise hyper-local weather forecasts readily available to all growers. These state-of-the-art weather prediction models provide our growers an hourly hyper-local weather forecast designated specifically to their unique area anywhere in the world; the forecast is provided at a 3km resolution, so it is specific to their fields and gardens.

There is no need to check the growing degree days accumulation based on your zip code. We help growers abandon cumbersome excel sheets and complicated growing degree days formulas and instead rely on our algorithms to do the GDD tracking for them.  We compute the accumulation of the growing degree days based on hourly temperatures instead of the more common practice of averaging the day low and high temperatures. This guarantees more accurate results. We manage the entire process for the grower in the following way:

  • The home screen’s daily briefing instructs growers on the required scouting operations and interventions in their fields. These are updated in real-time with the progress of the growing degree days accumulation, observations in the field made by the grower, and observations made by the community members in relevant proximity.
  • Agrio instructs growers when and how to set the biofixes promptly. We provide elaborate information on trap installation and maintenance as well.
  • Agrio tracks GDD according to multiple phonology models corresponding to different pests, diseases, and weeds in different fields or gardens that a grower manages.
  • We use big-data to optimize our predictions and offer phenology models particular to the different locations. We validate our phenology models continuously and adjust them when and where it is needed.
  • We coordinate area-wide integrated pest management operations and present users with the optimal IPM treatment on time.

The codling moth growing degree days calculator and model

To demonstrate how this technology can help growers, we want to discuss the tracking of growing degree days for a specific example. We will discuss the management of the codling moth in apple orchards.

Codling moth larvae are one of the most destructive pests. Although it can attack various fruits, it mainly damages apples. This is the primary pest of apples and needs to be managed in each orchard.

A trap for codling moth
Codling moth larvae
Codling moth larvae
Codling moth
Codling moth

To monitor the presence of adults in the orchard, growers need to install pheromone traps. The trap’s purpose is to attract male moths, and they should be installed before the pink stage of apple bud development. The trap’s inner surface is coated with a sticky material to hold insects when they fall into the trap. Traps should be checked by growers every day, and the trapped moths should be counted in each area separately. A total of five moths captured in the trap is the threshold to set the biofix; this is the day on which growing degree days will start to be tracked by the app. The accumulation of growing degree days is used to predict when egg hatching will occur and when pesticide application will be most effective.

Before the pink stage of the apple buds development, Agrio notifies growers that pheromone traps should be installed. The information page provides all the required instructions for the installation. In addition, the information page instructs the grower on what requirements need to be satisfied to set the biofix.

Growing degree days model | Daily briefing screen
Growing degree days model | Biofix requirements
Growing degree days model | Treatment instructions

Once the biofix is set, Agrio starts to track the GDD and shows an estimation of the time until the next spraying is due; growers should stay tuned and follow the instructions in the daily briefing section on the app. Notifications are sent as a reminder when important events are near. Growers can use our image identification capabilities if help is needed with the trap analysis, as precise moth identification can be challenging. The aim is to spray when the eggs are hatching; this is when growers will be notified with information on the required intervention.

The colorado potato beetle growing degree days calculator and model

Colorado potato beetle | weather-smart treatment plan

The Colorado potato beetle is a pest that can destroy potato, eggplant, and pepper crops. If it is not controlled, the beetle will reproduce rapidly and cause damage to the plants. The life cycle of the potato beetle can be predicted by using a weather-based model. It is essential to know the vulnerable period of the pest to determine when it is time to spray. This can help in controlling the pest population and reducing pesticide use. The life cycle of this pest can be predicted by using weather-based models. This model predicts the optimal time to apply pesticide treatments.

Female adults produce hundreds of eggs each year. The eggs are usually bright yellow to orange and typically found in clusters of ten to thirty on the underside of leaves. The model estimates when frequent scouting needs to be started to find signs of the eggs’ presence. Growers are notified and asked to confirm the eggs’ presence to start the life-cycle tracking.

The larvae should hatch from the eggs in 4-9 days, depending upon the temperature of the air. After this, they will molt three times before they pupate. These immature phases are called instars, and there are a total of 4. Biological treatment is effective against the first-stage larvae, and chemical spraying should be timed to the emergence of later stages. The number of pest generations in one season is also weather-dependent, and the model will estimate it for you, too.

Summary

We are adding new crops and new pest models regularly. Please write to us and tell us which pests you want us to prioritize, and we will make the Growing degree days calculator available for you.

Using growing degree days models can be a valuable tool in agricultural practices, as they can help you to understand the development of pests and crops better and make more informed decisions about pest control and crop management. Monitoring growing degree days helps eliminate the guesswork in determining the time required for control measures.

Luckily technology makes the process of using these practices easier. You can use Agrio as your growing degree days app, and all the calculations will be done for you by our software. We look forward to seeing you leverage this technology for intelligent and effective pest management in your field. 

In the meantime, as always, we wish you an abundant harvest.

Hyperlocal agriculture weather forecast for better farming

From sowing to harvest, the weather is one of the key factors for a successful yield. A hyperlocal agriculture weather forecast is an essential tool for growers who want to ensure healthy and productive crops. Luckily farmers’ weather apps improved considerably in recent years, and a hyperlocal weather app is available free of charge to provide you with live local weather.

Weather conditions affect crops from seed to fruit and should influence the decisions growers make to maximize quality and yield. Irrigation, pest and disease management, and other aspects can be optimized if planned accordingly. Weather conditions can also dictate how and when fieldwork can be done, and it can change (or even prevent) harvesting.

In this article, we will discuss the important weather considerations during the growing season and describe how technological advancements allow farmers to derive weather-wise plans and stay up-to-date with agriculture weather forecasts like never before.

Temperature considerations for planting and harvesting

Plant development is strongly influenced by ambient temperature exposure. Generally speaking, warmer days advance the growth of plants, while cooler days stunt growth. The accumulated degrees above a threshold (the base temperature) are called the growing degree days (GDD). This is used to estimate the growth of certain plants during the growing season. The method is considered a more accurate estimation of plants’ growth stage compared to the plants’ age. Tracking the GDD can help growers decide on the timing for fertilization and harvesting.

On the other hand, in some plants, winter dormancy release depends on having a sufficient number of accumulated chill hours, as in apples or grapes. If the temperature does not drop low enough, the release from dormancy and subsequent plant flowering may become weak and uneven. In the absence of optimal conditions, the grower needs to apply chemicals to “wake” the plants and induce uniform flowering.

When sowing, several questions need to be addressed. Has enough water accumulated in the soil for seeds to sprout and develop? Are the days following the sowing going to have enough sunlight? Is there a danger of frost? Also, in certain crops, the temperature at the time of the harvest is important. For example, the sugar content and composition of wine grapes is more stable at lower temperatures so grapes are often harvested at cooler times of the day. 

Accurate long and short-term agriculture weather forecasting is a crucial tool for growers when planting and harvesting timing needs to be planned. 

Year after year corn development differences as monitored by hyperlocal weather models. In the example above we compare the development of corn in the same field in different years. Notice the slower growth of the crop that was sowed in August 2021 compared to August 2020. In particular, the transition from the 7-leaves stage to 5-inch tassels took 18 days longer in 2021 due to less favorable weather conditions.
Year-over-year development differences of corn as monitored by hyperlocal weather models. In the example above, we compare the development of corn in the same field in different years. Notice the slower growth of the crop sowed in August 2021 compared to August 2020. In particular, the transition from the 7-leaves stage to 5-inch tassels took 18 days longer in 2021 due to less favorable weather conditions.

Weather-wise irrigation planning

Once the field is sowed, weather forecasting helps growers optimize growth conditions. Weather forecasting can help plan efficient irrigation schedules that save water and reduce irrigation dependency. Knowledge of hot and dry days can be anticipated to allow adequate irrigation that prevents plant stress. Other factors such as temperature, humidity, sunlight intensity, and wind are important as well, as water loss from the evaporation from plants and soil (known as evapotranspiration) is affected by these factors. The large amount of variables that can change, and the high frequency of their change, make planning efficient irrigation schedules complex. Keeping track of rain and evapotranspiration through technology provides an easy and practical way to develop precise irrigation plans that continuously update as weather conditions change.

Hyperlocal agriculture weather forecast for better pest and disease management

Not only do weather conditions dictate plant behavior and development, but weather conditions also strongly influence the emergence and development of pests and diseases, such as the migration of insects, egg hatching, fungal spore development, sexual maturity, etc. 

Combining a weather forecast with the knowledge of the evolution of specific pests or diseases brings a new level of sophistication to pest and disease management. Weather predictions and GDD are used to predict when pest emergence is likely to occur. Growers then know when to look for pests and how to time the application of preventative measures and pesticides optimally. For example, the adult moths of the European Corn Borer typically start to appear and mate around spring, when the weather starts to get warmer. The eggs are laid on the underside of host plants, and within several days, they hatch as larvae and start feeding. By calculating the GDD, a grower can predict moth emergence and apply preventative measures when the pest is most vulnerable (and before damage has been done).

Smart weather-based planning can also prevent wasteful applications of pesticides and fertilizer. A chemical pesticide or fertilizer applied right before rain can be washed away and will have little or no effect. Pesticide applications on windy days are also situations to avoid, as the wind can have an adverse effect on the dispersal of pesticides and even cause damage in nearby fields due to the drift. Spraying should be avoided when wind speed is above 15 km/h. 

The temperature should also be taken into consideration when deciding when to spray because of several factors, such as the potential for droplet evaporation, risk of phytotoxicity, and more. In general, spraying pesticides should be avoided if temperatures are above 30 degrees Celsius. 

Relative humidity in the air is another important factor influencing droplet evaporation. Spraying should be avoided when humidity is low.

Knowing the right days to apply pesticides and fertilizer may make a difference between healthy and unhealthy fields.

Hyperlocal weather forecast improves farmers’ weather app capabilities

Several methods for weather forecasting are used by growers. These include large, regional weather stations that are based on a great deal of information and provide granular, low-resolution information to on-premise weather stations that are more area precise but are relatively expensive and require installation and maintenance. 

Better, faster computers and finer measurement tools have made meteorological modeling precise and weather forecasting more reliable than ever before. Observations such as temperature, humidity, and wind characteristics are gathered from different sources like weather stations, weather radars, and aircraft, which are then fed into computers to produce weather forecast simulations. The more accurate and abundant the input is, the more precise and localized the forecasts are. The increasing power of computers allows for frequent forecast refinement that results in high-resolution predictions in space and time. 

Such technological advancements make it possible to provide growers with high-resolution forecasts in an affordable way, even in rural, low-income nations that do not have access to weather measurement devices or affordable local weather stations. These new methods are important because they can predict the microclimate at the level of the field, allowing growers to prepare and plan ahead.

Agrio is a hyperlocal weather app that helps you to plan ahead

Combining weather forecasts and agricultural knowledge can have powerful outcomes. Agrio makes precise, hyperlocal weather forecasts readily available to all growers. Our prediction models combine weather measurements and observations from different sources. These state-of-the-art weather prediction models provide our growers with an hourly hyper-local weather forecast explicitly designated to their unique area anywhere in the world; the forecast is provided at a 3km resolution, so it is specific to their fields and acts as a great farmers’ weather app.

precise, hyper-local weather forecasts easily available to all growers
hyperlocal weather forecast app

By leveraging technological advancements, we help growers abandon cumbersome excel sheets and instead rely on our algorithms to track them. 

Agrio provides live local weather together with several dedicated features that allow growers to:

This allows growers to plan an efficient growing season and spraying schedule, save money, and grow stronger and healthier plants. We look forward to seeing you leverage this technology for smart and effective weather interventions in your field. 

In the meantime, as always, we wish you an abundant harvest.

2 Big Reasons to Implement Crop Rotation in Your Next Growing Season

Crop rotation is the practice of growing different crops in a sequence on the same field and it has been used as an important tool to improve farming since the early days of agriculture. In this practice, each crop serves a different purpose in the order of rotation. The crops are categorized into two main groups: Feeder crops and cover crops. Feeder crops deplete the soil nutrients, whereas cover crops are used to restore the soil, green manure, and prevention of erosion. 

The main benefits of crop rotation are disease and pest management and preservation and restoration of soil health. Though, there are additional benefits such as reduced reliance on chemicals and cattle grazing that will not be discussed in this scope.

Feeder crops

Chenopodiaceae (e.g. spinach, beetroot)
Brassicas (e.g. broccoli, cabbage)
Cucurbits (e.g. cucumber, melon)
Solanaceae (e.g. tomato, potato)
Alliums (e.g. onion, leek)
Corn

Cover crops

Legumes (e.g. alfalfa, beans)
Grasses (e.g. sorghum, oats)

Beetroot is an example of a feeder crop

Managing Pests and Diseases with Crop Rotation

Pests and diseases are one of the biggest challenges to growers worldwide. The good news is that crop rotation can help combat pests and diseases by interrupting life cycles and altering pest habitats.

The spread of pests and diseases can be inhibited by understanding their life cycle. Fungi, bacteria, insects, nematodes, and even viruses have specific hosts that can be removed and habitats that can be made less favorable to them. This can help disrupt and reduce the population of pests and diseases. 

For example, if a potato field has a Colorado Potato Beetle infestation, alfalfa can be planted in the following season to reduce pest pressure. What would planting alfalfa in this case achieve? Well, during the growing phase, the beetle will lay its eggs in the field. The eggs would hatch in alfalfa plants, which are not viable hosts for the beetle. This means that the larvae population will be greatly reduced because of its lack of mobility (in the larvae stage the pest doesn’t have wings). By altering the beetle’s habitat, and interrupting its life cycle, prevention of a buildup of the beetle’s population for the next planting season is achieved.

If the grower were to grow potatoes in neighboring fields, it would reduce the effectiveness of using alfalfa for crop rotation because the potatoes would act as a temporary host for the beetle. Beetles can migrate back to the main field the following season when the potato crop is planted again. 

While the alfalfa is grown in the field as a cover crop, weeds from the solanaceous family (such as nightshade) may host the beetle. Thus, weeds can also function as potential transitional hosts and act as temporary hosts for the beetle. Such challenges among others can hinder the effectiveness of crop rotation.

Growers can achieve higher yields by having a good understanding of the biology of pests and diseases. Does the pest or disease have a wide or short range of hosts? How long can the pest or disease survive without a host? How mobile is it? These and other questions need to be addressed when planning crop rotation for pest and disease management. Additionally, by relying less on conventional chemicals for pest management, there is less chance of the pests and diseases developing resistance which leads to a higher success rate of eradicating the problem. 

The colorado potato beetle

Preserving and Building Soil Quality

While crop rotation implications on plant protection is an important consideration for its own sake, growers need to pay attention to soil quality. Years and years of intensive single-crop farming can exhaust the soil, deplete its nutrients and damage the microorganism ecology. This can reduce yields, increase the need for fertilizers, and increase soil pathogens that damage the plants. How can crop rotation help build good soil health?

Some crops are known to be beneficial for soil health; these are known as cover crops. Cover crops promote soil health and structure, return nutrients to the soil, and contribute to the soil ecology. 

Potato is an example of an exhaustive crop, which means that soil’s nutrients can be depleted after growing potatoes consecutively. Growers can prevent exhaustive crops from depleting soil by planting cover crops. In this case a legume such as alfalfa.

Why legumes? Legumes are known to be restorative crops. Legumes have symbiotic relations with bacteria in their root system that capture atmospheric nitrogen and return it to the soil in a form that is available to the plant. Legumes also have a deep taproot which is used to recycle nutrients that are deeper in the ground. 

Grasses can be used as cover crops as well. Grasses have wide fibrous root systems that secrete substances into the soil and promote soil aggregation. This process stabilizes the soil and improves aeration. Their roots also decompose slowly and act as a source of slow-releasing nutrition.

What makes cover crops even more interesting is the fact that they can be used as green manure. At the end of the season cover crops can be cut up or left to decompose in the soil. Doing so adds rich organic substance to the soil and promotes soil health. However, the usage of green manure should be planned carefully as the decomposing plant material may be a source of inoculation and the spread of pathogens.

Using legumes, grass or even leaving the soil fallow for some period can greatly benefit soil health. It can return nutrients, promote soil microorganisms, and better the soil structure.

The nitrogen cycle

Nitrogen fixers from the pea family (peas, beans, and clover) increase the level of nitrogen in the soil. Nitrogen is the most abundant in the atmosphere, but in its atmospheric form, it cannot be utilized by plants. To make it available to plants, we need the help of bacteria that have the ability to absorb atmospheric nitrogen and output ammonia. Other bacteria can consume ammonia and create nitrite and nitrate. These three forms of nitrogen are available to plants. Symbiotic connections of fungi with the root system allow plants to absorb these molecules even if they are not nearby.

Nitrogen gets depleted from the soil by volatilization, a process in which gas escapes the soil and returns to the atmosphere. In addition, nitrogen in different forms can be washed away by water (leaching). Moreover, there are other bacteria that, in anaerobic conditions, consume nitrate and release nitrogen back into the atmosphere (denitrification).

The nitrogen-fixing plants create an ideal habitat for the bacteria that accomplish the nitrogen-fixing process described above. After the plant dies, the bacteria are released into the soil, increasing the bacteria population in an accumulative way.

The environmental benefit is due to the fact that fixed nitrogen is considerably less prone to washing effects and volatilization. Nitrogen from synthetic fertilizers is not attached to biological organisms and can be washed into water bodies such as rivers and change the ecological balance. In addition, it more easily escapes to the atmosphere as nitrous oxide, a contributor to climate change.

Planning out a crop rotation

Poor yield, heavy fertilizer reliance, and high pest and disease pressure should incentivize growers to make plans for crop rotation.

Planning of the crop rotation can be divided into several steps:

  1. Deciding which cover crops are available to be used based on location and climate, local market trends, and the season of the available field.
  1. Deciding when to plant the cover crops. Ask yourself how often you can afford to rotate and what type of rotation. Are you going to plant only in the off-season, or have several consecutive seasons of cover crops?
  1. Deciding which cover crops to use: legumes or grasses. Both legumes and grass have relatively low nutrient demands and can be used as green manure. Other considerations that should be taken into account include their main benefits:

Legume benefits:

  • Important in the process of atmospheric nitrogen(N) capturing.
  • Recycles nutrients from deeper soil.

Grass benefits:

  • Promotes soil aggregation and aeration.
  • Acts as a source for the slow release of organic material.
Alfalfa fixes nitrogen in the soil

What Else?

The root systems of cover crops hold the soil together and stabilize its structure which prevents strong rain and storms from causing soil erosion. Cover crops promote a diverse field that can combat weeds and might even suppress weed growth. In addition, rotating with a crop allows for easy weed control and gives growers an opportunity to reduce the build-up of weeds.

When used correctly, crop rotation can be an effective and powerful tool to add to crop management. Its benefits can be wide and long-lasting for managing pests and diseases by interrupting life cycles and altering habitats, preserving and promoting soil health and stability, and enriching the microorganism ecology of the soil.

We can help growers to be better, greener, and more effective. 

  • Our platform helps growers keep records of the crops in their fields.
  • Our database can help growers plan a crop rotation by providing a historical account of pests and diseases in the region.
  • Our resource library provides detailed information on the life cycle and range of hosts for pests and diseases in accordance with specific crops and locations.
  • Our system generates end-of-season crop cover recommendations.

We are looking forward to seeing you apply this information to build a smart, effective crop rotation in your field. In the meantime, as always, we wish you an abundant harvest.

Crop monitoring app that helps mapping chlorophyll remotely

A crop monitoring app that helps to monitor crop progress and spot problems in the field before symptoms are apparent is crucial for a successful harvest. In this article, we want to discuss how mapping the spatial variability of leaf chlorophyll content (LCC) within fields can help in spotting plant health problems and differing quantities of nitrogen fertilizer application.

The leaf chlorophyll content is an important indicator of plant health, photosynthetic potential, and nutritional state. Although extraction analysis by field sampling provides an accurate estimation of LCC status, such methods are not practical. Non-destructive remote sensing measurement offers an affordable, and frequent way to monitor crops and assess the LCC of plants over fields in high resolution.

The leaf nitrogen content is strongly correlated with chlorophyll content. The optimum rate and application timing of nitrogen fertilizer is crucial in achieving a high yield. Monitoring the chlorophyll index allows variable-rate fertilizer application and site-specific crop management.

Weather and soil conditions are major factors in the rate at which nitrogen is escaping the soil system to the atmosphere, and therefore the fertilization needs cannot be easily predicted. New ways to observe fields can reduce the grower guesswork when mid-season fertilizer application decisions are made, it is an important decision since the costs of nitrogen can make the difference between a profitable season to an unfavorable one

Why the normalized difference vegetation index (NDVI) is not suitable for this task? NDVI shows a low correlation with the chlorophyll content, it is more severe in advanced growth stages when the NDVI becomes saturated. This saturation is due to the increase in the leaf area, and the density of the canopy structure. In this stage, there is a need to monitor an index that is highly correlated with the leaf chlorophyll content and less sensitive to the leaf and canopy structure.

Farmers that are using Agrio can monitor crops and the chlorophyll index of their fields in a very simple way. All that is needed is to define the field location by drawing a polygon that represents the field boundary. Once this is done we are kicking in to do constant monitoring of your crop for you, and notify you when a new scan is available. 


Monitoring crop condition - evolution of chlorophyll content in the growing season
evolution of chlorophyll content in the growing season


We expect a scan to be available every few days, but when the sky is cloudy a clear shot of the field is not possible and we need to wait for the next time that the satellite is passing above your field. On our platform, you can get access to Sentinel and Planet scope satellite scans. With Sentinel we are able to provide 10-meter resolution scans with 3-5 days revisit frequency. PlanetScope is one of the satellite constellations operated by Planet. With daily revisits and 3-meter resolution, we can better deal with cloud interference and track the changes in the fields more closely.

Early detection of plant disease based on the chlorophyll index with the aid of crop monitoring app

We do the image analysis and alert you when we find anomalies

Wondering how your last field intervention affected the plants? Did you manage to improve the health of the plants? Do the leaf area and chlorophyll concentration show improvement? You can monitor such changes by selecting the “compare” tab. We compare your subsequent satellite scans to show you the change in a 3-5 days resolution.

Compare subsequent satellites scans to monitor progress

Take a big leap forward in your farming practices by engaging with the Agrio remote sensing technology. We are looking forward to helping you monitoring your crop.

In the meantime, as always, we wish you an abundant harvest.

Monitoring agricultural fields with satellites

Monitoring agricultural fields tracking progress, and spotting problems in the field before symptoms are apparent is crucial for a successful harvest. Exciting advancements in technology allow us to capture images of farms around the world with the aid of satellites, thus making monitoring simple and affordable. The most popular vegetation index that is being used by farmers is the Normalized Difference Vegetation Index(NDVI), it is an indicator of the health of the plant based on a reflection of different light waves.

Satellite monitoring in agriculture is a technique that has been used for many years. However, the use of satellite technology to monitor agricultural fields has increased significantly over the past decade. The use of satellite monitoring in agriculture can increase yield, improve precision, and early detection of issues with crops.

NDVI is a remote sensing method for estimating crop health and biomass. The NDVI index measures the difference between visible and near-infrared reflectance of the vegetation. Crop reflectance depends on leaf area, chlorophyll content, age of leaves, canopy density, and soil type. NDVI is often used with satellite imagery, which provides high-resolution images from space. The use of satellites has helped to make NDVI more accessible to farmers all over the world because it is accessible to anyone with an internet connection. The use of NDVI for crop health monitoring has been around for decades, but it has only recently gained popularity due to the use of satellites and high-resolution aerial photography that provide frequent revisits. It provides an accurate estimate of plant biomass and leaf area index (LAI) without needing any ground data collection or manual interpretation.

Farmers that are using Agrio can monitor their agricultural fields, and track the NDVI index in a very simple way. All that is needed is to define the field location by drawing a polygon that represents the field boundary. Once this is done we are kicking in to do constant monitoring for you, and notify you when a new scan is available. We expect a scan to be available every few days (in some packages we offer daily revisits), but when the sky is cloudy, and a clear shot of the field is not possible we need to wait for the next time that the satellite is passing above your field. Our algorithms identify the clouds in the sky automatically and we present filtered images that are clean from artifacts.

Agrio users can expect to receive the following images:

We do the image analysis and alert you when we find anomalies. More detailed case studies can be found in the following links: monitoring apple orchards, and monitoring guava orchards.

To give you some intuition on the process let’s refer to the figure above. The vegetation degree is represented by the different colors that are shown in the legend. The spectrum starts with the brown color that represents low vegetation and ends in the dark green color that represents high vegetation. Regions in which the vegetation is lower compared to other parts of the field might indicate that there is a problem, scouting might be needed in these field regions to further investigate the cause. In the image above we can see a yellow patch on the left side of the field, in contrast to the rest of the field with the green pixels.

Use the Agrio smartphone application to upload images of the symptoms you find during your scouting. It will help us give a more precise recommendation and improve our capabilities to identify the exact problems directly from the satellite images as we go along.

Moreover, the NDVI index allows us to estimate if the crop is developing in a good phase. If the index is low in the middle of the season, there is probably a problem requiring investigation, like a nutrient deficiency.

Wondering how your last field intervention affected the plants? Did you manage to improve the health of the plants? Do the leaf area and chlorophyll concentration show improvement? You can monitor such changes by selecting the “compare” tab. We compare your subsequent satellite scans to show you the change.

On our platform, you can get access to Sentinel and Planet scope satellite scans. With Sentinel we are able to provide 10-meter resolution scans with 3-5 days revisit frequency. PlanetScope is one of the satellite constellations operated by Planet. With daily revisits and 3-meter resolution, we can better deal with cloud interference and track the changes in the fields more closely. We apply our algorithm to the imagery to monitor crop progress, spot problems in the field, and alert growers when interventions are needed.

We save you time by optimizing your scouting routes! We are your eyes in the sky.

Take a big leap forward in your farming practices by engaging with the Agrio remote sensing technology. We are looking forward to helping you with monitoring your agricultural fields.

In the meantime, as always, we wish you an abundant harvest.

Artificial Intelligence for Integrated Pest Management

Modern plant protection practices implemented in well-supported farms result in considerable yield gains. Unfortunately, such practices are not widely adopted and are still challenging to enact because farmers lack the required support and knowledge. Integrated pest management (IPM) is the approach of combining methods that work better together than separately. It allows diseases and pests to be controlled by managing the ecosystem, which results in long-term pest control that is less risky to farmers and the environment. IPM is an environmentally sound approach that has been shown to reduce pesticide use by 80% or more compared with conventional pest control approaches. With IPM, monitoring crops and correctly identifying pests demands well-trained experts. The decision to choose one treatment over another is based on a set of factors that include the identity of the pest, the number of crops affected, and the environment. If treatment is to be applied it should be scheduled to the timing that makes the most economical sense. Agrio is an artificial intelligence-based integrated pest management tool that helps to close the gap in farmer-received support. Agrio facilitates modern plant protection adaptation and is easy to use, affordable, and scalable. We simplify integrated pest management implementation by providing the following benefits to our users:

Easy method for scouting fields and sharing findings with coworkers

We offer a typing-free reporting system to provide accurate descriptions of pest and disease pressure in fields. The digital reports are automatically augmented with insights derived by our artificial intelligence algorithms. During the scouting process, location-based tasks are shared with coworkers to make the treatment procedure more efficient and precise.

Artificial intelligence-based integrated pest management tool for farming organizations

Addressing challenges in diagnosis for optimal treatment

Farmers and inspectors can find it challenging to identify the correct pathogens, as well as to decide the economical threshold that requires a treatment program. Our solution enables users to rely on well-trained artificial intelligence algorithms to identify problems with their crops and decide on treatment necessities. If treatment is deemed required, the options are numerous and there is no effective way to follow a protocol that is with the lowest environmental and economic risk. Our decision support system enables farmers and inspectors to follow a consistent scientific regime that optimizes the pest management process.

Beneficial insects are an essential part of a successful IPM program

Predicting problems early

Timing is crucial when it comes to protecting crops and an effective IPM program could benefit from farmers knowing what to expect before it infects their fields. Prevention is most often the best treatment option. In more extreme epidemics, organizations are left unprepared when a pest or a disease invades a new territory. Agrio monitors global spread and provides users with pest and disease alerts that allow them to minimize surprises during growing seasons.

Supervising large-scale operations

IPM programs take into account numerous observations made by inspectors. By deploying their observations in real-time, and facilitating communication between coworkers, our solution considerably reduces the management resources that are required to brief inspectors, coordinate plant protection operations, and monitor the progress of outbreaks.

We developed Workgroup in order to help farming groups overcome the above challenges. Workgroup is an artificial intelligence-based integrated pest management tool for farming organizations; it is an internal operations tool for managing large-scale crop protection endeavors.  Workgroup is customizable and buildable; the protocols and agriculture inputs can be predetermined and displayed to users within their secure channel. Organized data from the Workgroup is displayed in a dashboard for the luxury of crop protection supervision from the office or home. The dashboard arranges information for supervisors who want more thorough management of the crop protection activities within their organizations. Workgroup allows farming organizations to manage plant protection activities on a large scale.